The post Tomato Sauce appeared first on Your Allergy Chefs.
]]>
free of gluten and top 9 allergens
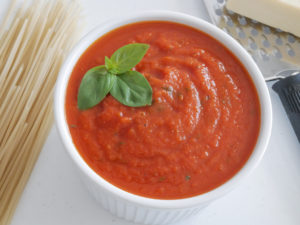
A good tomato sauce is the basis for so many dishes from pasta and pizza, to meatballs, soups and more.
This pandemic has caused a shortage on grocery shelves of many things, including tomato sauce. Now’s the perfect time to skip the prepared sauce and make your own.
Here’s a delicious basic tomato sauce that’s easy to cook up.
Fresh or Canned Tomatoes
The first consideration is whether to use fresh or canned tomatoes. We only use fresh during peak tomato season. If tomatoes are not in season, it’s best to use canned tomatoes. Thankfully, we don’t have to rely on fresh tomatoes for a good sauce.
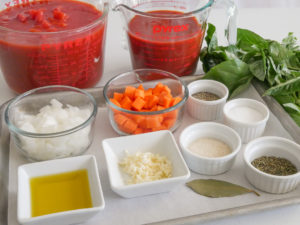
mise en place
It’s not quite peak tomato season in our area, so this batch of sauce welcomed canned tomatoes.
Steps
- Cook diced onions and carrots in a little oil over medium heat for about 8 minutes, until slightly softened and they take on a light golden color. Add minced garlic and cook for another minute.
- Add fresh roma or plum tomatoes, coarsely chopped. If not tomato season, add canned whole tomatoes, coarsely chopped or chopped or crushed canned tomatoes (and their juices). Add tomato puree, a bay leaf, and dried thyme.
- Bring the sauce to a boil over medium-high heat. Reduce heat to medium-low and gently simmer, stirring occasionally until a good sauce-like consistency develops, about 45 minutes. The exact cooking time will depend on the size of your saucepan and the quality of the tomatoes and their natural moisture content.
- Remove and discard the bay leaf. If you prefer a smooth sauce, blend in batches in a blender or use a hand-held immersion blender. We prefer using an immersion blender. It’s much safer and easier than transferring hot sauce to a blender.
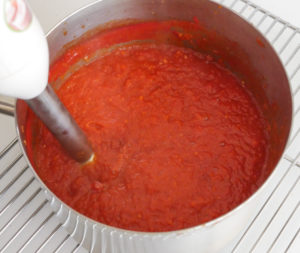
- Add a teaspoon or two of sugar (2 tsp if tomatoes are super acidic), fresh chiffonade of basil, fresh chopped rosemary, and simmer for an additional 2-3 minutes. Taste and adjust with a little salt and pepper, if needed.
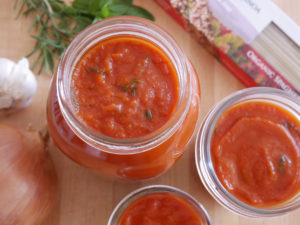
The sauce can be frozen for up to 3 months. Just transfer into freezer containers or freezer bags.
Chef Joel’s Tips
- To cut a chiffonade of basil, stack several basil leaves and roll lengthwise into a cylinder. Cut crosswise into thin strips or shreds while holding the leaf roll tightly.
- When it comes to canned tomatoes, using poor quality tomatoes can leave an acidic or tinny taste in your mouth. We like to use Pomi brand chopped tomatoes…the ones in the box.
- When it comes to fresh tomatoes, core the tomatoes. With a paring knife, cut an “X” through the skin at the bottom of the tomato. Drop in boiling, salted water and blanch for 30 seconds to a minute, just to loosen the skins. Transfer to an ice bath (bowl of ice and water) to stop the cooking. When the tomatoes have cooled, remove from ice bath and peel the skin off the tomato starting from the “X” at the bottom. Cut the tomato in half crosswise through the middle. Remove seeds and coarsely chop.
Your Allergy Chefs are participants in the Amazon Associates Program, an affiliate advertising program designed to provide a means for sites to earn advertising fees by advertising and linking to Amazon.
Tomato Sauce
Yield 6 Cups
Free of: gluten and top 9 allergens.
A delicious tomato sauce that’s easy to cook up!
Ingredients
1 tbsp olive oil
1/2 cup diced yellow onion
1/2 cup diced carrots
1 tbsp minced garlic
4-1/2 cups plum or roma tomatoes, canned or fresh, coarsely chopped (or chopped or crushed canned tomatoes) – see recipe notes
1 (15-ounce) can tomato puree (or tomato sauce)
1 bay leaf
1/2 tsp dried thyme
1/4 cup chiffonade of basil – see recipe notes
1 tsp chopped fresh rosemary
1 – 2 tsp sugar
1/2 tsp salt
1/4 tsp ground black pepper
Instructions
- Heat oil in a medium saucepan or stockpot over medium heat. Add onions and carrots and cook, stirring occasionally, until slightly softened and just starting to take on a light golden color, about 8 minutes.
- Add the garlic and continue to sauté, stirring frequently for 1 minute.
- Add the tomatoes and their juices, tomato purée, bay leaf and thyme. Increase heat to medium-high. When the sauce comes to a simmer reduce heat to medium-low, stirring occasionally until a good sauce-like consistency develops, about 45 minutes. Exact cooking time depends on size of saucepan and on the quality of the tomatoes and their natural moisture content. Remove and discard the bay leaf.
- You can leave the sauce chunky, just as it is or break it up with a whisk. If you prefer a smooth sauce, puree using an immersion blender, in batches in a food processor or blender, or through a food mill fitted with a coarse disc. We prefer using an immersion blender. It’s much safer and easier than transferring hot sauce to a blender or food processor.
- Add the basil and rosemary and simmer for an additional 2 to 3 minutes. Add sugar (2 teaspoons if the tomatoes are super acidic). Taste and adjust seasoning with a little salt and pepper.
Notes
- To cut a chiffonade of basil, stack several basil leaves and roll lengthwise into a cylinder. Cut crosswise into thin strips or shreds while holding the leaf roll tightly.
- If using fresh tomatoes, core the tomatoes. With a paring knife, cut an “X” through the skin at the bottom of the tomato. Drop in boiling, salted water and blanch for 30 seconds to a minute, just to loosen the skins. Transfer to an ice bath (bowl of ice and water) to stop the cooking. When the tomatoes have cooled, remove from ice bath and peel the skin off the tomato starting from the “X” at the bottom. Cut the tomato in half crosswise through the middle. Remove seeds and coarsely chop.
Courses Sauces & Condiments
The post Tomato Sauce appeared first on Your Allergy Chefs.
]]>The post Lemon Curd appeared first on Your Allergy Chefs.
]]>
free of gluten and top 8 allergens
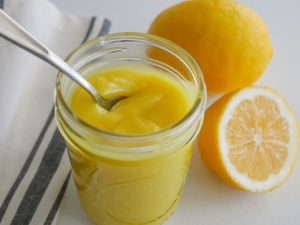
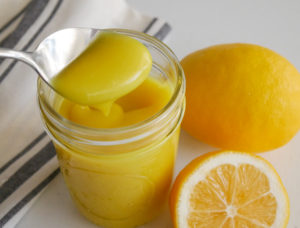
Lemon curd is deliciously tangy, creamy, sweet, and so much better when it’s homemade.
Our friends brought us some meyer lemons from their tree. With social distancing, Harriet and Roger dropped off some real beauties. We thank you both and look forward to getting together soon.
Our first thought…when life gives you lemons, make lemon curd!
Traditional lemon curd consists of egg yolks, butter, lemon juice, and sugar.
Converting this to an allergy-friendly and healthier curd is easy and we think even better than the traditional, and with just 5 ingredients. Honestly, we could just eat spoonfuls of it straight from the jar.
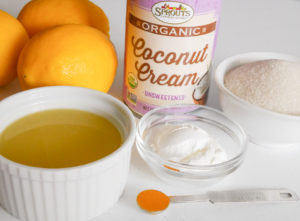
mise en place
Don’t worry. If you don’t have meyer lemons, any fresh lemons will make a great curd.
Lemon juicers make juicing lemons so easy, squeezing out every bit of juice. Our juicer is one of our most used kitchen tools. The best thing is that they are very affordable and can be found online or at kitchen specialty stores, such as Williams Sonoma.
Okay, so all you have to do is:
- Whisk together lemon juice and cornstarch in a small saucepan.
- Add coconut cream, sugar, and turmeric.
- Turn heat to medium and keep whisking and alternatively stirring until it thickens. Once it starts to thicken, whisk vigorously for 2 minutes more.
- Remove from heat and pour into a heat safe container and let it cool before storing in the fridge.
Lemon curd is perfect for meringue cookies, and this cookie recipe will be posted soon.
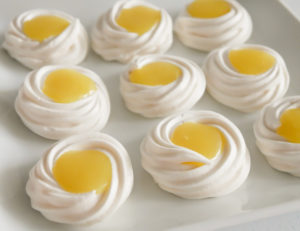
meringue cookies with lemon curd
Lemon curd is also perfect for:
- scones, muffins, cinnamon raisin toast, and waffles
- a filling for crepes, lemon cupcakes, and cakes
- a topping for pavlova, ice cream, or pound cake
- tart or pie filling
- fresh berries
- triffles
- and so much more!
Chef Mary’s Tips
- Reactive cookware (aluminum, unlined copper, iron, and non-stainless steel) is an excellent heat conductor for cooking. However, it’s also highly reactive with acidic foods such as citrus, tomatoes, and vinegar. Acidic foods pull atoms of metal from reactive pans. So when making lemon curd, these pans can react with the acid in the lemons, discoloring the curd and leaving a metallic aftertaste.
- Always use fresh lemon juice, not the bottled stuff. The results are so much better!
Your Allergy Chefs are participants in the Amazon Associates Program, an affiliate advertising program designed to provide a means for sites to earn advertising fees by advertising and linking to Amazon.
Lemon Curd
Yield 1-3/4 cups
Free of: gluten and top 8 allergens.
Lemon curd is deliciously tangy, creamy, sweet, and so versatile.
Ingredients
1/2 cup fresh lemon juice
2 tbsp cornstarch
1 cup coconut cream
3/4 cup granulated sugar
1/4 tsp turmeric powder
Instructions
- In a small saucepan, whisk together lemon juice and cornstarch.
- Add coconut cream, sugar, and turmeric powder. Whisk together.
- Turn on heat to medium and continue to whisk and alternately stir. When the mixture thickens, vigorously whisk over medium-low heat for another 2 minutes.
- Remove from heat and let it rest for 15 minutes. Then whisk once more and transfer to a heatproof container. Allow lemon curd to cool before placing in the fridge for storage.
- It will thicken as it cools.
Notes
- Turmeric powder gives this curd its brilliant yellow color. It could be omitted. However, we strongly suggest keeping it in the recipe. After all, turmeric is good for you…and we do eat with our eyes!
- Before storing, classic lemon curd is covered with plastic wrap, with the plastic wrap touching the curd. This prevents a film from forming. However, with this recipe it’s not necessary to cover the curd directly. Simply give the curd a stir before using.
Courses Sauces & Condiments
The post Lemon Curd appeared first on Your Allergy Chefs.
]]>The post Emerald Herb Oil appeared first on Your Allergy Chefs.
]]>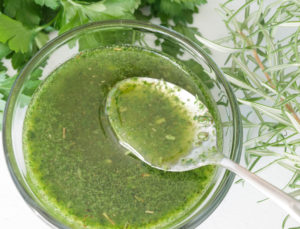
We love herb oils and this combination of fresh and dry herbs makes flavoring foods easy.
This is Joel’s go-to savory oil that he uses in so many dishes. It’s delicious with vegetables and potatoes, as a dip for bread, makes a great marinade for proteins, and can be used to make vinaigrettes and dressings.
This Emerald Herb Oil is made with fresh Italian parsley, fresh rosemary, and dried thyme. But this is just the beginning of the many combinations you can create using your favorite herbs and spices.
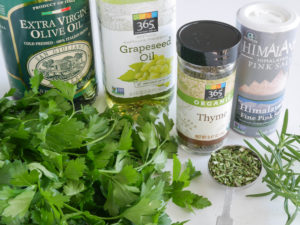
With just six ingredients, making this is a breeze.
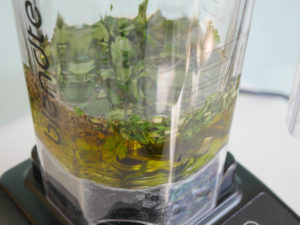
Pour the olive and grapeseed oils into a blender. Add fresh Italian parsley, fresh rosemary, dried thyme, and a little salt. Blend for about 20 seconds until combined. You should still have small bits and pieces of the herbs. Transfer herb oil to a jar and store in the fridge for up to a week, stirring before each use as the herbs settle to the bottom of the container.
Safety Alert
We love garlic, but we don’t add it to the herb oil until we are finalizing our dish.
Botulinum spores are part of nature and are found in soil. Because garlic bulbs grow underground, they can easily pick up these spores, which can cause botulism. Botulinum spores on garlic thrive in oxygen-free environments like oil.
Eating raw garlic on its own doesn’t pose a threat of botulism, since it’s exposed to air. Nor does heating garlic in oil, or mixing raw garlic and oil and using it right away.
For oils that are given several months shelf life in the fridge, the herbs are normally blanched for 10 seconds to kill any trace of botulinum spores. Since we’re only making small batches to use immediately or for up to a week and we wash our herbs well, we can safely omit the step of blanching the herbs.
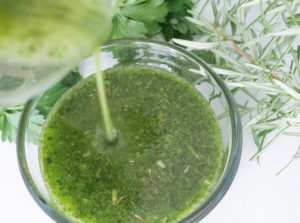
This Emerald Herb Oil is great in mashed potatoes, white bean dip, cauliflower mash, buckwheat pilaf, as a marinade for meats, tossed with fresh pasta, drizzled over minestrone soup, and in so many more dishes.
A flavor alternative to butter, this flavored oil can season anything from veggies to meats. So turn those leftover herbs into a super-simple and handy herb oil.
Be sure to try this herb oil on our Loaded Herb-Roasted Smashed Potatoes.
Emerald Herb Oil
Yield 1-1/8 Cups
Free of: gluten and top 8 allergens.
This flavored oil can season anything from veggies to meats.
Ingredients
1/2 cup olive oil
1/2 cup grapeseed or canola oil
1/2 cup roughly chopped Italian parsley, loosely packed
1 tbsp fresh rosemary, stems removed and chopped
1 tsp dried thyme
1/4 tsp salt
Instructions
- Pour the olive and grapeseed oils into a blender or food processor. Add the parsley and rosemary which have been rinsed before chopping, followed by the thyme and salt. Blend or pulse for approximately 20 seconds until combined. You will still have bits and pieces of the chopped herbs.
- Place mixture into a covered jar. Store in the refrigerator for up to a week.
Courses Sauces & Condiments
The post Emerald Herb Oil appeared first on Your Allergy Chefs.
]]>The post Apple Butter appeared first on Your Allergy Chefs.
]]>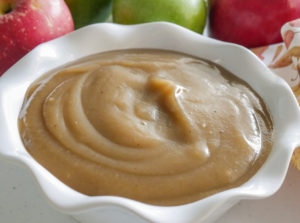
Got lots of apples? Try this apple butter, bursting with the flavors of fall’s harvest and warm spices.
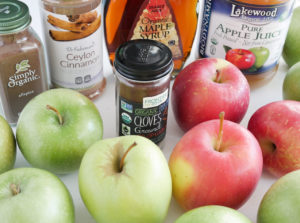
Don’t let the name fool you. There’s no actual butter in this delicious jam-like spread. The name comes from its smooth and buttery texture. In addition to fresh apples, you’ll need a little apple juice, some pure maple syrup, cinnamon, allspice, and a touch of cloves.
Just a few ingredients needed for delicious apple butter that tastes sooooooo much better than the store-bought stuff and with fractions of the sugar!
More versatile than ketchup, Apple Butter and…
- cinnamon raisin toast
- biscuits
- scones
- pancakes
- yogurt
- muffins
- spice cake filling
- thumbprint cookies
- ice cream
- crepes
- Overnight Oats for a real breakfast treat!
- and more!
How about including it on your holiday cheeze board? It’s also a great savory option as a marinade or glaze for proteins such as chicken or pork.
Apples
Granny Smith, Fuji, Braeburn, McIntosh, Cortland, Golden Delicious, Gravenstein, and Winesap are good varietals for making apple butter. We like using Granny Smith, but oftentimes we’ll use a combination of mostly Granny Smith with 2 soft and sweet varieties. For this batch we used Granny Smith, Golden Delicious, and Fuji.
Granny Smith apples are more firm and tart and have a higher pectin content than sweet apples. The higher pectin allows for a nice setting or gelling.
First Stage of Cooking
Core, peel, and cut the apples into quarters. Then cut each quarter in half crosswise.
Put the apples into a large pot. Add water and apple juice and bring to a boil. Reduce heat and simmer for about 20 minutes, until apples are soft.
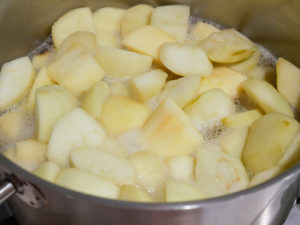
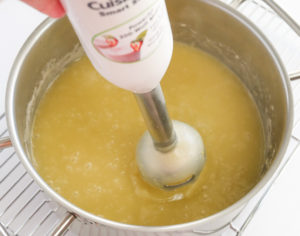
Now it’s time to puree. We like to use an immersion blender (hand blender), but you can also use a food mill, blender, or food processor. If you’re not using a hand blender, you’ll want to puree in batches. Be careful – the mixture is hot!
There are lots of immersion blenders on the market. We have several, but the one we used today was a Cuisinart, our most economical hand blender.
Second Stage of Cooking
Add maple syrup, cinnamon, allspice, and cloves. Puree just to combine. If you didn’t use an immersion blender, add the syrup and spices to one of the batches in the blender or food processor. Transfer batches back to the original pot.
Apple butter’s nice golden brown color comes from the caramelization of the sugars in the apples during this extended cooking time.
Raise the heat to medium-high. When mixture comes to a boil, lower heat to medium-low and cook at a gentle simmer until apple mixture darkens and is thick, stirring frequently to prevent sticking.
The apple butter should be thick enough to hold a dollop on a plate with no liquid seeping out around the edges. There is no magical amount of time that this takes. It may only take 45 minutes, or it could take up to 1-1/2 hours, depending on the width of your pot and temperature of the stove.
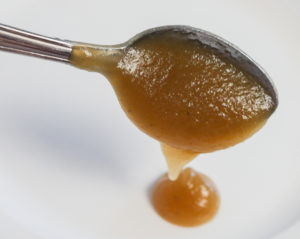
the perfect consistency
Canning
We’re storing some apple butter in the fridge for the coming week. We’ll freeze the rest in Ball plastic freezer jars. The shelf life in the freezer is 4-6 months.
You could “can” the apple butter by heat processing in boiling water. However, we’ve made this with an extremely low amount of sugar. That being said, the shelf life of canning this apple butter diminishes. We suggest freezing the leftovers.
Sugar is a powerful preservative. Jams and preserves with higher amounts of sugar hold their quality longer than lower sugar preserves. That’s why most store bought jams and recipes for canning have such high amounts of sugar.
Some apple butter recipes call for up to 3-1/2 cups of sugar for the same amount of apples as our recipe. However, we only used 1/2 cup of pure maple syrup. In fact, some jam and preserve references suggest the ratio between sweet fruits and sugar as 2:1 (2 parts fruit to 1 part sugar). Bitter fruits can even have more sugar with a ratio of 3:2.
Don’t get me wrong. We love canning. For years we made jams, jellies, and preserves year round. It was like one of our most favorite things to do. We’d head to the farmers market weekly for the picks of the season and start jammin’!
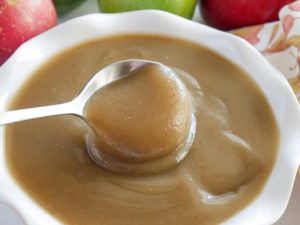
We’re just looking forward to making more jams, jellies, and preserves without all the sugar.
Try our Blueberry Jam which was made with just 3 tablespoons of pure maple syrup.
And now it’s time for dinner. A nice salad and baked sweet potato fries with…yes, apple butter!!!
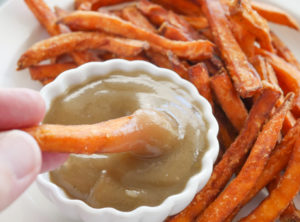
Delicious!
Your Allergy Chefs are participants in the Amazon Associates Program, an affiliate advertising program designed to provide a means for sites to earn advertising fees by advertising and linking to Amazon.
Apple Butter
Yield 4 1/2 Cups
Free of: gluten and top 8 allergens.
Smooth, buttery texture, that tastes like apple pie!
Ingredients
4 pounds apples, about 10 to 14 medium (see recipe notes)
2 cups water
1 cup apple juice or apple cider
1/2 cup pure maple syrup (see recipe notes)
1 tsp ground cinnamon
1/4 tsp ground allspice
1/4 tsp ground cloves
Instructions
- Wash apples under cold running water. Core, peel, and cut the apples into quarters. Then cut each quarter in half crosswise. You should have 12 cups of chopped apples.
- Combine apples, water, and apple juice in a large saucepan over medium-high heat. When liquid comes to a boil, reduce heat to medium and simmer for about 20 minutes, until apples are soft. Puree mixture using an immersion blender, or in batches using a food mill, blender, or food processor.
- Add maple syrup, cinnamon, allspice, and cloves and puree just to combine.
- Raise heat to medium-high. When mixture comes to a boil, reduce heat to medium-low and cook at a gentle simmer until apple mixture is dark and thick enough to hold a dollop on a plate with no liquid seeping out around the edges, stirring frequently to prevent sticking. This may take 45 minutes or it could take up to 1-1/2 hours, depending on the width of your pot. Remove from heat. As the hot apple butter thickens, it splatters a bit. If you have one, you may want to use a splatter screen.
- Let cool completely and portion what you need for the coming week into a container and store in the fridge. We suggest freezing the rest. Apple butter freezes well for 4-6 months. Ball’s plastic freezer jars are perfect for storing apple butter and other jams and preserves in the freezer.
Notes
- Granny Smith, Fuji, Braeburn, McIntosh, Cortland, Golden Delicious, Gravenstein, and Winesap are good varietals for making apple butter. We like using Granny Smith, but oftentimes we’ll use a combination of mostly Granny Smith with 2 soft and sweet varieties. For this batch we used Granny Smith, Golden Delicious, and Fuji. Granny Smith apples are more firm and tart and have a higher pectin content than sweet apples. The higher pectin allows for a nice setting or gelling of the apple butter.
- Pure maple syrup can be replaced with honey, 3/4 cup brown sugar, or 3/4 cup granulated sugar. If you like a sweeter apple butter, increase the maple syrup to 3/4 cup or as desired. The amount of sugar also depends on the apple varietal and its sweetness.
Courses Sauces & Condiments
The post Apple Butter appeared first on Your Allergy Chefs.
]]>The post Roasted Tomatillo Salsa appeared first on Your Allergy Chefs.
]]>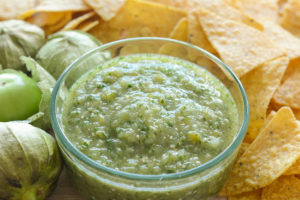
A delicious Mexican green salsa, roasted tomatillo salsa is made with roasted tomatillos, chile peppers, onions, cilantro and lime juice.
Tasty not only with tortilla chips, but on grilled meats or your favorite Mexican dishes, like enchiladas, tacos, or tamales.
A must-have in your refrigerator, this roasted tomatillo salsa recipe is so easy and delicious! Once you make your own, you won’t want to go back to the store-bought versions!
A tomatillo is a tangy lime-green fruit, also known as a Mexican husk tomato. Because they are wrapped in a papery husk, it can be hard to tell the quality.
When purchasing tomatillos, ripe ones are firm, juicy and tangy, and bright green in color. The husks should be light green and moist. As the tomatillos age, their husks turn brown and dry out. By the way, smaller tomatillos tend to be sweeter than larger ones.
We usually buy a few more tomatillos than we need in case we run across a bad one and also to account for the weight of the husks.
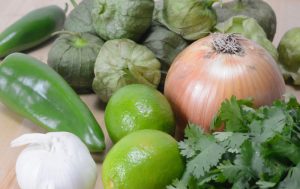
It’s best not to peel the husks from the tomatillos until you’re ready to use them.
We’re ready!
Four Easy Steps
- Place tomatillos in a bowl and cover with warm water. Letting them sit for about 20 minutes in water is not necessary, but makes removing the husks easier. Go ahead and peel the husks, rinsing off the sticky residue from the tomatillos.
- Toss tomatillos, anaheim pepper, jalapeno, onion, and garlic with a little olive oil. Spread out on a rimmed baking sheet. Roast in oven until charred, about 15-20 minutes, turning peppers halfway through.
- Place peppers in a small bowl and cover with plastic wrap and let cool for 10-15 minutes. This process helps to loosen their skins. Remove the stem, seeds, and outer skin from the peppers.
- Transfer the cooled vegetables, peppers, and their juices to a food processor. Add cilantro, lime juice, and a bit of sugar. Pulse until mixture is as smooth or as chunky as you want it with no super big chunks of tomatillos remaining.
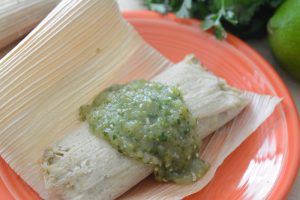
roasted tomatillo salsa and tamales – what a pair!
A bit of sugar?
Sugar is optional. However, we use a tablespoon of organic cane sugar to balance the acidity of the tomatillos.
Transfer your roasted tomatillo salsa to a sealed contained and store in the fridge for up to four days, if it lasts that long.
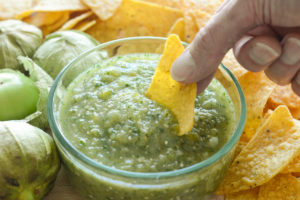
Enjoy this roasted tomatillo salsa on game day with chips, or as a condiment to almost any Mexican dish!
Roasted Tomatillo Salsa
Yield 2 Cups
Free of: gluten and top 8 allergens.
Tasty not only with chips, roasted tomatillo salsa is great on grilled meats or your favorite Mexican dishes, like enchiladas, tacos, or tamales.
Ingredients
1 pound tomatillos
1 anaheim chili pepper
1 jalapeno pepper
1 cup onions, cut in chunks
1 garlic clove, peeled
1 tbsp olive oil
1/2 cup packed cilantro
2 tbsp fresh lime juice
1 tbsp granulated sugar
Instructions
- In a medium bowl, cover the tomatillos with warm water. Set aside for 20 minutes. This is not necessary, but makes removing the husks easier.
- Preheat oven to 400-degrees F.
- Peel the husks from tomatillos and rinse off the sticky residue from their skins, discarding the husks.
- Toss tomatillos, anaheim pepper, jalapeño, onion, and garlic with olive oil. Spread out on a rimmed baking sheet, lined with foil or parchment paper.
- Place in oven and roast until soft and a bit charred, about 15-20 minutes, turning peppers halfway through.
- Remove from oven. Place the anaheim and jalapeño pepper in a small bowl. Cover tightly with plastic wrap and allow to cool for 10-15 minutes. This process will help to loosen their skins, making them easier to remove.
- Remove the stem, seeds, and outer skin from the peppers.
- Transfer the cooled vegetables, peppers, and their juices to a food processor. Add cilantro, lime juice, and sugar. Pulse until mixture is as smooth or as chunky as you want with no big chunks of tomatillos remaining, scraping down sides of bowl as needed.
Notes
- The salsa will be a bit thinner at first, but will thicken as it sits for a few hours in the refrigerator, due to the natural pectin in the tomatillos.
Courses Sauces & Condiments
The post Roasted Tomatillo Salsa appeared first on Your Allergy Chefs.
]]>The post Blueberry Jam appeared first on Your Allergy Chefs.
]]>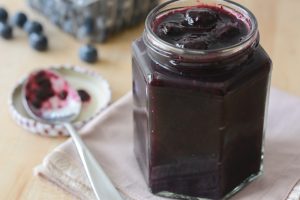
There’s something special about homemade blueberry jam made with love.
Most commercially prepared jams are loaded with sugar that hides the natural sweet tartness of the blueberries. Making this homemade jam is as easy as can be and has none of the refined sugars or preservatives that the store bought stuff contains.
Jam is traditionally crushed fruit with sugar and pectin. Instead of pectin, which requires lots of sugar to set, we’re using chia seeds to thicken our blueberry jam.
Chia seeds are magic. When soaked in liquid, they absorb about 12-times their weight and develop a gel-like coating. We love using them in all kinds of foods from overnight oats to sauces and baked goods.
Cha-cha-chia!
You don’t have to add loads of sugar to make a good jam. Come see…no pectin or canning required!
We have always loved traditional canning, a great way to preserve the season’s best!
With blueberries in their prime, it’s time to enjoy them in jam.
Blueberries are cooked with a little pure maple syrup for about 5 minutes. Chia seeds, lemon juice and a touch of cinnamon are added, and the jam is cooked for about 15 minutes. Once thick, the jam is removed from the heat and vanilla extract is added.
Don’t worry if the jam looks a little runny when it’s hot. The chia seeds will plump up as the jam cools, thickening it considerably.
What Color Seeds are Best?
Chia seeds are categorized as white or black. Though there is no nutritional difference between white and black chia seeds, they’re isolated purely for aesthetic preferences.
We’re not processing the jam the traditional way, using a boiling water bath to make the jam shelf stable, and there’s no fussing with having to seal the jars.
This quick and easy jam will hold for 2 weeks in an air-tight container in the fridge.
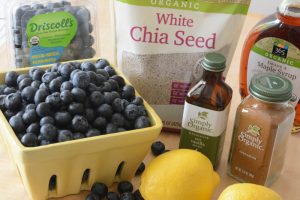
mise en place
2 weeks…our jam never lasts that long.
Lip-Smacking Good!
This blueberry jam is so good on pancakes, ice cream, in thumbprint cookies and tarts, and of course on toast or biscuits! Try scooping atop a batch of overnight oats.
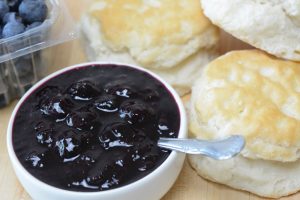
Thanks to chia seeds, we’re also pumping up the jam with a hearty dose of Omega 3, fiber, and protein. And blueberries have been shown to protect against heart disease and cancer, and can also help maintain bone strength, mental health, diabetes management, skin health, and healthy blood pressure.
Who knew blueberry jam could be so healthy!
Blueberry Jam
Yield 1 3/4 cups
Free of: gluten and top 8 allergens.
This delicious jam highlights the natural sweet tartness of blueberries with no refined sugar.
Ingredients
3 cups fresh blueberries
3 tbsp pure maple syrup
2 tbsp chia seeds, white or black (see recipe notes)
1 tbsp fresh lemon juice
1/8 tsp ground cinnamon
1/2 tsp pure vanilla extract
Instructions
- In a medium saucepan over medium-high heat, combine the blueberries and maple syrup. When blueberries come to a simmer, reduce heat to medium-low and gently simmer, covered for about 5 minutes, stirring often.
- Remove the lid and stir in the chia seeds, lemon juice, and cinnamon. Continue cooking, uncovered, about 15 minutes. The jam will continue to thicken as it cools so don’t let it reduce too much.
- Once the jam is thick, remove from heat and stir in vanilla extract.
- When the jam is completely cool, place in an air-tight container and store in the fridge for up to 2 weeks. It can also be stored in the freezer for up to 3 months.
Notes
There is no nutritional difference between white and black chia seeds. They are isolated purely for consumers’ aesthetic preferences.
Courses Sauces & Condiments
The post Blueberry Jam appeared first on Your Allergy Chefs.
]]>The post Creamy Mushroom Gravy appeared first on Your Allergy Chefs.
]]>
free from gluten and the top 8 food allergens
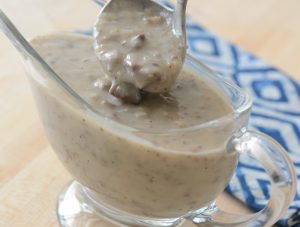
Creamy mushroom gravy is not only the perfect partner for biscuits, but pairs well with everything from smashed potatoes and meatloaf-your-way, to pasta and casseroles.
Mushrooms give this gravy a meaty texture that is packed with umami, and with a touch of toasted fennel seeds, what a match for sausage gravy!
See how easy it is to make this rich, satisfying gravy without the classic veal stock, gluten or dairy.
It’s so incredible, you’ll be tempted to skip right to the gravy and make it the main meal.
The creamy white “mother sauce” called béchamel, is the basis for our mushroom gravy. Also known as champignon, it is one of the many small sauces created from the versatile béchamel.
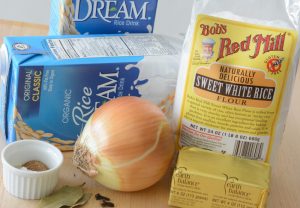
mise en place for bechamel
The method for making a basic béchamel is quite simple.
Rice milk, onion, cloves and bay leaves are brought to a boil and then simmered for 10 minutes. The liquid is then strained and reserved.
Next comes the roux, a cooked mixture of equal parts of flour and fat. An allergy-friendly margarine, such as Earth Balance is melted over low heat. Sweet white rice flour is stirred in and cooked for 1 minute.
The reserved liquid is gradually whisked into the roux over medium heat, then gently simmered for 15 minutes. Salt, white pepper and nutmeg are whisked in.
Here we have the easiest of the 5 mother sauces, béchamel.

bechamel
This base sauce is great in lasagna, casseroles, for mac ‘n cheese, and in making a variety of small sauces, including cream sauce, mornay, cheddar cheese sauce, mustard sauce, soubise, poblano cream sauce, and tomato cream sauce…whew! It’s also perfect for mushroom gravy!
To start mushroom gravy, onions, garlic and fennel seeds are cooked for 2 minutes over medium heat.
The Success Factor
Divide a pound of cremini or button mushrooms, or a combination of both into two parts. Half are pulsed in a food processor, and the other half are diced by hand as shown below. We’ve made the gravy using all pulsed mushrooms. We’ve also made the gravy using all diced mushrooms. We found the best results were a combination of half pulsed and half diced, which gives the perfect “sausage gravy” texture.
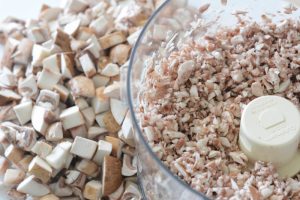
The mushrooms are added to the onion/fennel mixture and cooked for 8 minutes. It’s important to cook the mushrooms until all of the liquid has evaporated, as below.
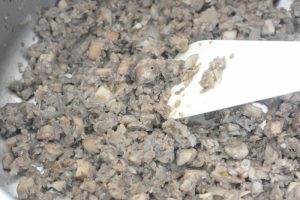
The béchamel sauce is poured over the mushrooms, stirred and heated through, then seasoned with salt and pepper.
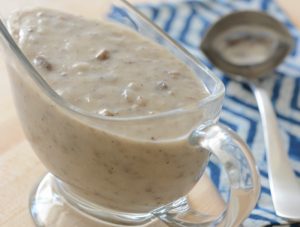
There are so many ways to enjoy this delicious gravy.

Biscuits and gravy are always a winner, and a popular breakfast dish in the United States, especially in the South.
Celebrating Foods Free
Creamy Mushroom Gravy
Yield 6 Cups
Free of: gluten and top 8 allergens.
This delicious creamy mushroom gravy is not only perfect for biscuits, but pairs well with everything from smashed potatoes and meatloaf-your-way, to pasta and casseroles.
Ingredients
Bechamel
6 cups rice milk (see recipe notes)
1/4 of a yellow onion
2 whole cloves
2 bay leaves
6 tbsp allergy-friendly margarine, such as Earth Balance
6 tbsp sweet white rice flour (see recipe notes)
1 tsp salt
1/8 tsp white pepper
1/4 tsp nutmeg
Creamy Mushroom Gravy
1 tbsp grapeseed oil
1 small onion, cut in quarters
2 garlic cloves
16 ounces button or cremini mushrooms, or a combination, divided (8 ounces + 8 ounces)
1 tsp fennel seeds, toasted and coarsely ground
1 quart bechamel (above)
3/4 tsp black pepper
Dash salt
Instructions
- For the béchamel, in a medium saucepan over high heat, bring rice milk, quarter of an onion, cloves and bay leaves to a boil. Reduce heat and simmer for 10 minutes. Strain and reserve liquid, discarding onion, cloves and bay leaves.
- To make the roux, using the same saucepan, melt margarine over low heat. Add flour and cook for 1 minute, stirring constantly.
- Increase heat to medium. Add half of the milk, whisking until smooth. Increase heat to medium-high and add remaining milk, whisking occasionally. When the sauce comes to a simmer, reduce heat and gently simmer for 15 minutes. Remove from heat and whisk in salt, pepper and nutmeg. Set béchamel aside.
- To make the creamy mushroom gravy, a.k.a champignon, place the small quartered onion and garlic in a food processor. Pulse until coarsely ground. Transfer onion and garlic to a small bowl. Set aside.
- Trim and clean mushrooms. Cut half of the mushrooms in quarters and place in food processor. Pulse until coarsely ground. Set aside. Dice the remaining half of the mushrooms.
- In a large saucepan, heat oil over medium heat. Add onions, garlic and fennel and cook for 2 minutes, stirring occasionally.
- Add coarsely ground and diced mushrooms. Increase heat to medium-high. Cook for 8 minutes, or until all of the liquid has evaporated.
- Stir in the béchamel. Add pepper and bring to a simmer, cooking for 1 minute. Season with salt.
Notes
- We suggest using Organic Rice Dream Rice Drink, Original Classic over Organic Sprouted Rice Dream Rice Drink, which curdles in the heating process.
- In this recipe, regular rice flour is not a good substitution for sweet white rice flour, which is much higher in starch than regular rice flour. Sweet white rice flour can be hard to find, but Bob’s Red Mill Sweet White Rice Flour can be purchased online or at markets that carry Bob’s Red Mill products, such as Whole Foods.
Courses Sauces & Condiments
The post Creamy Mushroom Gravy appeared first on Your Allergy Chefs.
]]>The post Chocolate Ganache appeared first on Your Allergy Chefs.
]]>
free from gluten and the top 8 food allergens
Chocolate ganache is the divine blending of pure chocolate and cream. Oftentimes it includes, butter, liqueur or other flavorings. Today, there are many high quality vegan and allergy friendly chocolates on the market that are bittersweet, semisweet or dark.
It’s definitely worth paying a little more for good quality chocolate, also called couverture…sweet chocolate containing no added fats other than natural cocoa butter. The problem is, many chocolate manufacturers process in facilities that handle one or more of the top allergens, such as milk, tree nuts, peanuts and/or soy. This doesn’t work if you have an allergy to one of those.
We made this ganache using Enjoy Life’s Mini Chips. Since Enjoy Life has a dedicated facility, there are no worries of cross contact.
One ganache for so many desserts…


Start by melting coins or finely chopped chocolate in a double boiler, stirring occasionally. Notice the water in the saucepan is only a couple inches deep. The bowl of chocolate should not be in direct contact with the water. Once you place the bowl on the saucepan, lower the heat so the water is gently simmering.
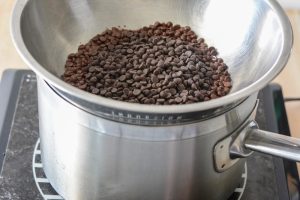
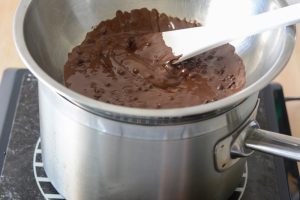

When the chocolate is melted, stir in warmed hemp milk. If the hemp milk is cold, the chocolate will resolidify and lump. Stir the ganache with a rubber spatula or process with an immersion blender to emulsify the milk and chocolate.
Using a whip to whisk the ganache is fast, but the ganache may become grainy and less creamy. However, with the ganache using Enjoy Life mini chips, we finished using the whip just briefly and had great results.
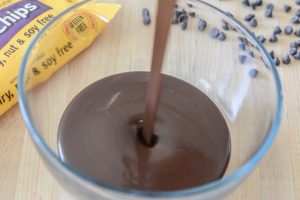
It’s that quick and easy. Depending on the application, you can use the ganache immediately, or set ganache aside to cool for approximately one hour, stirring occasionally.
Most of the dessert ideas below, with the exception of the ice cream and fondue, require a cooled and thicker ganache.
Ganache adds decadence and richness to cakes, tarts and more, such as:
- glaze for donuts
- drizzled warm over ice cream
- dipping cupcakes
- filling for crepes
- layers in trifles
- addition to milk shakes
- fondue for dipping fruit, pieces of cake and marshmallows
- hot chocolate
- added to coffee for a mocha
- truffles
- coating for brownies
- glaze for cookies and pastries
Tidbits
- Keep chocolate away from steam, as water is an enemy of chocolate, causing it to seize up.
- Store leftover ganache in the refrigerator. Ganache can be reheated over a hot water bath, or gently in a microwave at 5 second intervals.
Chocolate Ganache
Yield 2 Cups
Free of: gluten and top 8 allergens.
This ganache is the star of so many desserts. From fondue to ice cream and cakes, and from brownies to donuts and more, this chocolate sauce adds pure decadence.
Ingredients
10 ounces chocolate (see recipe notes)
1 cup alternative milk, such as hemp
Instructions
- Place chocolate in a medium stainless steel bowl. Fill a medium saucepan with about 3-inches of water. Bring the water to a boil. Reduce heat to low and place the bowl of chocolate over the saucepan. The bowl should sit nicely in the saucepan without directly touching the water. Gently stir the chocolate until melted, monitoring the water to ensure it’s not boiling, but gently simmering. Turn off heat and remove bowl from saucepan.
- Heat hemp milk in a small saucepan or microwave just until warm. Stir warm milk into the melted chocolate. Gently stir until smooth or combine using an immersion blender. Whisking does the job quicker, but depending on the chocolate, may result in a slightly grainy or less creamy ganache. Ganache made with Enjoy Life Mini Chips was finished with the whisk, which helped emulsify the chocolate and milk.
- Depending on your application for the ganache, you can use it warm or set ganache aside at room temperature for 1 hour to allow it to cool and thicken slightly.
Notes
- Many makers of fine chocolate (couverture), manufacture their chocolate on equipment shared with allergens. Enjoy Life semi-sweet chocolate mini chips are free from the top 8 allergens and make a nice ganache. However, if you use Enjoy Life mini chips, the recipe is: 2 cups (12 ounces) mini chips to 1 cup alternative milk, such as hemp.
- Store leftover ganache in the refrigerator. Ganache can be reheated over a hot water bath, or gently in a microwave at 5 second intervals.
Courses Sauces & Condiments
The post Chocolate Ganache appeared first on Your Allergy Chefs.
]]>The post Hooked on Mole appeared first on Your Allergy Chefs.
]]>
free from gluten and the top 8 food allergens
We are hooked on molé!
Each region in Mexico has it’s own slant on specific ingredients and methods. These sauces can be red, black, green or yellow. Molé poblano from the town of Puebla is probably the most famous.
When it’s made from scratch, no matter what regional version you’re tasting, the sauce offers a complexity that is spun into harmony with rehydrated chiles, nuts and seeds, corn and sometimes chocolate.
We’ve omitted peanuts, tree nuts and sesame seeds to equal “allergy-friendly” with the same great taste!
This traditional Mexican sauce is known for being complicated and taking a long time to make. We think our version is fairly easy compared to some. Keep in mind, this is a sauce that is worth every effort.
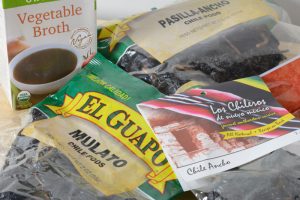
The Key Ingredient
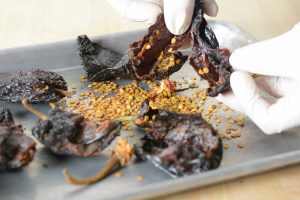
We start by making the pepper paste. The dried peppers are heated briefly in the oven just until soft and pliable. Wearing disposable gloves, once the chilies are cool enough to handle, pull off the stems and gently rip the peppers open to pour out the seeds. The seeds and stems are discarded.
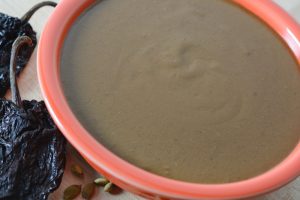
Next, the peppers are simmered with vegetable broth for about 10 minutes. They are then blended until smooth and strained through a fine sieve, by moving a ladle up and down, forcing the paste through the sieve. This yields 2-3/4 cups of paste and more than you’ll need for the recipe.
Certainly, that’s a good thing. After you finish the molé sauce, you can portion the remaining paste into containers and freeze. Once you make this, you’ll be wanting to make it again and again. You’ll be glad you have the paste handy.
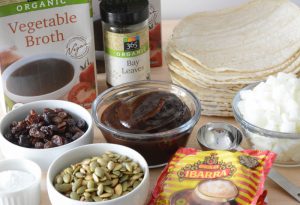
La Salsa
Next, the vegetable broth, onions, corn tortillas, raisins, pumpkin seeds and bay leaf are simmered together for 10 minutes.
Remove the bay leaf and transfer the mixture in batches to a high speed blender and puree until smooth. Back in the saucepan the mixture goes.
Add pepper paste (pictured above in the center) and chocolate to the mixture, and simmer for 5 minutes.
Lastly, taste the sauce for spiciness and add additional pepper paste if needed, a tablespoon at a time.
The delicious molé sauce is ready and was so easy to make.
Don’t Forget the Disposable Gloves!
A compound in the chile pepper called capsaicin can cause a burning sensation to any part of the skin it touches. The tingly burning can last for hours and even longer depending on how many chiles you’ve touched. And can you imagine if you should rub your eyes? No thanks!
I’m sure Joel will not be upset, but I can’t help but share this story. Joel did his externship during culinary school at a restaurant famous for Southwestern cuisine. One of his first tasks was to clean case after case of dried chile peppers, an all day task. The simple process was explained, minus the importance of wearing gloves.
It didn’t take long before Joel felt burning sensations in his hands and under his nails. He looked around to the chuckling of the other cooks who congratulated him on his initiation as an extern while handing him a pair of gloves. The burning pain lasted for 3 days, with Joel sleeping with a fan blowing on his hands.
Tidbits
- This molé sauce is incredible in so many dishes, from enchiladas, tacos, chili, and tamales to tostadas, casseroles, burgers, bowls and more. Check out our post for Molé Nachos Especiales, heaven on a plate!
- Molé stems from the Nahuatl word “molli” which means “sauce.” Nahuatl is a widely spoken indigenous language predominately spoken in Central Mexico. It was once the most widely spoken language in the Aztec Empire.
Hooked on Mole
Yield 1 quart
Free of: gluten and top 8 allergens.
The depth of this Mexican chili and chocolate sauce is nothing shy of spectacular. This velvety sauce is ideal for so many dishes, from enchiladas and tamales, to casseroles, chili and so much more!
Ingredients
Pepper Paste
2 ounces dried ancho chiles (approximately 5)
2 ounces dried mulatto chiles (approximately 4)
2 ounces dried pasilla chiles (approximately 3)
1 quart vegetable broth
Mole Sauce
1 quart vegetable broth
1 cup yellow or white onions, diced
4 (6-inch) corn tortillas, roughly chopped
1/2 cup dark raisins
1/2 cup pumpkin seeds, toasted
1 bay leaf
1/3 cup pepper paste, plus more as needed
2 ounces finely chopped or grated Mexican chocolate, such as Ibarra
Instructions
- For the pepper paste, preheat oven to 350-degrees F. Place dried peppers on a sheet pan. Heat in oven for 5-7 minutes, until peppers are soft and pliable.
- Remove peppers from oven and allow to cool slightly. Wearing disposable gloves, clean the peppers by pulling out the stems, tearing them open and shaking out the seeds. Be sure to work fast, before chiles cool and become brittle, making them difficult to work with. Discard stems and seeds.
- Place the peppers and first quart of broth in a medium saucepan and bring to a boil.
- Reduce heat and gently simmer for 10-12 minutes.
- Transfer ingredients to a high speed blender or food processor and blend until smooth. Strain through a fine sieve, by moving a ladle up and down, forcing the paste through the sieve to remove any seeds or skin. Set aside while making the mole sauce. You can make the paste ahead of time and refrigerate until needed. You will have 2-3/4 cups.
- After using 1/3 cup and more if needed, freeze the remaining paste in increments of a heaping 1/3 cup to have onhand the next time you make mole.
- For the mole sauce, in a medium saucepan, place second quart of broth, onions, tortillas, raisins, pumpkin seeds and bay leaf. Bring to a boil. Reduce heat and simmer for 10 minutes, stirring occasionally.
- Remove bay leaf and transfer mixture to a large container. Blending in 2 batches, pour half of the mixture in a high speed blender. Start on low and increase to high speed and blend for 40-50 seconds, until smooth. Return mixture to saucepan. Repeat with remaining mixture.
- Place saucepan on stove and turn on heat to medium. Add pepper paste and chocolate to pureed mixture. Bring to a gentle simmer and cook for 5 minutes.
- Taste mole sauce for spiciness and add additional pepper paste if desired, a tablespoon at a time. Season with salt, if needed.
Notes
- At our local market, mulatto chiles are not always available. When that’s the case, we increase the other chiles.
- Capsaicin is concentrated in the tissue of a chili pepper and can cause a burning sensation on any part of the skin it touches. The tingly burning can last for hours after handling hot peppers without gloves. The capsaicin from your hands can also burn your eyes if you should rub them.
Courses Sauces & Condiments
The post Hooked on Mole appeared first on Your Allergy Chefs.
]]>The post Cranberry Relish appeared first on Your Allergy Chefs.
]]>
free from gluten and the top 8 food allergens
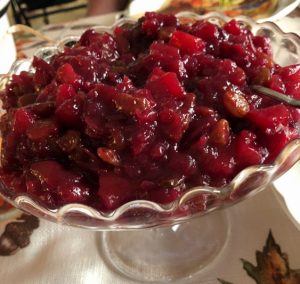
Fall is cranberry harvest season. We’re so glad we don’t have to wait for the traditional holiday meal to enjoy this delicious relish.
Call it what you may…chutney, sauce, spread, condiment or relish. Let’s look at the endless ways to use this delicious cranberry relish throughout its peak season.
What ends up on our holiday table will be decided by tradition, ethnic favorites, and sometimes wanting to do something different. But most likely, cranberries will be included.
You can substitute cranberry relish for the fruit in many sweet and savory dishes. Here are just a few ideas for using this delicious relish:
- As a sandwich spread
- A filling for a cake
- Spread on toast
- Glaze or condiment for chicken, pork or meatloaf
- Mixed into your favorite plain allergy-friendly yogurt
- Warmed up (or not) and poured over your favorite alternative ice cream
- Added to your favorite BBQ sauce
- A flatbread or crostini spread
- Pancake, waffle or French toast topping
- A filling for crepes
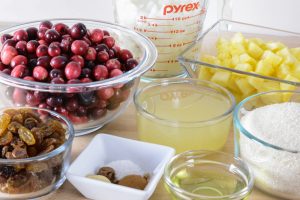
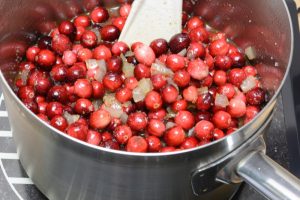
Cranberry Relish
Yield 5-1/2 Cups
Free of: gluten and top 8 allergens.
When it comes to holiday sides, cranberry relish is where it’s at. You can use this delectable sauce-spread-chutney-condiment-relish in so many ways.
Ingredients
2 tbsp vegetable oil
2 cups diced yellow or white onion
4 cups fresh or frozen cranberries
1 cup pineapple juice
1 cup golden raisins
1-1/2 cups granulated sugar or coconut sugar
1/2 tsp ground ginger
1/2 tsp ground cinnamon
1/4 tsp ground allspice
1/2 tsp salt
2 cups diced fresh pineapple (See Recipe Notes)
Instructions
- Heat the oil in a medium saucepan. Add onions and cook for 5 minutes.
- Add cranberries, pineapple juice, raisins, sugar, ginger, cinnamon, allspice and salt. Cook uncovered over medium heat until cranberry skins start to pop, approximately 5 minutes, stirring occasionally.
- Add the pineapple and simmer for 15 minutes, uncovered, stirring occasionally.
- Transfer to a stainless steel bowl and cool over an ice bath by placing bowl of cranberry relish over a larger bowl filled with ice and cold water. Stir every couple of minutes. When cool, store in refrigerator.
Notes
- You can replace the pineapple juice and diced fresh pineapple in the recipe with one (20-ounce) can of pineapple tidbits. Drain and reserve the juice. You will have approximately 3/4’s cup of juice. Add water to make 1 cup liquid. Use canned tidbits in place of fresh pineapple.
- If you’ll be using the relish as a filling for a cake, cook 10-15 minutes longer for a firmer filling. This is great sandwiched between vanilla cake layers, covered with a vanilla frosting.
Courses Sauces & Condiments
The post Cranberry Relish appeared first on Your Allergy Chefs.
]]>


