The post Chia Pudding with Citrus appeared first on Your Allergy Chefs.
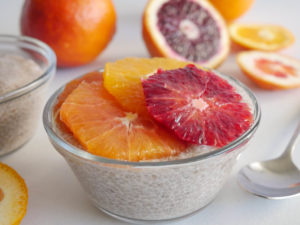
]]>
plant-based and free of gluten and the top 8 allergens
This chia pudding with citrus tastes like sunshine in a bowl. Make this magical dish for a decadent breakfast, healthy snack, or dessert.
What are Platelets?
Platelets are made in your bone marrow along with white and red blood cells. These tiny blood cells help your body form clots to stop bleeding. Having too many platelets causes the blood to be thick and flow more slowly, and can lead to a clot in the blood vessels.
We chose chia seeds because they are one of the most nutritious foods on the planet, loaded with protein, fiber, micronutrients, and omega-3 fatty acids. Omega-3 fatty acids contribute to the flexibility of cell membranes, making them more slippery so that platelets are less sticky and less likely to clump together in the blood.
Next, bring on the oranges. Oranges contain salicylates, which help prevent clotting and thin the blood. And what a great time to get a variety of peak season oranges!
Cinnamon is known to reduce the accumulation of platelets and therefore blood clotting. So let’s add a little cinnamon.
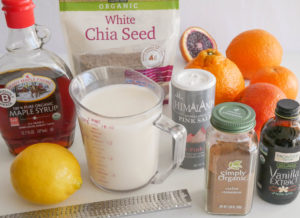
mise en place
Types of Cinnamon
There are 2 types of cinnamon, Cassia (known as regular) and Ceylon (known as true cinnamon). Most cinnamon available on the market is Cassia. Cassia cinnamon contains high amounts of coumarin, which has been linked to conditions like liver damage, cancer, mouth sores, and low blood sugar.
Ceylon only contains trace amounts of coumarin. If possible, purchase only Ceylon. And enjoy cinnamon, as it’s one of the healthiest spices around!
Whether or not you’re watching your platelet count, let’s make one of the healthiest puddings ever!
There are different recommendations for the best chia pudding ratio. Making this several times, the ratio we found that works best is 1/2 cup chia seeds to 2 cups milk.
Black Chia Vs White Chia
The black chia seeds make up the majority of chia seeds grown today. Nutritional differences are so marginal that most consider them equal. Black chia seeds have a slightly higher protein content, while white chia seeds are slightly higher in ALA Omega-3 fatty acids.
Most people make their decision purely on aesthetics. We just happened to have white chia seeds. However, black chia seeds are more readily available and are equally as good.
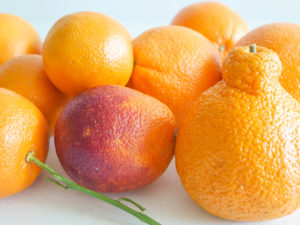
Choose Your Oranges
From blood oranges to Valencia, satsuma, and tangerines, there are so many choices.
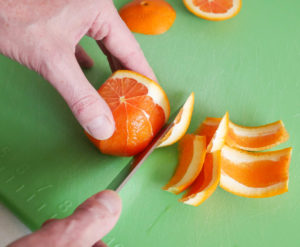
Using a sharp knife, carefully slice off the top and bottom of each orange.
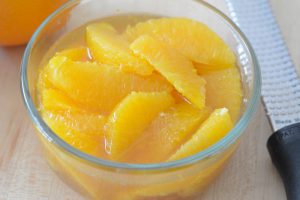
With even downward strokes, slice the skin away from the flesh, as shown below. Remove any remaining white pith. Cut crosswise into slices, or for segments, cut between the membranes to segment the orange. Place slices or segments in a container and store in the fridge until ready to serve the pudding.
Easy as 1-2-3
- In a large bowl, whisk together chia seeds, alternative milk, pure maple syrup, orange zest, Ceylon cinnamon, a little salt, and stir.
- Cover and place in the fridge for 15 minutes. Remove from fridge and stir again, incorporating the chia seeds that have sunk to the bottom and are clumped together. Place back in the fridge and chill for 8 hours, or overnight, until the pudding is thick. Stir in fresh lemon juice before serving.
- Portion into jars or bowls and top with orange slices or segments.
Chia pudding on its own is fairly plain, but that’s what makes it fun! You can add sunflower seed butter as a topping, a layer, or stirred into the pudding. Or add coconut, jams and spreads, raw cacao powder, or other fresh fruits (berries, bananas, apples, pears, peaches…whatever’s in season).
Chef Mary’s Tip
If you’re having trouble getting your chia pudding to set, check that your chia seeds aren’t old. Also make sure to give your chia pudding a good stir 15 minutes after you initially mix it together. This breaks up any clumps of seeds and ensures the pudding will set.
Chia won’t gel if a liquid is too acidic. For this reason, we let the chia gel before adding a little fresh lemon juice.
We think the texture of chia is fun! However, we have a friend that does not. She wanted to get the health benefits without the tiny pearls, so she blended chia pudding in a high speed blender. She loves it. We have to say, we have never tried this.
Your Allergy Chefs are participants in the Amazon Associates Program, an affiliate advertising program designed to provide a means for sites to earn advertising fees by advertising and linking to Amazon.
Chia Pudding with Citrus
Yield 4 Servings
Free of: gluten and top 8 allergens.
This chia pudding with citrus is like sunshine in a bowl.
Ingredients
1/2 cup chia seeds, black or white
2 cups alternative milk
3 tbsp pure maple syrup
1 tsp orange zest
1/2 tsp ground Ceylon cinnamon
1/8 tsp sea salt
2 tbsp fresh lemon juice
2 oranges, peeled & sliced or segmented (see recipe notes)
Instructions
- In a large bowl, whisk together the chia seeds, milk, maple syrup, orange zest, cinnamon, and salt.
- Cover and place in the fridge for 15 minutes. Remove and stir again, incorporating the chia seeds that have sunk to the bottom and are clumped together. Return to the fridge and chill for 8 hours, or overnight, until the pudding is thick. Once the pudding has gelled, stir in lemon juice, if desired.
- Portion into jars or bowls and top with orange slices or segments.
- For a richer version, substitute 1 cup of full-fat coconut milk for 1 cup of the alternative milk.
Notes
Orange Slices or Segments
Using a sharp knife, carefully slice off the top and bottom of each orange.
With even downward strokes, slice the peel away from the flesh. Remove any remaining white pith. Cut crosswise into 1/4-inch slices, or for segments, cut between the membranes to segment the orange.
Courses Breakfast & Brunch
The post Chia Pudding with Citrus appeared first on Your Allergy Chefs.
]]>The post Creamy Ranch Dressing appeared first on Your Allergy Chefs.
]]>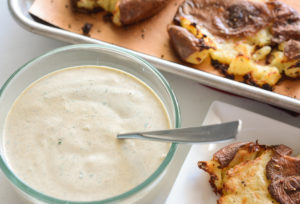
This creamy ranch dressing is so special that it deserves its own post.
America’s favorite dressing goes beyond salads and raw veggies. From baked cauliflower to chicken nuggets, and from pizza, potato skins and smashed potatoes to replacing mayo in potato salad, the possibilities are endless.
Ranch dressing that’s oh so delicious and oh so good for you!
As we mentioned in a recent post for our Southwestern Wedge Fully Loaded, the ingredients of most store bought ranch dressings include not only lots of dairy, but MSG, high fructose corn syrup, modified food starch, less than 2% of natural flavor, and so much more processed stuff.
It just makes sense to make our own!
The dressing is super easy to make. However, you have to allow about 6 hours for soaking the raw sunflower seeds in a small bowl covered with lukewarm filtered water.
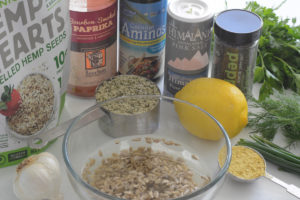
You could skip the step of soaking the seeds, but you won’t want to. Let’s talk about why.
Nuts and seeds have high amounts of enzyme inhibitors which protect these foods from sprouting prematurely, but which also give nuts and seeds a bitter flavor and make digesting them difficult.
Soaking nuts and seeds has so many benefits, such as:
- neutralizing the enzymes allowing for proper digestion
- encouraging the production of beneficial enzymes
- removing and reducing phytic acid and tannins
- increasing amounts of vitamins, especially B vitamins
- enabling their many nutrients to be more easily absorbed by the body
Depending on the nut or seed, different soaking times are required, which may vary from 2 to 12 hours.
Why Raw?
It’s important to only soak nuts and seeds that are raw, as those that have been roasted or heated at high temperatures loose many of their enzymes and nutrients.
Also, it’s good to choose organic nuts and seeds when possible, simply because if not they are likely to have been treated with chemicals.
When the seeds are done soaking, drain out the soak water and discard. Thoroughly rinse the seeds. The soaking step can be done up to a day in advance. After draining and rinsing, store soaked seeds in the fridge until you’re ready to make the dressing.
Ready?
Transfer seeds to a high-speed blender. Add hemp seeds, water, olive oil, lemon juice, nutritional yeast flakes, coconut aminos, and white wine vinegar. Start blending on low and gradually increase speed. Blend until smooth and creamy, about 45-60 seconds.
Health food stores and markets such as Whole Foods and Sprouts carry hemp seeds, nutritional yeast flakes, and coconut aminos. If you can’t find these products in your area, they are available online.
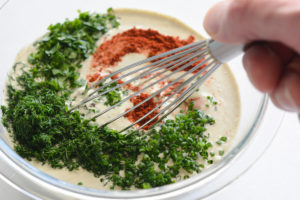
Transfer to a medium bowl and whisk in garlic, dill, parsley, chives, paprika, and a little salt and pepper. Cover and place in the fridge until ready to serve.
Enjoy…with endless possibilities, including our Southwestern Wedge Fully Loaded!
Your Allergy Chefs are participants in the Amazon Associates Program, an affiliate advertising program designed to provide a means for sites to earn advertising fees by advertising and linking to Amazon.
Creamy Ranch Dressing
Yield 1 1/2 Cups
Free of: gluten and top 8 allergens.
America’s favorite salad dressing!
Ingredients
1/4 cup raw sunflower seeds + water to cover
1 clove garlic, peeled
1/2 tsp salt, divided (1/4 tsp + 1/4 tsp)
1/2 cup hemp hearts (shelled hemp seeds)
1/2 cup water
1/4 cup olive oil
2 tbsp fresh lemon juice
1 tbsp nutritional yeast flakes
2 tsp raw coconut aminos
1 tsp white wine vinegar
1 tbsp minced fresh dill
1 tbsp minced fresh Italian parsley
2 tsp minced fresh chives
1/4 tsp smoked paprika
1/8 tsp black pepper
Instructions
- Soak the sunflower seeds in a bowl of lukewarm filtered water to cover at room temperature for 6 hours, or up to 8 hours. The water should be at least double in volume as the amount of seeds. Drain and rinse well.
- Smash garlic clove with blade of knife. Sprinkle first ¼ tsp salt over garlic. Mash into a paste with a fork. Set aside.
- Transfer sunflower seeds to a high-speed blender with hemp seeds, water, olive oil, lemon juice, nutritional yeast flakes, coconut aminos, and vinegar. Start blending on low and gradually increase speed. Blend until smooth and creamy, about 45-60 seconds.
- Transfer to medium bowl, and whisk in reserved garlic, remaining ¼ tsp salt, dill, parsley, chives, paprika, and pepper. Cover and place in refrigerator until ready to serve. This makes a scant 1 ½ cups.
Notes
- Nuts and seeds have high amounts of enzyme inhibitors. This is a reason that unsoaked, they are hard to digest. Soaking neutralizes the enzymes allowing for proper digestion.
Courses Soups & Salads
The post Creamy Ranch Dressing appeared first on Your Allergy Chefs.
]]>The post Four-Bean Salad appeared first on Your Allergy Chefs.
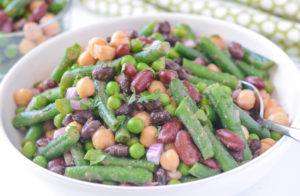
]]>
plant-based, free of gluten and top 8 allergens
With no oil, no added salt, and no refined sugar, it’s protein-rich, easy to put together and full of flavor. Perfect for potlucks, parties and busy weeks.
Some research indicates that taking in large quantities of raw lectins, which are found in beans and other foods, could have negative health effects. Read more as we share the facts…after sharing the recipe.
First of all, we give a huge shout out to Cathy Fisher and her blog, Straight up Food! Cathy creates recipes without salt, oil, sugar, animal foods, and uses very few processed foods. Her focus is on a diet that promotes excellent health.
We’ve adapted this classic four-bean salad from Cathy.
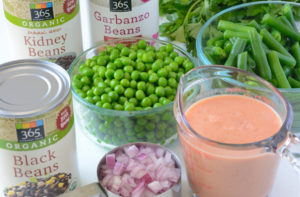
The salad is typically made with canned green beans. We’ve yet to meet a canned green bean we like, so we blanch fresh green beans in simmering water for about 4-6 minutes, until crisp tender.
The beans are then quickly removed and plunged into ice water to stop the cooking process.
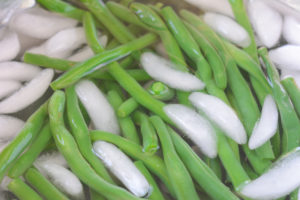
You’ve got plenty of options for this salad: butter beans, lima beans, yellow wax beans, black-eyed peas, or navy beans. Just be sure to use green beans for some color and texture.
Starting with the vinaigrette, place chopped roma tomatoes, apple cider vinegar, lemon juice, Dijon mustard, pure maple syrup or raw honey, ground cumin, and garlic in a blender, and blend until smooth.
In a large bowl, add green beans, peas, chopped red onion, black, kidney, and garbanzo beans. Pour in the vinaigrette and toss gently to combine.
A little chopped Italian parsley is also nice in this salad.

Just What Are Lectins?
Lectins are naturally occurring proteins that are found in most plants. They serve a protective function for plants as they grow.
Some foods that contain higher amounts of lectins include beans, peanuts, lentils, tomatoes, potatoes, eggplant, fruits, and wheat and other grains.
The Mayo Clinic tells us that some research seems to indicate that taking in large quantities of raw lectins could have negative health effects. The amounts you’d need to consume each day to get to that level, however is much higher than a typical diet would include.
Studies have shown that lectins break down when processed or cooked, so the risk of adverse health effects arising from lectin-rich foods that aren’t raw is not cause for concern.
Besides, bean consumption is associated with a myriad of health benefits. Beans are packed with fiber, folate, and phytates, which may help reduce the risk of stroke, depression, breast and colon cancer.
No wonder the cancer guidelines suggest you fit beans into your daily meals!
For more information on the benefits of beans and the myths of lectins check out:
The Mayo Clinic Q and A: What are dietary lectins and should you avoid eating them?
Beans and Nutrition: The Latest Research | NutritionFacts.org
Beans, Beans: The Truth About Lectins | NutritionFacts.org
Have you been on the website, NutritionFacts.org? It’s run by Michael Greger, a physician, author, and professional speaker on public health issues. He delivers the latest in nutrition research in easy to understand videos, blog posts, and podcasts. Check him out. He’s awesome!
Four Bean Salad
Yield 2 quarts
Free of: gluten and top 8 allergens.
Perfect for potlucks, parties and busy weeks.
Ingredients
Vinaigrette
2 roma tomatoes, chopped (about 3/4 cup)
1/4 cup apple cider vinegar
2 tbsp fresh lemon juice
2 tbsp Dijon mustard
1 tbsp pure maple syrup or raw honey
1 tsp ground cumin
1 tsp minced garlic
Salad
3 cups precooked green beans, cut into 1-inch pieces (see recipe notes)
1 (15-ounce) can black beans, drained and rinsed
1 (15-ounce) can kidney beans, drained and rinsed
1 (15-ounce) can garbanzo beans, drained and rinsed
1 1/2 cups frozen peas, thawed
1/2 cup finely chopped red onion, soaked in ice water for 15 minutes, then drained (see recipe notes)
3 tbsp chopped parsley, optional
Instructions
- For the vinaigrette, place tomatoes, vinegar, lemon juice, mustard, maple syrup or honey, cumin, and garlic into a high-speed blender, and blend until smooth. Set aside in refrigerator.
- For the salad, place the green beans, black beans, kidney beans, garbanzo beans, peas, onions, and parsley into a large bowl. Pour the dressing over the beans and toss gently to coat.
Notes
- You can either steam or blanch the green beans. For blanching, bring a pot of water to a boil. Add green beans and simmer for 4-6 minutes, until crisp tender. Quickly remove beans from water and plunge into a bowl of ice water to stop the cooking process.
- Soaking chopped onions in ice water for at least 15 minutes mellows their flavor. The cold water keeps the onions super crunchy, while the sulfur compounds that give onion its pungent, harsh flavor will dissipate in the water.
We’ve adapted this classic four-bean salad from Cathy Fisher’s blog, Straight up Food! Cathy creates recipes without salt, oil, sugar, animal foods, and very few processed foods. Her focus is on a diet that promotes excellent health.
Courses Soups & Salads
The post Four-Bean Salad appeared first on Your Allergy Chefs.
]]>The post Watermelon, Feta and Summer Fruit Salad appeared first on Your Allergy Chefs.
]]>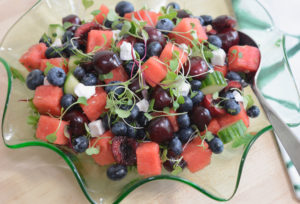
Easy, healthy, and colorful, this watermelon, feta and summer fruit salad is beyond delicious!
Watermelon and cucumbers are one of the most refreshing combos of all time. Throw in some cherries, blueberries, mint, and feta and toss with a simple dressing, and you’ve got yourself the perfect summer salad.
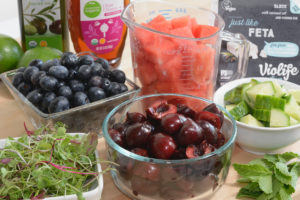
mise en place
Starting with the dressing, in a small bowl whisk together honey (or pure maple syrup), lime juice, a dash of extra virgin olive oil, and a pinch of sea salt. Set aside while preparing the fruit.
The dressing is optional, but it does bring everything together beautifully.
We cut the seedless watermelon into cubes because it’s quick and easy, and we like the contrast in shapes. However, you can use a melon baller for a more elegant presentation.
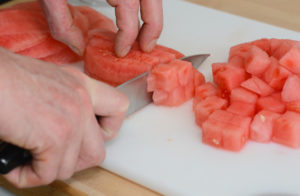
In a large bowl, combine watermelon cubes, fresh cherries (pitted and halved), fresh blueberries, diced English cucumber, micro greens or baby arugula, and mint. Drizzle with honey vinaigrette, tossing gently to combine. Top with feta cheese.
We love Violife’s ‘just like Feta!’ However, an alternative mozzarella block would also work.
Choosing the Best Watermelon
Sadly, at one time or another, we’ve probably all cut into a watermelon only to be disappointed.
Here are some tips in choosing that perfect melon.
- Give the watermelon a nice tap or knock. It should have an almost hollow sound and the surface should be firm.
- Pick it up. The melon should be heavy for its size. If not, it could be lacking in water/moisture. Be sure to pick the one that is the heaviest for its size.
- Look for the field spot. There should be a creamy yellow spot where the watermelon rested on the ground to ripen. If the field spot is white, this indicates an underripe melon.
- A shiny appearance also indicates an underripe melon, so pick one that’s dull looking.
- Lastly, the watermelon should have a nice uniform shape.
What’s the difference between English and regular cucumbers?
English cucumbers are the longer ones that are typically wrapped in plastic. They are nice in this salad because they have thinner skin that is not waxy and they’re seedless.
You can use any cucumber in the salad, but you may need to peel and seed first.
This salad is best prepared and enjoyed on the same day.
However, if you need to do some advance prepping the night before, cube the watermelon and cucumber and prepare the remaining ingredients. Store each in the fridge in separate containers.

Just before serving, add the dressing and gently toss the salad together. Garnish with feta and enjoy the bounty of summer!
Watermelon, Feta and Summer Fruit Salad
Yield 4-6 Servings
Free of: gluten and top 8 allergens.
Easy, healthy and colorful, this is the perfect summer salad!
Ingredients
1-1/2 tbsp honey (or pure maple syrup)
2 tbsp lime juice
1 tbsp extra virgin olive oil
1/8 tsp sea salt
2 cups cubed seedless watermelon
2 cups fresh cherries, pitted and halved
1 cup fresh blueberries
3/4 cup cubed English cucumber
1/2 cup micro greens or 2 cups baby arugula
4 fresh mint leaves, thinly sliced
2/3 cup crumbled feta cheese, such as Violife’s ‘just like Feta’
Instructions
- In a small bowl, whisk together honey, lime juice, olive oil, and salt. Set aside.
- Combine the watermelon, cherries, blueberries, cucumber, and micro greens or arugula, and mint in a large bowl.
- Drizzle the salad with the honey vinaigrette and gently toss to combine.
- Top with feta and enjoy!
Courses Soups & Salads
The post Watermelon, Feta and Summer Fruit Salad appeared first on Your Allergy Chefs.
]]>The post Overnight Oats appeared first on Your Allergy Chefs.
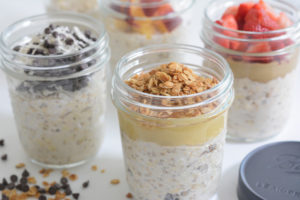
]]>
Overnight oats are a simple grab-and-go breakfast.
Most of our mornings start at 5 with a trip to the gym. When we get home we have our daily smoothie and often grab a jar of oats and it’s off to work. These oats are perfect for our busy schedules.
Say goodbye to that bland bowl of oatmeal with some topping ideas that will jazz up breakfast’s most popular cereal.
If you haven’t tried overnight oats yet, this recipe is for you…
Overnight oats are basically a no-cook method of making oatmeal.
Rolled or Quick
Use plain old-fashioned rolled oats, not quick oats that will get too soggy when soaked with milk.
On the topic of milk, of course it’s one that meets your dietary needs. Coconut, vanilla rice, almond, soy, or hemp all work well.
Easy Prep
In a medium bowl combine 2-1/2 cups gluten-free rolled oats, 2-1/2 cups alternative milk, 3 tablespoons pure maple syrup or honey, 5 teaspoons chia seeds (optional), and 1/2 teaspoon sea salt. Cover and place in fridge overnight.
The next morning, stir the oats and portion into 5 bowls or 5 (12-ounce) mason jars.
This can be enjoyed plain or with a topping.
Check out some delicious topping ideas…
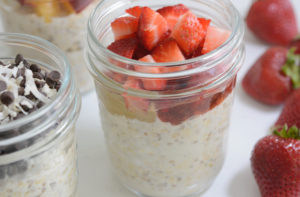
It’s really hard to choose a favorite, but sunbutter and jelly rocks!
Top the soaked oats with sunbutter, strawberry preserves, and diced fresh strawberries.
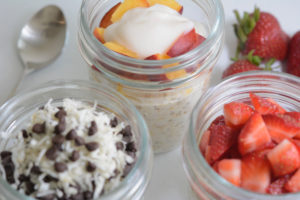
With peaches in season, we love to top the soaked oats with fresh diced peaches and allergy-friendly yogurt.
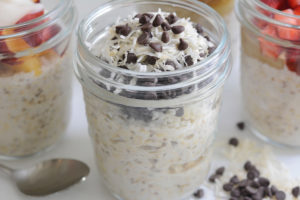
Here our topping is unsweetened shredded coconut and Enjoy Life’s mini chocolate chips for a real treat! This reminds me of the Mounds candy bar I used to love as a kid.
Apple Pie
Who doesn’t like apple pie? To keep it simple, we added raisins to the oats and topped with unsweetened applesauce and granola. The first photo on this post shows the apple pie oats. We used an allergy-friendly store-bought granola. However, to take it up a notch, top with our toasted coconut and pumpkin seed granola!
Overnight oats are typically served cold, but you can definitely eat them warm. Just place in the microwave for a minute or so and enjoy as is, or top with your favorite topping.
Preparing a large batch before your work week starts will save you time in the morning, as the shelf life for overnight oats is 5 days.
Check out the recipe for other delicious toppings and enjoy your morning!
Overnight Oats
Yield 5 Servings
Free of: gluten and top 8 allergens.
The best grab-and-go breakfast!
Ingredients
2-1/2 cups gluten-free rolled oats
2-1/2 cups alternative milk
3 tbsp pure maple syrup or honey
5 tsp chia seeds, optional but recommended
1/2 tsp sea salt
Instructions
- In a medium bowl, combine rolled oats, milk, maple syrup, chia seeds, and sea salt. Cover and place in the fridge for at least 2 hours or overnight.
- The next morning, stir the oats and portion into 5 bowls or 5 (12-ounce) mason jars.
- Enjoy plain or add a topping (see recipe notes).
- Shelf life for overnight oats is 5 days.
Notes
The following topping amounts are for 1 serving:
Sunbutter & Jam:
Top soaked oats with:
1 tbsp strawberry jam or preserves
1 tbsp sunbutter
1/4 cup diced fresh strawberries
Apple Pie:
3 tbsp raisins, stir into soaked oats and top with:
1/4 cup unsweetened applesauce
1/4 cup granola
Carrot Cake:
Stir into soaked oaks:
1/4 cup grated carrots
3 tbsp raisins
1/4 tsp ground cinnamon
Coconut Chocolate Chip
1/4 cup shredded coconut
2 tbsp allergy-friendly chocolate chips
Peaches-and-Cream
1/4 cup diced peaches
2 tbsp allergy-friendly vanilla yogurt, optional
Bananas-and-Cream
1/4 cup sliced bananas
2 tbsp allergy-friendly vanilla yogurt, optional
Courses Breakfast & Brunch
The post Overnight Oats appeared first on Your Allergy Chefs.
]]>The post Chopped Spring Fruit Salad appeared first on Your Allergy Chefs.
]]>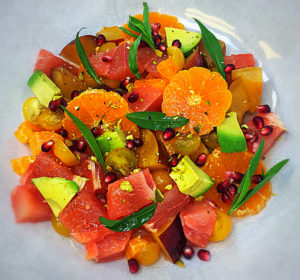
We’re excited to share Chef Mark Allison’s recipe for his refreshing chopped spring fruit salad, especially with citrus still in abundance.
While Joel was teaching food allergy safety at each of the Johnson & Wales campuses, he had the pleasure of meeting Chef Mark at the Charlotte, North Carolina campus.
We’re pleased to introduce you to Chef Mark Allison, the chef that created healthy recipes on the set of films such as Star Wars, Cars 3, The Incredibles 2, and Beauty and the Beast…
Where It All Began
When Mark’s father was not working his day job at a factory in Northern England, he loved to tend to the vegetable garden. Mark’s mother was – among many other things – a talented cook, and she prepared dinner every night for the family.
Mark left school at the age of 16 to become a chef. After working and traveling throughout Europe during his late teens and early twenties, he returned to school to complete his education. Chef Allison studied culinary arts, education, and business, eventually earning an MBA from Leicester University.
At 30, Chef Allison became a teacher of culinary arts at Neath Port Talbot College in South Wales. This is where he met the woman who would become his wife and mother of his children, Alison Davies. Yes, Alison kept her last name so she would not become Alison Allison. 
In 1999, their 14-month-old son Matthew was diagnosed with type 1 diabetes. Chef Allison adjusted his family’s eating habits to accommodate baby Matthew’s dietary needs for blood sugar control – cutting back on meat, dairy, salt, sugar, and processed foods and focusing more on plant-based foods.
Chef Allison joined Johnson & Wales University in 2004 as a teacher and became the dean of the college of culinary arts in Charlotte, North Carolina in 2008.
Unfortunately, Chef Allison also found out in 2008 that his wife had stage-four carcinoid cancer. The prognosis was not good; the doctors said she had just three to four years to live – at most. Chef Allison became even more focused on providing plant-based nutrition for his family, and he carried this philosophy over into his work as well.
Alison Davies passed away on March 19, 2015; almost eight years after doctors gave her a prognosis of just four years to live. Chef Allison believes that their family dedication to plant-based eating helped his wife live as long as she did, as well as living her life vibrantly and happily.
Chef Allison created his blog in memory of his beautiful wife, and he fills it with recipes he enjoys at home with his three sons.
From Johnson & Wales, Chef Allison became the director of culinary nutrition for the Dole Food company, writing healthy recipes for the Dole/Disney partnership on films such as Star Wars, Cars 3, The Incredibles 2 and Beauty and the Beast.
Currently, Chef Allison is the Executive Chef of Culinary Innovation at the Cabarrus Health Alliance. Chef Allison travels across America presenting and teaching preventative health and wellness classes through good food choices and healthy eating practices.
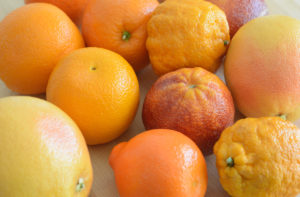
citrus galore
We hope you enjoy Chef Mark’s refreshing citrus salad, which takes the mundane salad to new heights that we think everyone will love!
Chopped Spring Fruit Salad
Yield 4 Servings
Free of: gluten and top 8 allergens.
Taking the mundane salad to new heights!
Ingredients
2 oranges, peeled and cut into thick chunks or slices (reserve juices)
1 pink grapefruit, peeled and cut into thick chunks or slices (reserve juices)
1 cup pomegranate seeds
1/2 cup baby yellow tomatoes, halved
1 lime, juice and zest of
2 tbsp citrus juice (from the reserved juices from the cut grapefruit and oranges)
1 avocado, pit removed and cut into chunks (see recipe notes)
1/4 cup raw sunflower seeds (if pistachios are not an issue, substitute unsalted pistachio nuts, slightly crushed)
1/2 cup allergy-friendly yogurt
2 tbsp freshly chopped tarragon leaves
Instructions
- Place the chopped oranges and grapefruits, pomegranate seeds, and tomatoes into a large salad bowl.
- In a small bowl, add the juice and zest of lime with the citrus juice. Gently toss in the avocado, carefully mixing with the juices to cover the avocado chunks to help prevent discoloration.
- Add the avocado to the citrus salad. Sprinkle with pistachios or sunflower seeds.
- Whisk together yogurt and chopped tarragon. Drizzle on or serve alongside the salad.
- Salad lovers around the world…enjoy!
Notes
How to cut, pit, and dice avocados
- Cut the avocado lengthwise around the pit or seed. Open the two halves to expose the pit.
- Here are 3 options in removing the pit:
- (1) Use a spoon to gently scoop out the pit, or (2) make another cut, lengthwise on the avocado that has the pit, cutting around the pit, making it easier to remove. (3) Probably the most popular method is to gently tap the pit with a knife until the knife edge wedges into the pit, without cutting all the way through. With the edge of the knife, carefully twist the pit out of the avocado and compost or discard the pit. Please keep in mind that this method requires care to avoid knife cuts.
- To make it easier to cut avocado cubes, before removing the skin or peel, take a knife and gently make cuts lengthwise and then crosswise, being careful not to cut through the peel. Using a spoon, scoop out the avocado chunks from the shell.
Courses Soups & Salads
The post Chopped Spring Fruit Salad appeared first on Your Allergy Chefs.
]]>The post Trail Mix Bars appeared first on Your Allergy Chefs.
]]>
free from gluten and the top 8 allergens
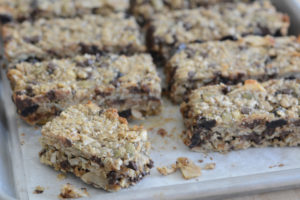
This trail mix bar is made with wholesome ingredients for bars you’ll feel good about eating.
Trail mix bar is the perfect name, cause they’re a super on-the-go snack, great for a hike or a picnic. And Joel loves ’em for breakfast with his coffee.
So…so…easy! Why not skip the packaged bars and make your own?
The inspiration for this week’s post was originally intended for the most amazing hippie bars from Bodhi Leaf Coffee Traders in Santa Clarita, CA. One of their baristas bakes amazing vegan and gluten-free pastries.
We dissected her hippie bars many times and set out to recreate them.
Hanging around for 4 days, our bananas were still not as ripe as we’d like for that perfect bar.
We’ll have to revisit the hippie bar down the road. When we do, we’ll be sure to share our version of that tasty treat.
Let’s make bars anyway. How ’bout replacing bananas with sunflower butter and applesauce? Ah, yes! A totally different bar, and wow! Really good!
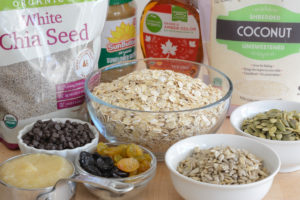
In a large bowl, combine sunflower seed butter, applesauce, maple syrup, and a little coconut oil.
Process oats in a food processor until coarsely chopped, but still having a lot of texture. Transfer oats to the sunflower seed butter mixture and mix with your hands until fully incorporated.
Add toasted pepita and sunflower seeds, dried fruit, coconut, chocolate chips, chia seeds, and salt. Mix with your hands to form a stiff dough.
Transfer the mixture into an 8″ x 8″ baking pan lightly coated with oil and lined with parchment paper. With slightly wet hands, press down on the dough until smooth and compacted.
Bake for 20-25 minutes, until firm and lightly golden around the edges. Once completely cool, cut into bars.
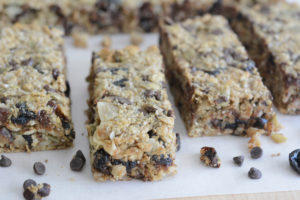
Mix ‘n Match
If tree nuts are not an issue, you can substitute a portion of the seeds for roughly chopped almonds and walnuts. Feel free to substitute your favorite nut butter for the sunflower seed butter.
We used dried cherries. Other dried fruits can be substituted, including cranberries, apricots, blueberries, golden or dark raisins, or a combination.
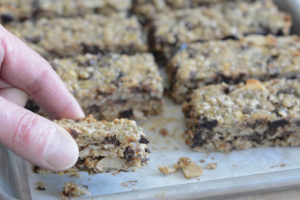
When planning a trip either in the air or on the road, these bars are the perfect safe snack.
Trail Mix Bars
Yield 10 Bars
Free of: gluten and top 8 allergens.
This trail mix bar is made with wholesome ingredients for bars you’ll free good about eating.
Ingredients
1/2 cup raw pumpkin seeds (pepitas)
1/2 cup raw sunflower seeds
1/2 cup sunflower butter
1/2 cup unsweetened applesauce
1/4 cup pure maple syrup or honey
1 tbsp coconut oil, melted and cooled to room temperature (optional)
2 cups gluten-free rolled oats
1/2 cup dried fruit, such as cherries, apricots, cranberries, raisins or a combination
1/2 cup unsweetened shredded coconut or coconut flakes
1/2 cup chocolate chips, such as Enjoy Life Semi-Sweet Mini Chips
1 tbsp chia seeds
1/2 tsp sea salt
Instructions
- Preheat oven to 325-degrees F. Place the pepitas and sunflower seeds on a baking tray lined with parchment paper. Roast nuts until lightly golden, about 8-10 minutes. Remove from oven and set aside to cool. This step is optional. However, we love the depth of flavor that the roasted seeds bring to the bars.
- Increase the oven temperature to 350-degrees F. Lightly grease an 8″ x 8″ baking dish and line with a piece of parchment paper (with overhang) so the bars are easier to remove.
- In a large bowl, combine the sunflower butter, applesauce, maple syrup, and coconut oil.
- Place the oats into a food processor and pulse until the oats are coarsely chopped, still having a lot of texture. Transfer oats to the sunflower butter mixture and mix with your hands until fully incorporated.
- Add the cooled pepita and sunflower seeds, dried fruit, coconut, chocolate chips, chia seeds, and salt. Mix with your hands. The dough will be stiff.
- Transfer the mixture into the prepared baking dish. With lightly wet hands, press down on the dough until smooth and compacted.
- Bake for 20-25 minutes, until firm and lightly golden around the edges.
- Place the dish on a cooling rack for 15 minutes, then carefully slide a knife to loosen the edges and gently lift out. Place the slab on cooling rack until completely cool.
- Once cool, slice into bars.
Courses Sweets
The post Trail Mix Bars appeared first on Your Allergy Chefs.
]]>The post Blueberry Jam appeared first on Your Allergy Chefs.
]]>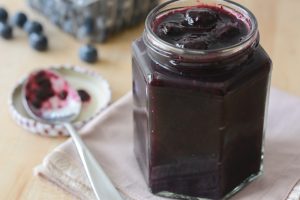
There’s something special about homemade blueberry jam made with love.
Most commercially prepared jams are loaded with sugar that hides the natural sweet tartness of the blueberries. Making this homemade jam is as easy as can be and has none of the refined sugars or preservatives that the store bought stuff contains.
Jam is traditionally crushed fruit with sugar and pectin. Instead of pectin, which requires lots of sugar to set, we’re using chia seeds to thicken our blueberry jam.
Chia seeds are magic. When soaked in liquid, they absorb about 12-times their weight and develop a gel-like coating. We love using them in all kinds of foods from overnight oats to sauces and baked goods.
Cha-cha-chia!
You don’t have to add loads of sugar to make a good jam. Come see…no pectin or canning required!
We have always loved traditional canning, a great way to preserve the season’s best!
With blueberries in their prime, it’s time to enjoy them in jam.
Blueberries are cooked with a little pure maple syrup for about 5 minutes. Chia seeds, lemon juice and a touch of cinnamon are added, and the jam is cooked for about 15 minutes. Once thick, the jam is removed from the heat and vanilla extract is added.
Don’t worry if the jam looks a little runny when it’s hot. The chia seeds will plump up as the jam cools, thickening it considerably.
What Color Seeds are Best?
Chia seeds are categorized as white or black. Though there is no nutritional difference between white and black chia seeds, they’re isolated purely for aesthetic preferences.
We’re not processing the jam the traditional way, using a boiling water bath to make the jam shelf stable, and there’s no fussing with having to seal the jars.
This quick and easy jam will hold for 2 weeks in an air-tight container in the fridge.
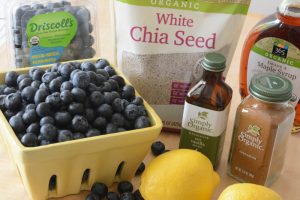
mise en place
2 weeks…our jam never lasts that long.
Lip-Smacking Good!
This blueberry jam is so good on pancakes, ice cream, in thumbprint cookies and tarts, and of course on toast or biscuits! Try scooping atop a batch of overnight oats.
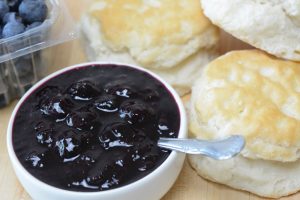
Thanks to chia seeds, we’re also pumping up the jam with a hearty dose of Omega 3, fiber, and protein. And blueberries have been shown to protect against heart disease and cancer, and can also help maintain bone strength, mental health, diabetes management, skin health, and healthy blood pressure.
Who knew blueberry jam could be so healthy!
Blueberry Jam
Yield 1 3/4 cups
Free of: gluten and top 8 allergens.
This delicious jam highlights the natural sweet tartness of blueberries with no refined sugar.
Ingredients
3 cups fresh blueberries
3 tbsp pure maple syrup
2 tbsp chia seeds, white or black (see recipe notes)
1 tbsp fresh lemon juice
1/8 tsp ground cinnamon
1/2 tsp pure vanilla extract
Instructions
- In a medium saucepan over medium-high heat, combine the blueberries and maple syrup. When blueberries come to a simmer, reduce heat to medium-low and gently simmer, covered for about 5 minutes, stirring often.
- Remove the lid and stir in the chia seeds, lemon juice, and cinnamon. Continue cooking, uncovered, about 15 minutes. The jam will continue to thicken as it cools so don’t let it reduce too much.
- Once the jam is thick, remove from heat and stir in vanilla extract.
- When the jam is completely cool, place in an air-tight container and store in the fridge for up to 2 weeks. It can also be stored in the freezer for up to 3 months.
Notes
There is no nutritional difference between white and black chia seeds. They are isolated purely for consumers’ aesthetic preferences.
Courses Sauces & Condiments
The post Blueberry Jam appeared first on Your Allergy Chefs.
]]>The post Creamy Rice Pudding with Brandied Oranges appeared first on Your Allergy Chefs.
]]>
free from gluten and the top 8 food allergens
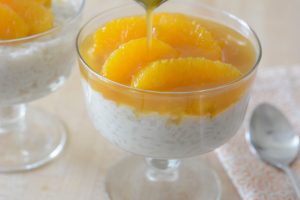
If you’re in the mood for an old-fashioned comforting treat, look no further than this recipe for creamy rice pudding. Creamy without the cream? You bet!
At Disney’s Coronado Springs Resort, I made this version of rice pudding for 3,000 guests at a Humane Society event. This timeless dessert was a big hit.
It’s not dramatic, or over the top flashy. It’s simply classic, elegant and delicious.
Besides, it also happens to be one of the most economical and easiest desserts on the planet!
C’mon…we’ll show ya.
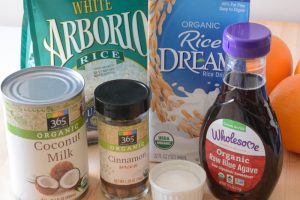
First, in a medium heavy bottomed saucepan, bring rice milk and coconut milk to a boil.
To get that essence of cinnamon, toss in a cinnamon stick. Then add arborio rice to achieve the ultimate creaminess.
The rice pudding is gently simmered until al dente, while stirring frequently. Al dente refers to being cooked so as not to be too soft or too crunchy, but firm to the tooth-or bite. Cooking time is about 25-30 minutes. Be sure to start testing and tasting for doneness after 20 minutes. Cooking times can vary based on stove tops, saucepans, and how high or low the simmering action is. Overcooking leads to mushy rice pudding.
A little sweetness is added. This can be in the form of agave nectar, honey, stevia, organic cane sugar, coconut sugar or dates. That’s it…easy, right?
Dress It Up!
We love topping rice pudding with roasted pineapple, which is always available. However, today we’re dressing it up with what’s in season, oranges.
 Chef’s Tip: To segment an orange, cut the top and bottom off the orange. This way, the orange will sit flat on the cutting board. Using downward strokes, cut the skin away from the flesh. Remove any remaining white pith. Without cutting all the way through, but just to the center, cut between the membranes to segment the orange.
Brandied Oranges
After the oranges are segmented, brandy, agave nectar and orange zest are simmered in a small saucepan and then poured over the orange segments and refrigerated for several hours to let the flavors blend together.
However, if you don’t want to do brandy, for a non-alcoholic version, rose water syrup gives another delicious dimension for oranges.
Rose Water Syrup
Combine 1/4 cup agave nectar or honey, 1/4 teaspoon cinnamon, 1 tablespoon rose water, and 1-1/2 teaspoons fresh lemon juice. Top your rice pudding with orange segments and finish by lightly drizzling the oranges with syrup.
With so many options, you can serve rice pudding individually in super cute bowls. Sprinkle a little cinnamon on top or drizzle with your favorite allergy-friendly caramel sauce.
The perfect sweet ending to a great meal, this recipe is a winner in our house and we hope it will be in your house too!
Creamy Rice Pudding with Brandied Oranges
Yield 4 Servings
Free of: gluten and top 8 allergens.
If you’re in the mood for an old-fashioned comforting treat, look no further than this recipe for creamy rice pudding with brandied oranges.
Ingredients
Rice Pudding
2-1/4 cups rice milk
2-1/4 cups coconut milk, unsweetened
1 (2-inch) cinnamon stick
3/4 cup Arborio rice
3 tbsp honey or agave nectar (see recipe notes)
1/4 tsp sea salt
Brandied Oranges
2 medium oranges
1/4 cup Brandy
1/4 cup honey or agave nectar
1 tsp grated orange zest
Instructions
- For the rice pudding, In a medium heavy bottomed saucepan, bring rice milk and coconut milk to a boil. Add cinnamon stick and Arborio. Reduce heat to medium-low and gently simmer for 25-30 minutes, until rice is al dente, stirring frequently to prevent burning.
- After 20 minutes, remove cinnamon stick and add honey or agave nectar and salt; cook another 5 minutes, or until done. Be sure to start testing and tasting for doneness at about 20 minutes. Cooking times can vary based on stove tops, saucepans, and how high or low the simmering action is.
- Allow to cool slightly before portioning into serving bowl or individual containers.
- Chill for several hours or overnight. When ready to serve, garnish with brandied oranges.
- For the brandied oranges, segment the oranges into a small bowl. Set aside.
- In a small saucepan, add brandy, honey or agave nectar, and orange zest. Stir over medium-low heat for about 5 minutes.
- Pour mixture over orange segments. Refrigerate for several hours or overnight to allow flavors to meld.
Notes
You can substitute 1/3 cup of organic cane sugar or coconut sugar for the honey or agave nectar.
Courses Sweets
The post Creamy Rice Pudding with Brandied Oranges appeared first on Your Allergy Chefs.
]]>


