The post Chia Pudding with Citrus appeared first on Your Allergy Chefs.
]]>
plant-based and free of gluten and the top 8 allergens
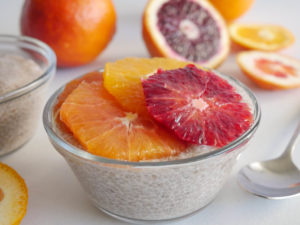
This chia pudding with citrus tastes like sunshine in a bowl. Make this magical dish for a decadent breakfast, healthy snack, or dessert.
What are Platelets?
Platelets are made in your bone marrow along with white and red blood cells. These tiny blood cells help your body form clots to stop bleeding. Having too many platelets causes the blood to be thick and flow more slowly, and can lead to a clot in the blood vessels.
We chose chia seeds because they are one of the most nutritious foods on the planet, loaded with protein, fiber, micronutrients, and omega-3 fatty acids. Omega-3 fatty acids contribute to the flexibility of cell membranes, making them more slippery so that platelets are less sticky and less likely to clump together in the blood.
Next, bring on the oranges. Oranges contain salicylates, which help prevent clotting and thin the blood. And what a great time to get a variety of peak season oranges!
Cinnamon is known to reduce the accumulation of platelets and therefore blood clotting. So let’s add a little cinnamon.
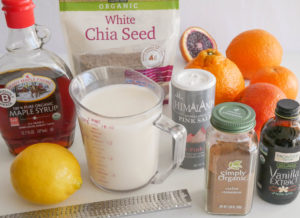
mise en place
Types of Cinnamon
There are 2 types of cinnamon, Cassia (known as regular) and Ceylon (known as true cinnamon). Most cinnamon available on the market is Cassia. Cassia cinnamon contains high amounts of coumarin, which has been linked to conditions like liver damage, cancer, mouth sores, and low blood sugar.
Ceylon only contains trace amounts of coumarin. If possible, purchase only Ceylon. And enjoy cinnamon, as it’s one of the healthiest spices around!
Whether or not you’re watching your platelet count, let’s make one of the healthiest puddings ever!
There are different recommendations for the best chia pudding ratio. Making this several times, the ratio we found that works best is 1/2 cup chia seeds to 2 cups milk.
Black Chia Vs White Chia
The black chia seeds make up the majority of chia seeds grown today. Nutritional differences are so marginal that most consider them equal. Black chia seeds have a slightly higher protein content, while white chia seeds are slightly higher in ALA Omega-3 fatty acids.
Most people make their decision purely on aesthetics. We just happened to have white chia seeds. However, black chia seeds are more readily available and are equally as good.
Choose Your Oranges
From blood oranges to Valencia, satsuma, and tangerines, there are so many choices.
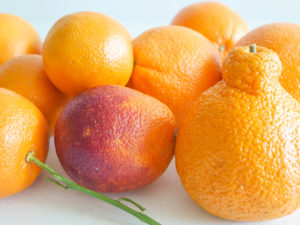
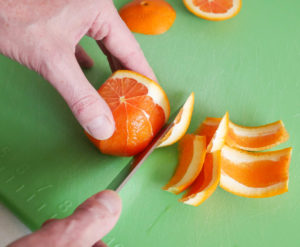
Using a sharp knife, carefully slice off the top and bottom of each orange.
With even downward strokes, slice the skin away from the flesh, as shown below. Remove any remaining white pith. Cut crosswise into slices, or for segments, cut between the membranes to segment the orange. Place slices or segments in a container and store in the fridge until ready to serve the pudding.
Easy as 1-2-3
- In a large bowl, whisk together chia seeds, alternative milk, pure maple syrup, orange zest, Ceylon cinnamon, a little salt, and stir.
- Cover and place in the fridge for 15 minutes. Remove from fridge and stir again, incorporating the chia seeds that have sunk to the bottom and are clumped together. Place back in the fridge and chill for 8 hours, or overnight, until the pudding is thick. Stir in fresh lemon juice before serving.
- Portion into jars or bowls and top with orange slices or segments.
Chia pudding on its own is fairly plain, but that’s what makes it fun! You can add sunflower seed butter as a topping, a layer, or stirred into the pudding. Or add coconut, jams and spreads, raw cacao powder, or other fresh fruits (berries, bananas, apples, pears, peaches…whatever’s in season).
Chef Mary’s Tip
If you’re having trouble getting your chia pudding to set, check that your chia seeds aren’t old. Also make sure to give your chia pudding a good stir 15 minutes after you initially mix it together. This breaks up any clumps of seeds and ensures the pudding will set.
Chia won’t gel if a liquid is too acidic. For this reason, we let the chia gel before adding a little fresh lemon juice.
We think the texture of chia is fun! However, we have a friend that does not. She wanted to get the health benefits without the tiny pearls, so she blended chia pudding in a high speed blender. She loves it. We have to say, we have never tried this.
Your Allergy Chefs are participants in the Amazon Associates Program, an affiliate advertising program designed to provide a means for sites to earn advertising fees by advertising and linking to Amazon.
Chia Pudding with Citrus
Yield 4 Servings
Free of: gluten and top 8 allergens.
This chia pudding with citrus is like sunshine in a bowl.
Ingredients
1/2 cup chia seeds, black or white
2 cups alternative milk
3 tbsp pure maple syrup
1 tsp orange zest
1/2 tsp ground Ceylon cinnamon
1/8 tsp sea salt
2 tbsp fresh lemon juice
2 oranges, peeled & sliced or segmented (see recipe notes)
Instructions
- In a large bowl, whisk together the chia seeds, milk, maple syrup, orange zest, cinnamon, and salt.
- Cover and place in the fridge for 15 minutes. Remove and stir again, incorporating the chia seeds that have sunk to the bottom and are clumped together. Return to the fridge and chill for 8 hours, or overnight, until the pudding is thick. Once the pudding has gelled, stir in lemon juice, if desired.
- Portion into jars or bowls and top with orange slices or segments.
- For a richer version, substitute 1 cup of full-fat coconut milk for 1 cup of the alternative milk.
Notes
Orange Slices or Segments
Using a sharp knife, carefully slice off the top and bottom of each orange.
With even downward strokes, slice the peel away from the flesh. Remove any remaining white pith. Cut crosswise into 1/4-inch slices, or for segments, cut between the membranes to segment the orange.
Courses Breakfast & Brunch
The post Chia Pudding with Citrus appeared first on Your Allergy Chefs.
]]>The post Superfood Smoothies appeared first on Your Allergy Chefs.
]]>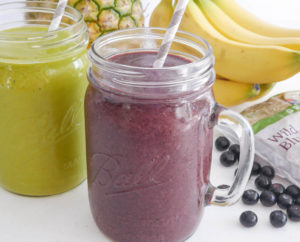
Smoothies are a great way to pack in extra fruit and veggies to your diet! We’re excited to share 2 of our favorites that we call the Green Machine and Berry Blast.
Get a head start on those New Year’s resolutions with these delicious blend-and-go healthy breakfast smoothies.
How much fruit is too much? Read more as we share a short video from Dr. Michael Greger. We also share the surprising facts about cinnamon and turmeric…
For 2 delicious smoothies, all you need is a high speed blender, 2 large glasses or Ball Mason Jars and…
- 16 ounces coconut water
- 4 cups (about 2 ounces) power greens
- 3 cups frozen fruit
- 1/2 – 1 tsp turmeric powder
- 1/2 – 1 tsp Ceylon cinnamon
You don’t necessarily need the newest or most powerful blender on the market. You just need a good blender for smoothies, one that can cut through frozen fruits and pulverize even the stringiest produce into a smooth liquid.
If we had to choose a favorite appliance, it would be our vitamix. It is worth the investment and we use it for so many things, from our morning smoothies to nut milks and from soups to sauces.
Coconut Water
Loaded with health benefits, coconut water is the perfect beverage for restoring hydration and replenishing electrolytes lost during exercise.
The Greens
Greens are one of the healthiest foods. About 2 cups of mixed power greens go into each smoothie. For convenience, we buy the pre-packaged greens that contain spinach, mizuna, chard, and kale.
We don’t even taste the greens. However, if you’ve never had a smoothie with greens, start by just adding a handful of baby spinach. You may hardly even taste the greens. As you add more and more greens, your taste buds will adapt and your body will love you.
The Fruit
It’s important to use whole fruits rather than just their juice. This is because, when juicing, the fiber and all the phytonutrients bound to it are lost.
For our Berry Blast, we chose blueberries, strawberries, cherries, and bananas.
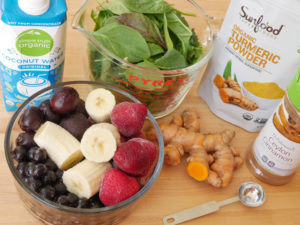
berry blast mise en place
The Green Machine is loaded with pineapple, mango, strawberries, and banana.
Switch up your smoothies a bit, depending on what fruits are in season. Aim for 1-1/2 cups of fruit per smoothie. Frozen fruit is the best since it blends up thicker than fresh.
We always have bananas and pineapples on hand. When the bananas are ripe, they are peeled, cut and frozen in large ziplocks. The fresh pineapple is trimmed, cut into cubes, and stored in the freezer. We prefer to freeze our own pineapples since we don’t have much luck in getting tasty store bought frozen ones.
As far as the berries and other fruit, most of the year we buy blueberries, strawberries, cherries, and mango frozen.
Add-Ins
To the batch of smoothies, add 1/2 – 1 teaspoon of turmeric powder (or fresh turmeric) and 1/2 – 1 teaspoon of Ceylon cinnamon.
Sometimes we’ll also add chia or flax seeds, or top our smoothies with hemp seeds.
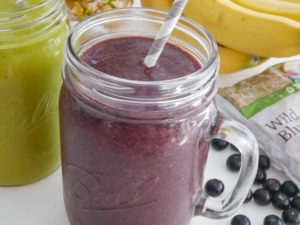
How Much Fruit is Too Much?
Some people have concerns about the sugar content of fruit, thus restricting their fruit intake. Dr. Michael Greger puts fruit to the test in this short video (just under 4 minutes), how much fruit is too much?
The Truth About Cinnamon and Turmeric
Cinnamon and turmeric are two of the healthiest spices on the planet! That’s a fact, but there are things to be aware of.
-Cassia (known as regular cinnamon) and Ceylon (known as true cinnamon) are the 2 types of cinnamon. Most cinnamon available on the market is Cassia. Cassia cinnamon contains high amounts of coumarin, which has been linked to conditions like liver damage and cancer.
Ceylon cinnamon only contains trace amounts of coumarin, so when possible purchase Ceylon. Cinnamon is loaded with antioxidants, anti-inflammatory properties, is linked to a reduced risk of heart disease, lowers blood sugar levels, fights various infections, helps protect against cancer, and has beneficial effects on Alzheimer’s and Parkinson’s.
-Be sure to purchase high quality turmeric, as there can be a danger of lead contamination. Bangladesh is one of the leading turmeric-growing regions in the world. Some spice processors in Bangladesh use an industrial lead chromate pigment to infuse turmeric with a bright yellow color. Lead can also come from soil contamination.
Turmeric is used in Ayurvedic medicine to treat inflammation. Uses include cancer prevention and treatment as well as treatment of rheumatoid arthritis and infections.
A few years ago, Joel suffered from severe inflammation that almost forced him to quit work. Months after taking turmeric supplements and going on a plant-based diet, his inflammation was gone. Today, he’s in the best shape ever!
Chef Joel’s Tips
- To save time in the morning, pick a day to make smoothie kits. Measure 3 cups of your favorite fruit combinations and place into ziplock quart freezer bags (3 cups of fruit makes 2 smoothies). Prepare enough fruit kits for the week ahead and freeze. In the morning, all you’ll have to do is add liquid, greens, and add-ins to your blender. Then dump in the frozen fruit and blend for about 30 seconds.
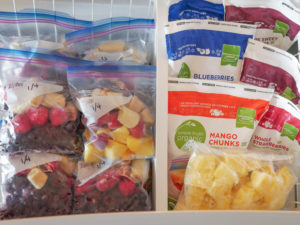
smoothie kits
- If you add lemon or other acidic fruits or vegetables to your smoothie, the enamel on your teeth may soften temporarily. Be sure to rinse your mouth with water after drinking a sour smoothie.
Your Allergy Chefs are participants in the Amazon Associates Program, an affiliate advertising program designed to provide a means for sites to earn advertising fees by advertising and linking to Amazon.
Superfood Smoothies
Yield 2 Servings
Free of: gluten and top 8 allergens.
Delicious blend-and-go breakfast smoothies!
Ingredients
Berry Blast
16 ounces chilled coconut water
4 cups (about 2 ounces) power greens (see recipe notes)
1 cup frozen blueberries
3/4 cup frozen strawberries
3/4 cup frozen banana slices
1/2 cup frozen cherries
1/2 – 1 tsp turmeric powder (or about a 3/4-inch piece of peeled fresh turmeric)
1/2 – 1 tsp Ceylon cinnamon
Instructions
- Pour coconut water into a high-speed blender.
- Add power greens, frozen fruit, turmeric, and cinnamon.
- Start blender on low speed and gradually increase to high speed, blending for about 30 seconds until smooth. If the smoothie is too thick, add 1/4 cup or so of distilled water and continue blending.
Notes
Most markets sell a mix of power greens especially for making smoothies. Mix up your favorite greens, from spinach to kale, or mizuna to chard.
Use 3 cups of your favorite fruits. Frozen fruit is best since it blends up thicker than fresh.
For the Green Machine, use 3 cups of a combination of pineapple, mango, strawberries, and banana.
Courses Beverages
The post Superfood Smoothies appeared first on Your Allergy Chefs.
]]>The post Vegetable Paella appeared first on Your Allergy Chefs.
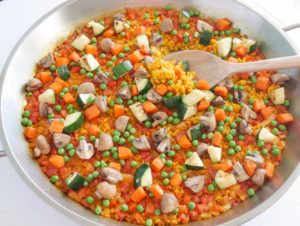
]]>
free of gluten and top 8 allergens
Really good paella has an amazing taste and texture. Named after the cooking pan itself, every Spanish family has its own recipe of this dish.
We just got back from Barcelona, where we dug deep into finding the secrets to making the best paella. Join us as we share our take on Spain’s most popular dish.
Peas?
Well, there are a couple of golden rules about paella, at least that’s what we were told. True Valencian paella is made with rabbit, chicken and green beans in summer, duck and artichoke in winter. There also should be no garlic…no peas…no potatoes…no stock…and no chorizo. Seafood and meat should never be mixed and seafood paella is only made if by the sea.
Whew! We sure did break the rules on peas and stock. I tried talking Joel out of the peas, but he dearly loves them. Besides, I couldn’t find nice fresh green beans this week.
On this trip to Barcelona, our favorite paella was from Restaurant Gaudim. We wanted you to see an authentic Spanish paella before we started making ours. Check out how thin the layer of rice is…
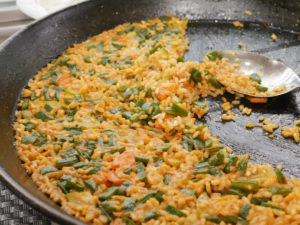
Vegetable Paella from Restaurant Gaudim in Barcelona, Spain
Absolutely delicious!
Once you have the techniques down, the adaptations are endless. Paella is a great way to use up seasonal vegetables that you may have onhand. Improvisation is the name of the game, since even in Spain the issue of what ingredients should go in paella is fiercely disputed.
That being said, there are still some guidelines.
The Rice
The short, round grains (Spanish rice) are perfect for paella and absorb liquid really well, which makes it the ideal rice for paella.
Rice varieties that are suitable for paella like Bomba (the most popular), Senia, and Calasparra are readily available in Spain. We brought back plenty of sacks of bomba rice, which are often packaged in cloth sacks which allow the rice to breath and maintain its high quality. However, if you’re in the United States, purchasing these varieties may be difficult since they are usually only available at gourmet and ethnic grocery stores and online.
We did find that our Whole Foods Market sells “Matiz Paella Rice”, which is sourced from Valencia, Spain. We made a second batch of paella with this rice from Whole Foods. We have to be honest, it did not compare to the paella we made with Bomba rice. It took about 10 more minutes to cook, and with a creamy texture it didn’t come close to the quality of the Bomba batch. When looking online, we found “Matiz Paella Rice” and also “Matiz Bomba Rice”, with their paella rice quite a bit cheaper than their bomba. We suggest skipping their paella rice and paying a little more for the best…la bomba!
Rice in important. If you can’t get paella rice but are determined to make paella, you can choose a different short grain rice, but the baking time will vary according to the variety. Calrose rice is readily available in supermarkets and is often substituted for the Spanish varieties. Medium grain or jasmine rice are sometimes substituted.
Some recipes call for using arborio rice, however you want the end result to yield separate grains, not a creamy texture like risotto.
The Pan
The best pan to use is a paella pan, which can range in diameter from 8-inches (single serving) all the way up to 60-inches, which can feed a crowd. Our pan is 15-inches, which serves 4 to 6.
Paella pans are wide and shallow to create maximum surface area, allowing liquid to evaporate and to form as much crisply golden crust (socarrat) on the bottom as possible.
This wide, shallow pan does make the best paella, but there are alternatives. If you want to dabble in paella without committing to a special pan, any wide, shallow, flat bottomed skillet will be do the job. Just make sure it’s not a non-stick pan.
Spanish Saffron and Smoked Paprika
As the world’s most expensive spice, saffron provides a beautiful golden color and flavor that only saffron can give. The redder the threads, the higher the quality. The good thing is that saffron can be purchased in small amounts that are affordable, and only 1/2 teaspoon is needed for this dish.
Smoked paprika gives a beautiful depth of flavor which is unique to Spanish cuisine. I guess it’s safe to say that high quality Spanish saffron and smoked paprika bring paella to life!
The Crispy Bits
Socarrat is the caramelized layer of toasted rice at the bottom of the pan. At the end of cooking, the heat is turned up to medium-high. The pan is rotated on the heat as needed for about 3 minutes, until you start to hear a snap, crackle and pop and the bottom layer is well browned and crisp. Many believe if you achieve socarrat, you have made a perfect paella.
Achieving socarrat takes practice, and you have to be careful not to burn the rice. So don’t worry about achieving socarrat on your first try. In fact, our favorite paella this last trip to Barcelona did not have socarrat! Can you believe it? Yes, we were disappointed!  However, it was still delicious and incredible.
Let’s Make Paella
You can absolutely do it!
The recipe might look long at first glance, but don’t feel intimidated. The ingredients are basic, and the method is surprisingly simple.
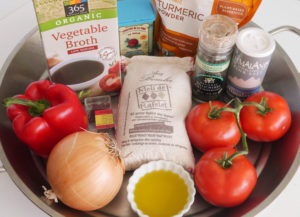
mise en place
As long as you have your mise en place (ingredients and utensils gathered and ready to go before you start cooking), making paella should be a breeze.
Steps
- Heat vegetable broth in a medium saucepan over medium-high heat. Break up saffron and add to the broth. When broth starts to simmer, reduce heat to low just to keep broth hot.
- Heat olive oil in a 12 to 16-inch paella pan (or large wide flat bottomed stainless steel pan…not a non-stick pan). Add onions and red bell peppers and sauté about 5 minutes.
- Add diced tomatoes, smoked paprika and turmeric, cooking for another 1-2 minutes. Turmeric is optional, but we added it because…why not? It’s loaded with health benefits!
- Add a little more oil and the rice. Stir to coat the rice well, cooking for 1 minute to incorporate flavors.
- Slowly pour in the hot broth. Add a little salt and pepper. Gently move the vegetables around so the rice falls evenly to the bottom of the pan as much as possible. Do not stir after this point as stirring will cause the rice to release starches and become creamy. Increase heat to medium-high. When broth comes to a boil, reduce heat to medium or medium-low and cook at a continuous gentle boil, uncovered, for 20 minutes. If using a large paella pan (15 inches or so) you’ll want to rotate the pan over the burner every so often so the rice cooks evenly.
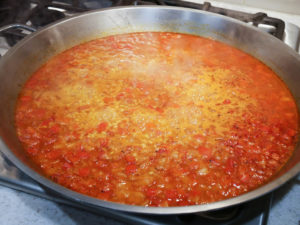
simmered, not stirred
- If you like the socarrat (caramelized layer of toasted rice at the bottom of the pan), at the end of cooking, turn up the heat to medium-high for about 3 minutes, rotating the pan as needed, until you start to hear a snap, crackle, pop and the bottom layer of rice is well browned and crisp.
- Socarrat or not, remove from heat and sprinkle peas (optional) and your favorite roasted veggies over the rice, without mixing them in. Cover with foil and let the paella rest for 5 minutes.
- Garnish with a sprinkle of chopped parsley, if desired and serve with lemon wedges on the side.
Portion onto serving plates or enjoy straight from the pan, as true Valencians do.
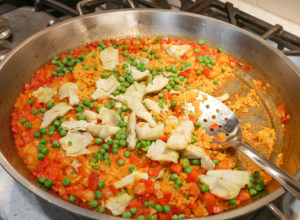
the best batch made with bomba rice
Even though peas are not part of traditional paella, use whatever vegetables you’d like. The above paella is the first batch we made with Bomba rice. You can see we got a nice socarrat, caramelized rice at the bottom of the pan. We added peas and artichoke hearts after the rice was cooked, removed the pan from the heat and covered with foil to let the paella rest for about 5 minutes. Delicious!
A Bit of Trivia
For ultra-authenticity, paella should only be cooked by a man…a Spanish man…and only in Valencia, Spain.
Your Allergy Chefs are participants in the Amazon Associates Program, an affiliate advertising program designed to provide a means for sites to earn advertising fees by advertising and linking to Amazon.
Vegetable Paella
Yield 4-6 Servings
Free of: gluten and top 8 allergens.
A taste of Spain!
Ingredients
Paella
4 cups low-sodium vegetable broth
1/2 tsp saffron threads, crumbled and loosely measured
3 tbsp olive oil, divided (2 tbsp + 1 tbsp)
1 cup diced yellow onion (1 small or medium onion)
3/4 cup diced red bell pepper (1 medium pepper)
1 cup diced tomato
1 tsp smoked paprika
1/2 tsp turmeric powder
1-1/2 cups short-grain paella rice, such as Bomba (see recipe notes)
1 tsp sea salt
1/8 tsp black pepper
3/4 cup frozen peas, thawed (optional)
Roasted Vegetables
1 cup diced carrots
1-1/2 tsp olive oil, divided
1/4 tsp sea salt, divided
8 oz button or cremini mushrooms, trimmed and quartered
1-1/2 cups zucchini, cut in half lengthwise and then cut crosswise into 1/2-inch slices
Garnish
1 tbsp chopped Italian parsley (optional)
Lemon wedges
Instructions
- For the paella, heat vegetable broth in a medium saucepan over medium-high heat. Break up the saffron and add to the broth. When the broth comes to a simmer, reduce heat to low to keep the broth warm.
- Heat the first 2 tablespoons of oil in a 12 to 15-inch Paella pan (or large wide flat bottomed stainless steel pan…not a non-stick pan) over medium heat. Add onions and peppers; sauté until softened and onions are lightly browned, about 5 minutes.
- Add tomatoes, paprika, and turmeric, cooking another 1-2 minutes stirring frequently.
- Add the remaining 1 tablespoon oil and the rice. Stir to coat well, cooking for 1 minute to incorporate flavors.
- Slowly pour in the hot broth. Add the salt and pepper. Gently move the vegetables around so the rice falls evenly to the bottom of the pan as much as possible. Do not stir after this point as stirring will cause the rice to release starches and become creamy. Increase heat to medium-high. When broth comes to a boil, reduce heat to medium or medium-low and cook at a continuous gentle boil, uncovered, for 20 minutes. If using a large paella pan (15 inches or so) you’ll want to rotate the pan over the burner every so often so the rice cooks evenly. We made 2 batches. Our batch with Bomba rice was done in 20 minutes. The batch with “paella rice” from Whole Foods Market took an additional 10 minutes. It was necessary to add about 1/4 cup additional broth to the latter batch.
- For the roasted vegetables, preheat oven to 400-degrees F.
- Line 2 baking pans with parchment paper. In a medium bowl, toss the carrots with ½ teaspoon oil and a dash of salt and arrange in a single layer in the first baking pan.
- Using the same bowl, toss the mushrooms with ½ teaspoon oil and a dash of salt and arrange across half of the second baking pan.
- Toss the zucchini with the remaining ½ teaspoon oil and salt and arrange on the other half of the pan next to the mushrooms.
- Place in the oven and set your timer for 10 minutes. The mushrooms and zucchini will take about 10-15 minutes to roast. Remove the mushrooms and zucchini when they are tender, but not overcooked. Continue to roast the carrots for a total of about 15-20 minutes, removing from oven when crisp tender. Feel free to use whatever vegetables you’d like.
- If you like the socarrat (caramelized layer of toasted rice at the bottom of the pan), at the end of cooking, turn up the heat to medium-high for about 3 minutes, rotating the pan as needed, until you start to hear a snap, crackle, pop and the bottom layer of rice is well browned and crisp.
- Socarrat or not, remove from heat and sprinkle the peas and roasted vegetables over the rice, without mixing them in. Cover with foil and let the paella rest for 5 minutes. Garnish with a sprinkle of chopped parsley, if desired and serve with lemon wedges on the side.
Notes
The short, round grains (Spanish rice) are perfect for paella and absorb liquid really well, which makes it the ideal rice for paella.
Rice varieties that are suitable for paella like Bomba, Senia, and Calasparra are readily available for purchase in Spain. However, if you are in the United States, purchasing these varieties may be difficult since they are usually only available at gourmet and ethnic grocery stores and online. There are some Whole Foods Markets that do sell paella rice from Spain.
You can choose a different short grain rice, but the baking time will vary according to the variety. Calrose rice is readily available in supermarkets and is often substituted for the Spanish varieties. Medium grain or jasmine rice will also work.
Some may say to use arborio rice, however you want the end result to yield separate grains, not a creamy texture like risotto.
Courses Mains
The post Vegetable Paella appeared first on Your Allergy Chefs.
]]>The post Creamy Ranch Dressing appeared first on Your Allergy Chefs.
]]>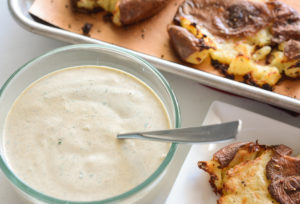
This creamy ranch dressing is so special that it deserves its own post.
America’s favorite dressing goes beyond salads and raw veggies. From baked cauliflower to chicken nuggets, and from pizza, potato skins and smashed potatoes to replacing mayo in potato salad, the possibilities are endless.
Ranch dressing that’s oh so delicious and oh so good for you!
As we mentioned in a recent post for our Southwestern Wedge Fully Loaded, the ingredients of most store bought ranch dressings include not only lots of dairy, but MSG, high fructose corn syrup, modified food starch, less than 2% of natural flavor, and so much more processed stuff.
It just makes sense to make our own!
The dressing is super easy to make. However, you have to allow about 6 hours for soaking the raw sunflower seeds in a small bowl covered with lukewarm filtered water.
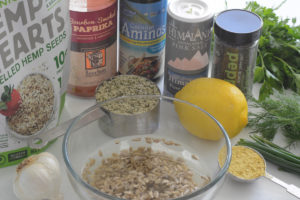
You could skip the step of soaking the seeds, but you won’t want to. Let’s talk about why.
Nuts and seeds have high amounts of enzyme inhibitors which protect these foods from sprouting prematurely, but which also give nuts and seeds a bitter flavor and make digesting them difficult.
Soaking nuts and seeds has so many benefits, such as:
- neutralizing the enzymes allowing for proper digestion
- encouraging the production of beneficial enzymes
- removing and reducing phytic acid and tannins
- increasing amounts of vitamins, especially B vitamins
- enabling their many nutrients to be more easily absorbed by the body
Depending on the nut or seed, different soaking times are required, which may vary from 2 to 12 hours.
Why Raw?
It’s important to only soak nuts and seeds that are raw, as those that have been roasted or heated at high temperatures loose many of their enzymes and nutrients.
Also, it’s good to choose organic nuts and seeds when possible, simply because if not they are likely to have been treated with chemicals.
When the seeds are done soaking, drain out the soak water and discard. Thoroughly rinse the seeds. The soaking step can be done up to a day in advance. After draining and rinsing, store soaked seeds in the fridge until you’re ready to make the dressing.
Ready?
Transfer seeds to a high-speed blender. Add hemp seeds, water, olive oil, lemon juice, nutritional yeast flakes, coconut aminos, and white wine vinegar. Start blending on low and gradually increase speed. Blend until smooth and creamy, about 45-60 seconds.
Health food stores and markets such as Whole Foods and Sprouts carry hemp seeds, nutritional yeast flakes, and coconut aminos. If you can’t find these products in your area, they are available online.
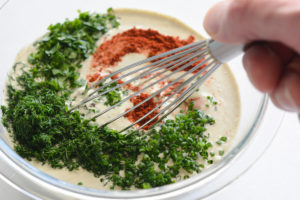
Transfer to a medium bowl and whisk in garlic, dill, parsley, chives, paprika, and a little salt and pepper. Cover and place in the fridge until ready to serve.
Enjoy…with endless possibilities, including our Southwestern Wedge Fully Loaded!
Your Allergy Chefs are participants in the Amazon Associates Program, an affiliate advertising program designed to provide a means for sites to earn advertising fees by advertising and linking to Amazon.
Creamy Ranch Dressing
Yield 1 1/2 Cups
Free of: gluten and top 8 allergens.
America’s favorite salad dressing!
Ingredients
1/4 cup raw sunflower seeds + water to cover
1 clove garlic, peeled
1/2 tsp salt, divided (1/4 tsp + 1/4 tsp)
1/2 cup hemp hearts (shelled hemp seeds)
1/2 cup water
1/4 cup olive oil
2 tbsp fresh lemon juice
1 tbsp nutritional yeast flakes
2 tsp raw coconut aminos
1 tsp white wine vinegar
1 tbsp minced fresh dill
1 tbsp minced fresh Italian parsley
2 tsp minced fresh chives
1/4 tsp smoked paprika
1/8 tsp black pepper
Instructions
- Soak the sunflower seeds in a bowl of lukewarm filtered water to cover at room temperature for 6 hours, or up to 8 hours. The water should be at least double in volume as the amount of seeds. Drain and rinse well.
- Smash garlic clove with blade of knife. Sprinkle first ¼ tsp salt over garlic. Mash into a paste with a fork. Set aside.
- Transfer sunflower seeds to a high-speed blender with hemp seeds, water, olive oil, lemon juice, nutritional yeast flakes, coconut aminos, and vinegar. Start blending on low and gradually increase speed. Blend until smooth and creamy, about 45-60 seconds.
- Transfer to medium bowl, and whisk in reserved garlic, remaining ¼ tsp salt, dill, parsley, chives, paprika, and pepper. Cover and place in refrigerator until ready to serve. This makes a scant 1 ½ cups.
Notes
- Nuts and seeds have high amounts of enzyme inhibitors. This is a reason that unsoaked, they are hard to digest. Soaking neutralizes the enzymes allowing for proper digestion.
Courses Soups & Salads
The post Creamy Ranch Dressing appeared first on Your Allergy Chefs.
]]>The post Southwestern Wedge Fully Loaded appeared first on Your Allergy Chefs.
]]>
plant-based and free of gluten and top 8 allergens
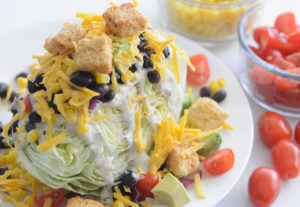
This classic salad begins with a wedge of iceberg lettuce that’s smothered in creamy ranch dressing, with avocado, tomatoes, onions, beans, corn, cheeze, and croutons. The toppings are endless.
Did you know that ranch dressing has double the sales of any dressing, leaving vinaigrettes and blue cheese in the dust? If you take a look at the ingredients of most store bought ranch dressings, you’ll notice not only lots of dairy, but there’s also MSG, high fructose corn syrup, modified food starch, less than 2% of natural flavor, and so much more processed stuff.
Let’s fix that and make our own!
The classic wedge, still popular at steakhouses and many other restaurants, consists of crunchy iceberg lettuce, bacon and blue cheese dressing. We gave our salad a Southwestern spin with ranch dressing, using ingredients we had on hand.
Saturday was 105 degrees here in the valley. We didn’t want to crank up the oven, so this salad was the perfect solution and so much fun!

mise en place for ranch dressing
The dressing is super easy. However, you have to allow time for soaking the sunflower seeds. We soaked the seeds covered in water for about 6 hours. Would the recipe work without soaking the seeds? Yes, but…
Nuts and seeds have high amounts of enzyme inhibitors. This is a reason that unsoaked, they are hard to digest. Soaking neutralizes the enzymes allowing for proper digestion.
When the seeds are done soaking, drain out the soak water and discard the water. Thoroughly rinse the seeds. This step can be done a day in advance. Store soaked seeds in the fridge until you’re ready to make the dressing.
Transfer sunflower seeds to a high-speed blender adding hemp seeds, water, olive oil, lemon juice, nutritional yeast, coconut aminos and vinegar. Start blending on low and gradually increase speed. Blend until smooth and creamy, about 45-60 seconds.
Transfer to a medium bowl. Whisk in garlic, dill, parsley, chives, paprika, and a little salt and pepper. Cover and place in the fridge until ready to serve.
Bad Rap
We know iceberg gets a bad rap, but all lettuce is good for you, even iceberg. Though it’s not as nutrient dense as kale or romaine, it still contains vitamins, it’s hydrating, and it’s definitely not junk food. It’s actually high in vitamin A and potassium.
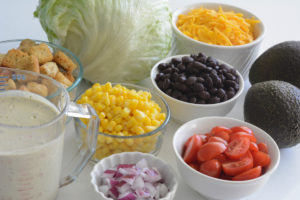
mise en place for wedge salad
Start with a full head of iceberg lettuce. Remove any brown or wilted outer leaves. Cut the head in half from top to bottom through the stem, leaving the core intact.
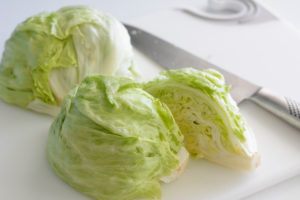
Cut each half in half again. Rinse the wedges with water and pat dry with paper towels. Carefully cut the core from each piece and place on separate salad plates or bowls, cut side up.
If you’d like, cut a little from the top as we did below, to form a flat base which will help the toppings from sliding off.
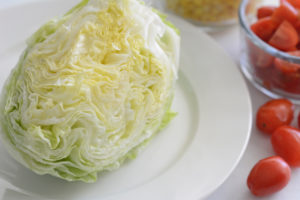
Spoon the desired amount of dressing over each wedge and sprinkle with tomatoes, corn, black beans, cheddar cheeze, avocado, and red onions. Add more dressing, as desired.
Add croutons that meet your dietary needs, or make a batch of our Bistro Croutons.
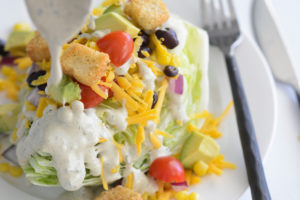
Let’s have a wedge party!
For a nice dinner party presentation, slice a head of iceberg in half, and then into 6 wedges instead of 4. On a large platter, arrange the wedges, cut side up in a circle around a jar of dressing. Top the wedges with your favorite toppings. Guests can help themselves to a wedge and load it with dressing.
It’s a fun salad that can be prepared in advance.
Southwestern Wedge Fully Loaded
Yield 4 Servings
Free of: gluten and top 8 allergens.
It’s cold, crunchy, delicious and fun to eat!
Ingredients
Ranch Dressing
1/4 cup raw sunflower seeds + water to cover
1 clove garlic, peeled
1/2 tsp salt, divided (1/4 tsp + 1/4 tsp)
1/2 cup hemp hearts (shelled hemp seeds)
1/2 cup water
1/4 cup olive oil
2 tbsp fresh lemon juice
1 tbsp nutritional yeast
2 tsp raw coconut aminos
1 tsp white wine vinegar
1 tbsp minced fresh dill
1 tbsp minced fresh Italian parsley
2 tsp minced fresh chives
1/4 tsp smoked paprika
1/8 tsp black pepper
Salad
1 head iceberg lettuce
1 cup cherry tomatoes, quartered
1 cup frozen corn, thawed and drained
1 cup canned black beans, drained and rinsed
1 cup grated cheddar cheeze
1 cup Bistro Croutons, or store bought
1 medium avocado, diced
1/4 cup diced red onion, soaked in ice water for 10-15 minutes (see recipe notes)
Instructions
- For the dressing, soak the sunflower seeds in a bowl with water to cover for 6 hours, or up to 8 hours. Drain and rinse well.
- Smash garlic clove with blade of knife. Sprinkle ¼ tsp salt over garlic. Mash into a paste with a fork. Set aside.
- Transfer sunflower seeds to a high-speed blender with hemp seeds, water, olive oil, lemon juice, nutritional yeast, coconut aminos, and vinegar. Start blending on low speed and gradually increase speed. Blend until smooth and creamy, about 45-60 seconds.
- Transfer to medium bowl, and whisk in reserved garlic, ¼ tsp salt, dill, parsley, chives, paprika, and pepper. Cover and place in refrigerator until ready to serve. This makes a scant 1 ½ cups.
- For the salad, remove the brown and wilted outer leaves from the head of lettuce. Cut in half from top to bottom through the stem, leaving the core intact. Each half will be cut in half again. Rinse the wedges with water and pat dry with paper towels. Carefully cut the core from each piece and place on separate salad plates, cut side up.
- Spoon the desired amount of dressing over each wedge. Top each wedge with tomatoes, corn, black beans, cheeze, croutons, avocado, and red onion. Drizzle more dressing as desired.
Notes
- Soaking chopped onions in ice water mellows their flavor. The cold water keeps the onions super crunchy, while the sulfur compounds that give onion its pungent, harsh flavor will dissipate in the water.
- Nuts and seeds have high amounts of enzyme inhibitors. This is a reason that unsoaked, they are hard to digest. Soaking neutralizes the enzymes allowing for proper digestion.
Courses Soups & Salads
The post Southwestern Wedge Fully Loaded appeared first on Your Allergy Chefs.
]]>The post Sloppy Joel appeared first on Your Allergy Chefs.
]]>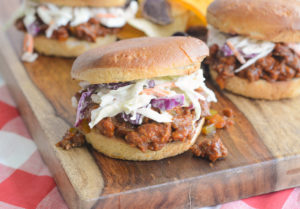
Who doesn’t need a quick and inexpensive meal idea that everyone will love? Messy and saucy, these sloppy joes fit the bill.
We’ve simmered Beyond Beef with onions and peppers in a tangy-sweet tomato sauce. For this recipe, choose whatever ground meat you like, from beef or pork, turkey or chicken to Beyond Meat’s plant-based ground beef.
These sloppy joes are even better than you remember!
The classic sloppy joe is a simple sandwich consisting of ground beef or pork, onions, tomato sauce or ketchup, Worcestershire sauce, and other seasonings, served on a hamburger bun.
Have you ever reached for a can of Manwich Original Sloppy Joe Sauce? If so, reach no more. This recipe is just about as easy as opening the can, but so much healthier. Did you know the second ingredient in Manwich is high fructose corn syrup, with corn syrup being the fourth ingredient?
It’s a Pantry Party
That’s just what we had in coming up with this recipe. We looked for ingredients we had in the pantry that might make a good sloppy joe sauce.
On the counter, we lined up fresh tomatoes, crushed tomatoes, tomato sauce, tomato paste, ketchup, various types of mustard, barbecue sauce, several hot sauces, sweet chili sauce, peppers, carrots, celery, and lots of spices. We mixed and matched products and finally settled on what we thought would make a great sloppy joe sauce.
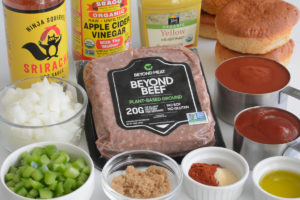
mise en place
Here we have everything lined up and ready to make our sloppy Joels. Yes, I couldn’t resist changing the name.
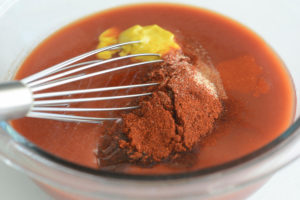
In a small bowl, whisk together tomato sauce, ketchup, sugar, vinegar, mustard, paprika, sriracha, and garlic powder.
Set sauce ingredients aside.
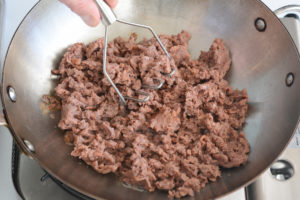
In a large saucepan over medium heat, add ground meat and brown, breaking apart crumbles as it cooks, stirring often, about 5 minutes. A potato masher is a fun and handy way to break apart the meat at the beginning of the cooking process. Drain well and transfer to a plate or bowl.
Wipe out excess oil, if needed, leaving about a tablespoon of oil to sauté the onions. Over medium heat, when oil is hot, add diced onion and a little salt and cook, stirring occasionally until softened, about 5 minutes. Add diced bell pepper and cook an additional 2 minutes, adding a tablespoon of water if needed to prevent sticking.
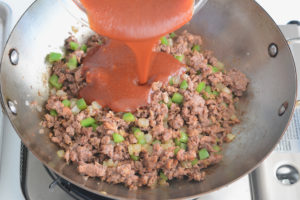
Add meat back to the skillet, followed by the sauce ingredients. Stir until evenly coated and gently simmer over medium-low heat for about 10 minutes, until mixture has slightly thickened.
Split the buns and lightly butter the cut sides, if desired. Lightly toast under the broiler, cut side up. Watch closely so they don’t burn.
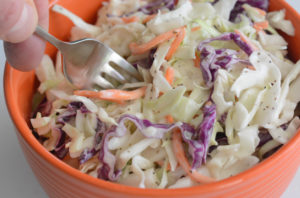
Divide the meat mixture onto the bottom buns, top with our Creamy Coleslaw or your favorite, and replace with the top buns.
Try other toppings, such as fried onions, cheese, lettuce, and/or pickles. Or just enjoy plain.
Leftovers?
In addition to rolls, this meat mixture is tasty in lettuce wraps or grilled cheese sandwiches, or over rice, pasta, biscuits, nachos, or baked potatoes.
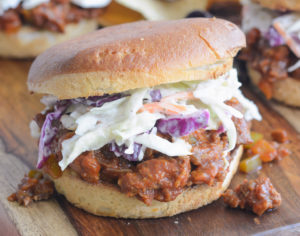
Enjoy!
Sloppy Joel
Yield 6 Servings
Free of: gluten and top 8 allergens.
Every meaty bite is messy and delicious!
Ingredients
1 cup tomato sauce
1/2 cup ketchup
2 tbsp brown sugar
1 tbsp apple cider vinegar
2 tsp yellow mustard
2 tsp smoked paprika
1/2 tsp sriracha
1/4 tsp garlic powder
1 pound ground meat, such as beef, pork, turkey, chicken, or Beyond Meat’s plant-based ground beef
1 tbsp grapeseed or olive oil, if needed
3/4 cup diced onion
1/2 tsp salt
1/2 cup diced bell pepper, green or red
6 hamburger buns (see recipe notes)
2 cups creamy coleslaw or your favorite slaw
Instructions
- In a small bowl, whisk together tomato sauce, ketchup, sugar, vinegar, mustard, paprika, sriracha, and garlic powder. Set sauce ingredients aside.
- In a large saucepan or Dutch oven over medium heat, add ground meat and brown, breaking apart crumbles as it cooks, stirring often, about 5 minutes. A potato masher is a fun and handy way to break apart the meat at the beginning of the cooking process. Drain well and transfer to a plate or bowl.
- With a paper towel, wipe out the saucepan or Dutch oven of excess oil, if needed, leaving a tablespoon of oil to sauté the onions. Depending on the meat, you may not have excess oil. If not, add a tablespoon of grapeseed or olive oil. When oil is hot, add onion and salt and cook, stirring occasionally until softened, about 5 minutes. Add bell pepper and cook an additional 2 minutes, adding a tablespoon of water if needed to prevent sticking.
- Add meat back to skillet. Stir well.
- Pour sauce ingredients over meat and stir until evenly coated.
- Gently simmer over medium-low heat for about 10 minutes, stirring occasionally until mixture has slightly thickened. Remove from heat.
- Split the buns and lightly butter, if desired, and toast them under the broiler. Watch closely so they don’t burn.
- Divide the meat mixture onto the bottom buns, top with coleslaw, and then replace with the top buns.
Notes
We get our hamburger buns from Rising Hearts Bakery in Culver City, California. Their baked goods are free from gluten and the top 8 allergens (some of their desserts do contain soy). Hopefully, you have a local bakery that can make your favorite baked goods.
BFree makes seeded brown rolls that are allergy-friendly. The rolls are not as soft as a hamburger bun, but are a great substitution. We buy these at Ralph’s. Check out their website to find availability in your area.
If eggs are not an issue, we recommend Canyon Bakehouse Gluten Free 100% Whole Grain Hamburger Buns.
Courses Mains
The post Sloppy Joel appeared first on Your Allergy Chefs.
]]>The post Four-Bean Salad appeared first on Your Allergy Chefs.
]]>
plant-based, free of gluten and top 8 allergens
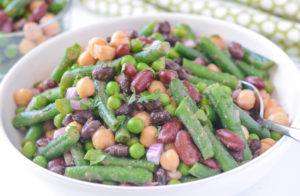
With no oil, no added salt, and no refined sugar, it’s protein-rich, easy to put together and full of flavor. Perfect for potlucks, parties and busy weeks.
Some research indicates that taking in large quantities of raw lectins, which are found in beans and other foods, could have negative health effects. Read more as we share the facts…after sharing the recipe.
First of all, we give a huge shout out to Cathy Fisher and her blog, Straight up Food! Cathy creates recipes without salt, oil, sugar, animal foods, and uses very few processed foods. Her focus is on a diet that promotes excellent health.
We’ve adapted this classic four-bean salad from Cathy.
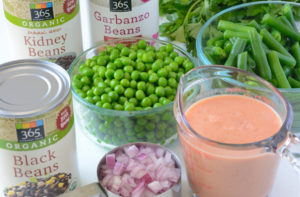
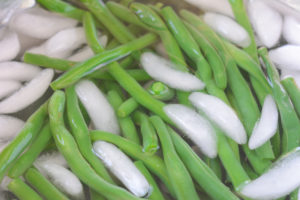
The salad is typically made with canned green beans. We’ve yet to meet a canned green bean we like, so we blanch fresh green beans in simmering water for about 4-6 minutes, until crisp tender.
The beans are then quickly removed and plunged into ice water to stop the cooking process.
You’ve got plenty of options for this salad: butter beans, lima beans, yellow wax beans, black-eyed peas, or navy beans. Just be sure to use green beans for some color and texture.
Starting with the vinaigrette, place chopped roma tomatoes, apple cider vinegar, lemon juice, Dijon mustard, pure maple syrup or raw honey, ground cumin, and garlic in a blender, and blend until smooth.
In a large bowl, add green beans, peas, chopped red onion, black, kidney, and garbanzo beans. Pour in the vinaigrette and toss gently to combine.
A little chopped Italian parsley is also nice in this salad.

Just What Are Lectins?
Lectins are naturally occurring proteins that are found in most plants. They serve a protective function for plants as they grow.
Some foods that contain higher amounts of lectins include beans, peanuts, lentils, tomatoes, potatoes, eggplant, fruits, and wheat and other grains.
The Mayo Clinic tells us that some research seems to indicate that taking in large quantities of raw lectins could have negative health effects. The amounts you’d need to consume each day to get to that level, however is much higher than a typical diet would include.
Studies have shown that lectins break down when processed or cooked, so the risk of adverse health effects arising from lectin-rich foods that aren’t raw is not cause for concern.
Besides, bean consumption is associated with a myriad of health benefits. Beans are packed with fiber, folate, and phytates, which may help reduce the risk of stroke, depression, breast and colon cancer.
No wonder the cancer guidelines suggest you fit beans into your daily meals!
For more information on the benefits of beans and the myths of lectins check out:
The Mayo Clinic Q and A: What are dietary lectins and should you avoid eating them?
Beans and Nutrition: The Latest Research | NutritionFacts.org
Beans, Beans: The Truth About Lectins | NutritionFacts.org
Have you been on the website, NutritionFacts.org? It’s run by Michael Greger, a physician, author, and professional speaker on public health issues. He delivers the latest in nutrition research in easy to understand videos, blog posts, and podcasts. Check him out. He’s awesome!
Four Bean Salad
Yield 2 quarts
Free of: gluten and top 8 allergens.
Perfect for potlucks, parties and busy weeks.
Ingredients
Vinaigrette
2 roma tomatoes, chopped (about 3/4 cup)
1/4 cup apple cider vinegar
2 tbsp fresh lemon juice
2 tbsp Dijon mustard
1 tbsp pure maple syrup or raw honey
1 tsp ground cumin
1 tsp minced garlic
Salad
3 cups precooked green beans, cut into 1-inch pieces (see recipe notes)
1 (15-ounce) can black beans, drained and rinsed
1 (15-ounce) can kidney beans, drained and rinsed
1 (15-ounce) can garbanzo beans, drained and rinsed
1 1/2 cups frozen peas, thawed
1/2 cup finely chopped red onion, soaked in ice water for 15 minutes, then drained (see recipe notes)
3 tbsp chopped parsley, optional
Instructions
- For the vinaigrette, place tomatoes, vinegar, lemon juice, mustard, maple syrup or honey, cumin, and garlic into a high-speed blender, and blend until smooth. Set aside in refrigerator.
- For the salad, place the green beans, black beans, kidney beans, garbanzo beans, peas, onions, and parsley into a large bowl. Pour the dressing over the beans and toss gently to coat.
Notes
- You can either steam or blanch the green beans. For blanching, bring a pot of water to a boil. Add green beans and simmer for 4-6 minutes, until crisp tender. Quickly remove beans from water and plunge into a bowl of ice water to stop the cooking process.
- Soaking chopped onions in ice water for at least 15 minutes mellows their flavor. The cold water keeps the onions super crunchy, while the sulfur compounds that give onion its pungent, harsh flavor will dissipate in the water.
We’ve adapted this classic four-bean salad from Cathy Fisher’s blog, Straight up Food! Cathy creates recipes without salt, oil, sugar, animal foods, and very few processed foods. Her focus is on a diet that promotes excellent health.
Courses Soups & Salads
The post Four-Bean Salad appeared first on Your Allergy Chefs.
]]>The post Watermelon, Feta and Summer Fruit Salad appeared first on Your Allergy Chefs.
]]>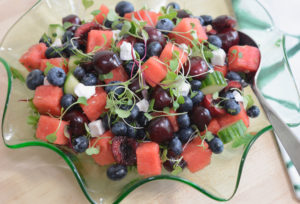
Easy, healthy, and colorful, this watermelon, feta and summer fruit salad is beyond delicious!
Watermelon and cucumbers are one of the most refreshing combos of all time. Throw in some cherries, blueberries, mint, and feta and toss with a simple dressing, and you’ve got yourself the perfect summer salad.
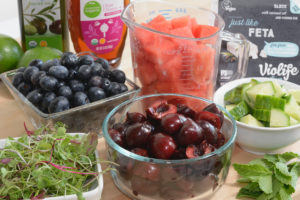
mise en place
Starting with the dressing, in a small bowl whisk together honey (or pure maple syrup), lime juice, a dash of extra virgin olive oil, and a pinch of sea salt. Set aside while preparing the fruit.
The dressing is optional, but it does bring everything together beautifully.
We cut the seedless watermelon into cubes because it’s quick and easy, and we like the contrast in shapes. However, you can use a melon baller for a more elegant presentation.
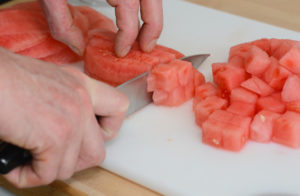
In a large bowl, combine watermelon cubes, fresh cherries (pitted and halved), fresh blueberries, diced English cucumber, micro greens or baby arugula, and mint. Drizzle with honey vinaigrette, tossing gently to combine. Top with feta cheese.
We love Violife’s ‘just like Feta!’ However, an alternative mozzarella block would also work.
Choosing the Best Watermelon
Sadly, at one time or another, we’ve probably all cut into a watermelon only to be disappointed.
Here are some tips in choosing that perfect melon.
- Give the watermelon a nice tap or knock. It should have an almost hollow sound and the surface should be firm.
- Pick it up. The melon should be heavy for its size. If not, it could be lacking in water/moisture. Be sure to pick the one that is the heaviest for its size.
- Look for the field spot. There should be a creamy yellow spot where the watermelon rested on the ground to ripen. If the field spot is white, this indicates an underripe melon.
- A shiny appearance also indicates an underripe melon, so pick one that’s dull looking.
- Lastly, the watermelon should have a nice uniform shape.
What’s the difference between English and regular cucumbers?
English cucumbers are the longer ones that are typically wrapped in plastic. They are nice in this salad because they have thinner skin that is not waxy and they’re seedless.
You can use any cucumber in the salad, but you may need to peel and seed first.
This salad is best prepared and enjoyed on the same day.
However, if you need to do some advance prepping the night before, cube the watermelon and cucumber and prepare the remaining ingredients. Store each in the fridge in separate containers.

Just before serving, add the dressing and gently toss the salad together. Garnish with feta and enjoy the bounty of summer!
Watermelon, Feta and Summer Fruit Salad
Yield 4-6 Servings
Free of: gluten and top 8 allergens.
Easy, healthy and colorful, this is the perfect summer salad!
Ingredients
1-1/2 tbsp honey (or pure maple syrup)
2 tbsp lime juice
1 tbsp extra virgin olive oil
1/8 tsp sea salt
2 cups cubed seedless watermelon
2 cups fresh cherries, pitted and halved
1 cup fresh blueberries
3/4 cup cubed English cucumber
1/2 cup micro greens or 2 cups baby arugula
4 fresh mint leaves, thinly sliced
2/3 cup crumbled feta cheese, such as Violife’s ‘just like Feta’
Instructions
- In a small bowl, whisk together honey, lime juice, olive oil, and salt. Set aside.
- Combine the watermelon, cherries, blueberries, cucumber, and micro greens or arugula, and mint in a large bowl.
- Drizzle the salad with the honey vinaigrette and gently toss to combine.
- Top with feta and enjoy!
Courses Soups & Salads
The post Watermelon, Feta and Summer Fruit Salad appeared first on Your Allergy Chefs.
]]>The post Overnight Oats appeared first on Your Allergy Chefs.
]]>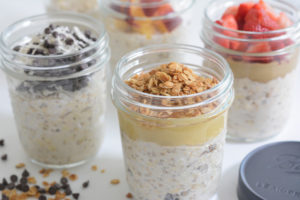
Overnight oats are a simple grab-and-go breakfast.
Most of our mornings start at 5 with a trip to the gym. When we get home we have our daily smoothie and often grab a jar of oats and it’s off to work. These oats are perfect for our busy schedules.
Say goodbye to that bland bowl of oatmeal with some topping ideas that will jazz up breakfast’s most popular cereal.
If you haven’t tried overnight oats yet, this recipe is for you…
Overnight oats are basically a no-cook method of making oatmeal.
Rolled or Quick
Use plain old-fashioned rolled oats, not quick oats that will get too soggy when soaked with milk.
On the topic of milk, of course it’s one that meets your dietary needs. Coconut, vanilla rice, almond, soy, or hemp all work well.
Easy Prep
In a medium bowl combine 2-1/2 cups gluten-free rolled oats, 2-1/2 cups alternative milk, 3 tablespoons pure maple syrup or honey, 5 teaspoons chia seeds (optional), and 1/2 teaspoon sea salt. Cover and place in fridge overnight.
The next morning, stir the oats and portion into 5 bowls or 5 (12-ounce) mason jars.
This can be enjoyed plain or with a topping.
Check out some delicious topping ideas…
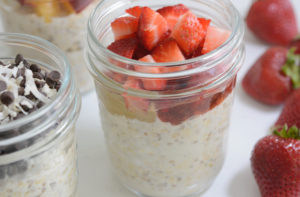
It’s really hard to choose a favorite, but sunbutter and jelly rocks!
Top the soaked oats with sunbutter, strawberry preserves, and diced fresh strawberries.
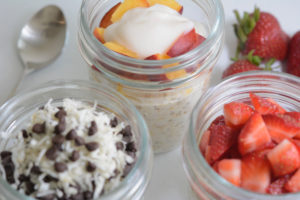
With peaches in season, we love to top the soaked oats with fresh diced peaches and allergy-friendly yogurt.
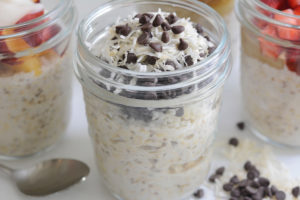
Here our topping is unsweetened shredded coconut and Enjoy Life’s mini chocolate chips for a real treat! This reminds me of the Mounds candy bar I used to love as a kid.
Apple Pie
Who doesn’t like apple pie? To keep it simple, we added raisins to the oats and topped with unsweetened applesauce and granola. The first photo on this post shows the apple pie oats. We used an allergy-friendly store-bought granola. However, to take it up a notch, top with our toasted coconut and pumpkin seed granola!
Overnight oats are typically served cold, but you can definitely eat them warm. Just place in the microwave for a minute or so and enjoy as is, or top with your favorite topping.
Preparing a large batch before your work week starts will save you time in the morning, as the shelf life for overnight oats is 5 days.
Check out the recipe for other delicious toppings and enjoy your morning!
Overnight Oats
Yield 5 Servings
Free of: gluten and top 8 allergens.
The best grab-and-go breakfast!
Ingredients
2-1/2 cups gluten-free rolled oats
2-1/2 cups alternative milk
3 tbsp pure maple syrup or honey
5 tsp chia seeds, optional but recommended
1/2 tsp sea salt
Instructions
- In a medium bowl, combine rolled oats, milk, maple syrup, chia seeds, and sea salt. Cover and place in the fridge for at least 2 hours or overnight.
- The next morning, stir the oats and portion into 5 bowls or 5 (12-ounce) mason jars.
- Enjoy plain or add a topping (see recipe notes).
- Shelf life for overnight oats is 5 days.
Notes
The following topping amounts are for 1 serving:
Sunbutter & Jam:
Top soaked oats with:
1 tbsp strawberry jam or preserves
1 tbsp sunbutter
1/4 cup diced fresh strawberries
Apple Pie:
3 tbsp raisins, stir into soaked oats and top with:
1/4 cup unsweetened applesauce
1/4 cup granola
Carrot Cake:
Stir into soaked oaks:
1/4 cup grated carrots
3 tbsp raisins
1/4 tsp ground cinnamon
Coconut Chocolate Chip
1/4 cup shredded coconut
2 tbsp allergy-friendly chocolate chips
Peaches-and-Cream
1/4 cup diced peaches
2 tbsp allergy-friendly vanilla yogurt, optional
Bananas-and-Cream
1/4 cup sliced bananas
2 tbsp allergy-friendly vanilla yogurt, optional
Courses Breakfast & Brunch
The post Overnight Oats appeared first on Your Allergy Chefs.
]]>The post Spaghetti Squash Fritters appeared first on Your Allergy Chefs.
]]>
plant based & free of gluten and top 8 allergens
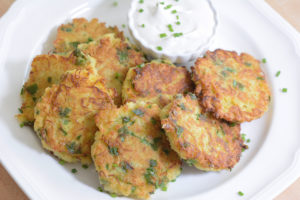
Spaghetti squash fritters are a delicious and healthier alternative to hash browns, potato pancakes or latkes.
They’re versatile with under 10 ingredients, including spaghetti squash, quinoa, and spinach and pair perfectly with a cool dollop of allergy-friendly sour cream or applesauce, or even drizzled with maple syrup.
Simply amazing…
If you have never prepared spaghetti squash before, it’s much easier than you might think.
The first step is to cut the stem off. Then split the squash in half lengthwise, by cutting from stem to end. Scrape out the seeds using a melon baller or spoon. Lightly rub olive oil on the inside of the halves.
Place squash halves cut side down in a baking dish lined with parchment and bake in an oven preheated to 375-degrees F for about 40-60 minutes, until the squash can be easily pierced with a fork. The time depends on the oven, the size of the squash and its moisture content.
When ready, remove from oven and allow to cool for 10 minutes before flipping over. Continue to cool for another 5-10 minutes.
When the squash is cool enough to handle, use a fork to scrape and fluff the strands from the sides of the squash.
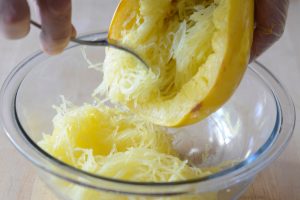
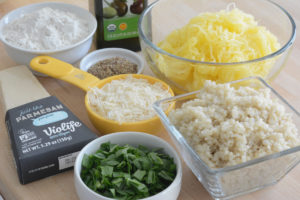
mise en place
Flax Eggs
If egg allergy or animal protein is not an issue, substitute 2 pasture-raised organic eggs for the flax eggs.
To make 2 flax eggs, whisk together 2 tbsp flaxseed meal with 6 tbsp lukewarm water in a medium bowl. Allow to sit for 5-10 minutes.
Easy Assembly
Using a hand held mixer, beat flax eggs on medium speed for 1-2 minutes. Add gluten-free all-purpose flour and 2 additional tbsp water and mix on low speed for about 30 seconds to combine. The batter will be thick.
To the same bowl, add spaghetti squash, quinoa, cheese, spinach, and salt. Mix well with hands until the mixture has uniform consistency.
Heat a large skillet over medium heat. When it’s hot, add olive oil. Frying in batches of 4-5 at a time, portion a scant quarter cup of batter for each fritter in the skillet. Slightly flatten to about 1/2-inch in thickness and cook for about 3 minutes on each side, until golden brown.
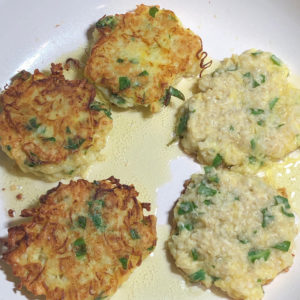
Transfer cooked fritters to a baking tray and place in a warm oven (about 170-degrees F) while frying the remaining fritters.
We had these this morning for brunch with applesauce, vegan sour cream, and maple syrup! And guess what? We ate ’em all!
Chef Joel’s Tip
- We like to use a portion scoop to portion the batter, also known as a disher. This ensures the fritters are uniform in size. For these fritters we used a #24 scoop, which often is identified with a red handle. The scoop holds about 3 tablespoons of batter.
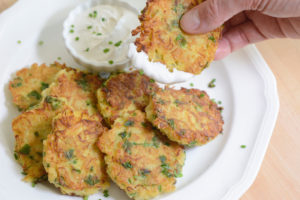
For other recipes you might like, check out our latkes, herb-roasted smashed potatoes, and spaghetti squash marinara.
Spaghetti Squash Fritters
Yield 4 Servings
Free of: gluten and top 8 allergens.
A delicious and healthier alternative to hash browns, potato pancakes or latkes!
Ingredients
1 spaghetti squash (2 cups cooked)
2 tbsp flaxseed meal (see recipe notes)
8 tbsp lukewarm water, divided (6 tbsp + 2 tbsp)
2/3 cup gluten-free all-purpose flour blend
2 cups quinoa, cooked
1/2 cup allergy-friendly grated parmesan cheese, such as Violife Just Like Parmesan
1/2 cup finely chopped fresh spinach
1/2 tsp salt
2 tbsp olive oil, or more as needed
chives or green onions, chopped (optional)
Desired toppings, such as allergy-friendly sour cream, applesauce, or pure maple syrup
Instructions
- Preheat oven to 375-degrees F. Cut off the stem of the squash. Then split in half lengthwise, by cutting from stem to end. Scrape out the seeds using a melon baller or spoon. Rub the inside of the halves lightly with olive oil. Place cut-side down on a baking sheet lined with parchment paper or foil.
- Bake for 40-60 minutes, until the interiors are easily pierced with a fork. The time will depend on the oven, the size of your squash and its moisture content. Remove from oven and allow to cool slightly for 10 minutes before flipping the squash so the cut sides are face up. Continue to cool for another 5-10 minutes. When the squash is cool, use a fork to scrape and fluff the strands from the sides of the squash.
- Measure out 2 cups of squash, reserving the remaining squash for another use. Wring out the squash by squeezing over a strainer in the sink to get rid of as much liquid as possible. Set aside.
- In a small bowl, whisk together flaxseed meal and 6 tbsp water. Let sit for 5-10 minutes.
- Transfer flax eggs to a large bowl. Using a hand held mixer, mix flax eggs on medium speed for 1-2 minutes. Add flour and 2 additional tbsp water and mix on low speed for about 30 seconds to combine.
- To the same bowl, add spaghetti squash, quinoa, cheese, spinach, and salt. Mix well with your hands until the mixture has uniform consistency.
- Heat a large skillet over medium heat. When hot add olive oil. Frying in batches of 4-5 at a time, portion a scant quarter cup of batter for each fritter in the skillet. Using a spatula, slightly flatten to about 1/2-inch in thickness. Cook until the bottom side of each is golden brown, about 3 minutes. Gently flip fritters over and cook 3 minutes more.
- As the fritters are cooked, transfer to a baking tray and place in a warm oven set at lowest temperature of the oven (about 170-degrees F). Continue to cook remaining fritters, adding additional oil as needed.
- Serve with sour cream, applesauce, or pure maple syrup. Garnish with chopped chives or green onions, if desired.
Notes
If egg allergy or animal protein is not an issue, substitute 2 pasture-raised organic eggs for the flax eggs.
Courses Veggies & Sides
The post Spaghetti Squash Fritters appeared first on Your Allergy Chefs.
]]>

