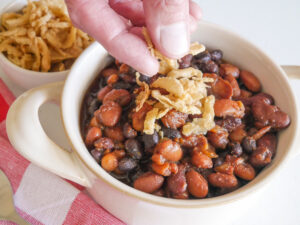
The post Bourbon Baked Beans appeared first on Your Allergy Chefs.
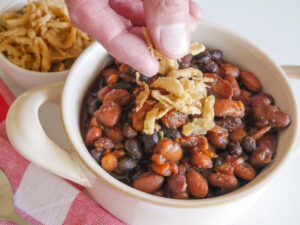
]]>
free of gluten and top 9 allergens
Since we are in the process of moving, we’re trying to use up what’s in our pantry…and that includes lots of beans. Not having everything needed to make my go-to baked beans, we created an easy recipe this weekend from items we had on hand and came up with these bourbon baked beans.
So obsessed with these delicious beans, read to the end and check out what we made with the leftovers.
Typically, baked beans are made with navy beans. We didn’t have any navy beans, but we did have 5 cans of assorted beans. We used light red kidney beans, great northern beans, black beans, pinto beans, and a can of a trio of beans. Mix and match with what you have on hand.
Two ingredients that really give personality to these baked beans are Bourbon Smoked Paprika from Bourbon Barrel Foods and bourbon, Knob Creek to be exact. However, any bourbon will do.
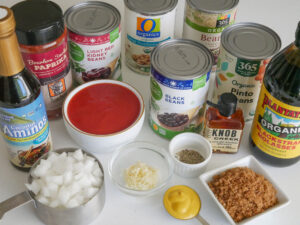
mise en place
Let’s Get Started
- Sauté onions for 5 minutes in a little vegetable or olive oil over medium heat. Add minced garlic and smoked paprika and cook another 30 seconds.
- In a large bowl, whisk together tomato sauce, molasses, brown sugar, bourbon, yellow mustard, coconut aminos, and black pepper. Add 5 (16-ounce) cans of assorted beans that have been drained and rinsed. Stir in the onion and garlic mixture.
Let’s Get Cooking
Choose your method:
- For crock pot cooking, place beans in crock pot and cover with lid. Cook on high for about 3 hours, or on low for about 5 hours, until beans are bubbling.
- To cook in the oven, preheat oven to 375°F. Transfer the bean mixture into a 2-1/2 quart casserole dish and bake for 1 hour, until beans are bubbling.
- Using an instant pot, place bean mixture in the pot and secure the instant pot lid. Cook the mixture on high pressure for 10 minutes. Be sure to follow manufacturer’s instructions for using the equipment.
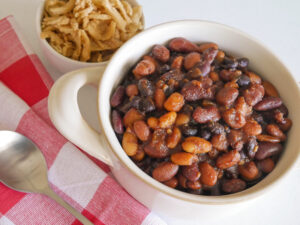
Serve and garnish with allergy-friendly French fried onions, if desired. These beans are also great served with dinner rolls, cornbread, or a toasted baguette.
Food Fun Ways to Use Leftover Baked Beans
- Make chili.
- Mix into cooked pasta with sausage, corn or other veggies. Top with cheddar cheese shreds.
- Stuff into a baked potato.
- Roll them in a burrito.
- Add cooked ground beef for Sloppy Joes.
- Create a shepherd’s pie.
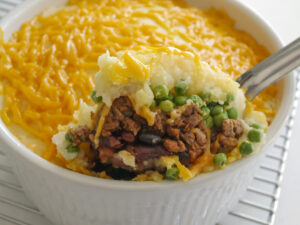
Today, we whipped up this shepherd’s pie.
It’s Lunch Time
In a 2-1/2 quart casserole dish, place 2 cups of bourbon baked beans. Top with 1-pound of cooked Beyond meat, or ground meat of your choice. Add 1 cup of cheddar cheese shreds, followed by 1 cup of peas. Top with 3 cups of mashed potatoes and bake uncovered in an oven preheated to 350°F for 25 minutes. Add another cup of cheddar shreds and continue to bake for an additional 10 minutes.
These easy baked beans are a delicious addition to barbecues, picnics, and potlucks!
Your Allergy Chefs are participants in the Amazon Associates Program, an affiliate advertising program designed to provide a means for sites to earn advertising fees by advertising and linking to Amazon.
Bourbon Baked Beans
Yield 6-8 Servings
Free of: gluten and top 9 allergens.
Simple bourbon baked beans and so good!
Ingredients
1 tbsp vegetable or olive oil
1 cup chopped onion
1 tablespoon minced garlic (about 3 cloves)
1 tsp smoked paprika
1 cup tomato sauce
1/2 cup molasses
1/4 cup brown sugar, packed (light or dark)
1/4 cup bourbon
1 tbsp yellow mustard
2 tsp coconut aminos
1/4 tsp black pepper
1 (16-ounce) can light red kidney beans, drained and rinsed
1 (16-ounce) can black beans, drained and rinsed
1 (16-ounce) can great northern beans, drained and rinsed
1 (16-ounce) can pinto beans, drained and rinsed
1 (16-ounce) can navy beans, drained and rinsed
Instructions
- Preheat oven to 375-degrees F.
- Heat a medium saucepan over medium heat. Add oil. When oil is heated add onion and sauté for about 5 minutes. Add minced garlic and paprika and cook another 30 seconds.
- In a large bowl, whisk together tomato sauce, molasses, brown sugar, bourbon, mustard, coconut aminos, and pepper. Add the beans and the onion and garlic mixture. Stir gently to combine.
- Transfer the bean mixture into a 2-1/2 quart casserole dish and bake, covered for 1 hour, until beans are bubbling. This makes about 7-1/2 cups of baked beans.
- Serve, garnished with gluten-free French fried onions, if desired.
Notes
- For crock pot cooking, place beans in crock pot and cover with lid. Cook on high for about 3 hours, or on low for about 5 hours, or until beans are bubbling.
- Using an instant pot, place bean mixture in the pot and secure the instant pot lid. Cook the mixture on high pressure for 10 minutes. Be sure to follow manufacturer’s instructions for using the equipment.
Courses Veggie & Sides
The post Bourbon Baked Beans appeared first on Your Allergy Chefs.
]]>The post Butternut Squash and Potatoes Au Gratin appeared first on Your Allergy Chefs.
]]>
vegan and free of gluten and top 8 allergens
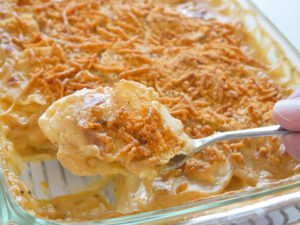
This Butternut Squash and Potato Gratin is the perfect simple side dish for any meal, whether it’s a holiday or weeknight dinner.
Thin slices of butternut squash and potatoes are tossed with cheese, a creamy white sauce infused with leeks and thyme, and baked until bubbling and golden brown.
Ordinary ingredients become extraordinary when combined in this casserole. If you thought au gratin potatoes required special cooking techniques or hours in the kitchen, let us take you through the easy step by step process for making this classic dish.
The Difference Between Scalloped and Au Gratin Potatoes
Scalloped potatoes consist of thinly sliced potato layers baked with heavy cream and/or milk.
Potatoes Au Gratin also consist of thinly sliced potato layers baked in a cream sauce, but with the addition of cheese and sometimes breadcrumbs sprinkled on top.
However, there are countless recipes for scalloped potatoes that call for cheese or breadcrumbs, or both. But the classic definition for scalloped potatoes does not include cheese. Confusing, huh? Well, regardless of what they are called, we do know one thing…they are seriously comforting and delicious and we’ll take a serving of either!
Russets or Yukon Golds?
They are both winners. Russets have the most starch which makes the creamiest sauce, but Yukons are waxy potatoes and tend to hold their shape a little better.
We’re using a combination of russets and butternut squash. We love the slightly sweet addition of the butternut squash. It’s the perfect pairing.
Butternut Squash and Potatoes Au Gratin Are Easier to Make Than You Think!
- Prepare the cream sauce. This is a basic white sauce of dairy-free, soy-free margarine, leeks, garlic, garbanzo bean (a.k.a. chickpea) flour, rice milk, a bay leaf, and fresh thyme.
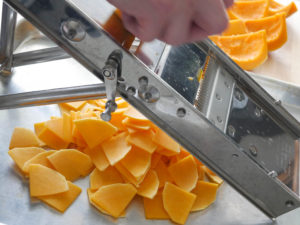
- Cut the butternut squash and potatoes into 1/8-inch slices for even cooking. We highly suggest using a mandolin for slicing. It is possible to cut by hand, but the slices may be uneven and the task will take so much longer. If you don’t have a mandolin, check out this simple, value conscious mandolin that will save tons of time.
Prep Squash Like a Pro
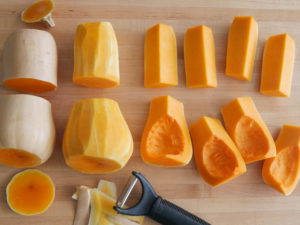
- Lay the squash on its side. Using a large, sharp chef’s knife, trim the top and bottom, then cut crosswise through the middle.
- Peel the skin using a peeler or Chef’s knife.
- Stand each section on its flat side and cut in half lengthwise. Using a melon baller or a large spoon, scrape out seeds and any pulp or stringy bits. Place each half cut side down and slice lengthwise in half again. Cut 1-pound of the squash into 1/8-inch slices.
- In a large bowl, add potatoes, squash, cream sauce, and cheddar shreds. Gently toss well to combine.
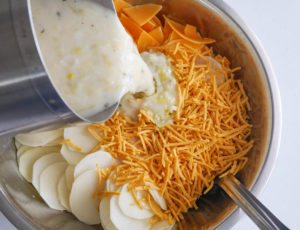
- Transfer to a lightly greased 13×9-inch baking dish. Cover tightly with foil. This will help cook the potatoes as they steam and boil in the sauce. Bake for 45 minutes. Remove the foil and sprinkle with a crumb topping or just a little more cheese. Bake, uncovered for another 25-30 minutes, until vegetables are tender.
- If your top layer doesn’t brown as much as you’d like, crank up the broiler and broil for a couple of minutes until the top is golden.
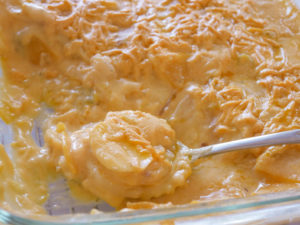
butternut squash and potatoes au gratin with cheese
Butternut Squash and Potatoes Au Gratin will go with just about any main dish that you can imagine!
Your Allergy Chefs are participants in the Amazon Associates Program, an affiliate advertising program designed to provide a means for sites to earn advertising fees by advertising and linking to Amazon.
Butternut Squash and Potatoes Au Gratin
Yield 12 Servings
Free of: gluten and top 8 allergens.
Ordinary ingredients become extraordinary when combined in this casserole!
Ingredients
4 tbsp dairy-free, soy-free margarine, such as Earth Balance buttery sticks
2 cups leeks, washed well and thinly sliced, white and pale green parts only
3/4 tsp sea salt, divided (1/4 tsp + 1/2 tsp)
2 tsp minced garlic
1/3 cup garbanzo bean flour
4 cups unsweetened rice milk
1 bay leaf
1 tsp chopped fresh thyme
1/8 tsp white pepper
1/8 tsp ground nutmeg
2 pounds russet potatoes, peeled and sliced 1/8-inch thick (see recipe notes)
1 pound butternut squash, peeled, seeded, quartered and sliced 1/8-inch thick (see recipe notes)
2-1/2 cups cheddar-style shreds, such as Daiya, divided (2 cups + 1/2 cup)
1/4 cup gluten-free breadcrumbs or panko, optional
1/2 tsp smoked paprika, optional
Instructions
- For cream sauce, in a medium saucepan, melt margarine over medium heat. Add the leeks and 1/4 teaspoon salt and cook for about 8 minutes until very soft, stirring occasionally. Add garlic and cook for another 30 seconds.
- Add flour and cook for 1 minute, stirring constantly. Gradually whisk in milk. Add bay leaf and thyme and increase heat to medium-high. When sauce comes to a simmer, lower heat to medium-low and gently simmer for 15 minutes, stirring occasionally. Remove from heat. Whisk in remaining 1/2 teaspoon salt, pepper, and nutmeg. Remove and discard bay leaf. Set sauce aside.
- Preheat oven to 400° F.
- To assemble, in a large bowl, add potatoes, squash, reserved cream sauce, and 2 cups cheddar-style shreds. Gently toss well to combine. Transfer to a lightly greased 13×9-inch baking dish. With fingers separate and arrange butternut squash and potatoes so they are mixed fairly evenly. Cover tightly with foil sprayed with cooking spray. Bake for 45 minutes.
- While casserole is baking, in a small bowl, mix the remaining 1/2 cup cheddar shreds, bread crumbs, and smoked paprika.
- Remove foil and sprinkle bread crumb mixture over the casserole. If you choose to omit the crumb topping, sprinkle with remaining half cup of cheddar-style shreds, omitting the breadcrumbs and paprika. Continue to bake, uncovered until vegetables are tender, about 25-30 additional minutes.
- Let rest for 15 minutes before serving.
Notes
- Make the sauce before slicing the potatoes and squash. This way you will not have to place the potatoes in water which will release the starches needed for a creamy casserole.
- Cut the butternut squash and potatoes into 1/8-inch slices for even cooking. We highly suggest using a mandolin for slicing. It is possible to cut by hand, but the slices may be uneven and the task will take so much longer.
- To prep squash like a pro, lay the squash on its side. Using a large, sharp chef’s knife, trim the top and bottom, then cut crosswise through the middle. Peel the skin. Stand each section on its flat side and cut in half lengthwise. Using a melon baller or a large spoon, scrape out the seeds and any pulp or stringy bits. Place each half cut side down and slice lengthwise in half again. Cut 1-pound of the squash into 1/8-inch slices.
- We have slightly modified this recipe that we first developed for Allergic Living Magazine.
Courses Veggies & Sides
The post Butternut Squash and Potatoes Au Gratin appeared first on Your Allergy Chefs.
]]>The post Cheesy Green Bean Casserole appeared first on Your Allergy Chefs.
]]>
vegan and free of gluten and top 8 allergens
What is Thanksgiving without sides? The Green Bean Casserole is one of the top sides not only at Thanksgiving, but all thru the holidays.
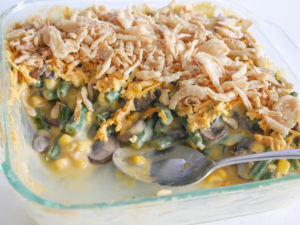
Here’s an easy way to upgrade the out-of-the-can version. Tender green beans, mushrooms, and corn are tossed in a delicious cheese sauce and baked until hot and bubbly, then topped with crispy onions.
It’s so good we know you’ll go back for seconds.
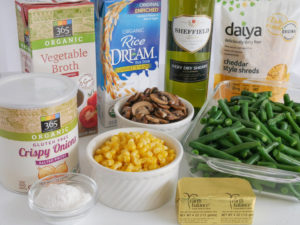
mise en place
We first developed this casserole for FARE (Food Allergy Research & Education). We’re sharing it here with a couple of modifications.
Green Beans
Using fresh green beans is hands down the simplest way to upgrade your casserole. Frozen green beans have been frozen at their peak, so would be our second option.
Bring a large pot of water to a boil. Drop in the beans. When water returns to a boil, lower heat and simmer for 4 minutes or until crisp tender. Drain beans and transfer to a large bowl of ice water for 5 minutes to shock the beans and stop the cooking process. The result will be crisp, tender, gorgeous green beans.
Cut beans in half…or thirds if they are super long. Ideally the pieces should be about 2 to 3-inches. Transfer to a covered container and place in the fridge until ready to assemble. This step can be done a day or two in advance.
Saucy
Make a roux by melting margarine in a medium saucepan over low heat. Add sweet white rice flour and a little salt. Cook the roux for 1 minute, stirring constantly.
Gradually add dry sherry and vegetable broth, whisking until smooth. Choose an inexpensive drinking sherry. Be sure you don’t use sherry vinegar or cooking sherry, which usually has added salt. Whisk in rice milk and bring to a boil, stirring constantly. Reduce heat to medium-low and simmer for 10 minutes.
Add cheddar style shreds and cook for an additional 5 minutes. The sauce will be thick. Remove from the heat and let cool slightly.
In a large bowl, place green beans, sautéed mushrooms, and corn. Pour the cheese sauce over the vegetables.
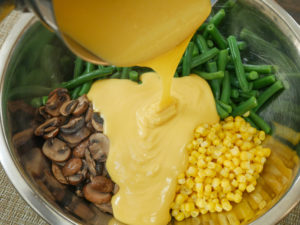
Gently toss to combine well. Transfer green bean mixture to an 8×8-inch baking pan. Gently press mixture evenly into the pan.
Place in an oven preheated to 350°F. After 15 minutes of baking, sprinkle 1/2 cup cheddar shreds over the casserole and continue baking for 10-15 minutes or until casserole starts to bubble around the edges.
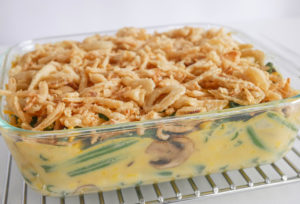
Remove from oven and let cool for 10 minutes. Garnish with fried onions.
You can make your own fried onions or shallots, but store bought are super delicious and practically define this green bean casserole. Besides, you’ll have more time for all the other things on your plate.
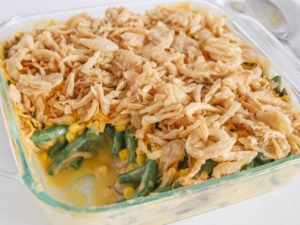
Enjoy our version of the classic that was created by Campbell’s in 1955!
Chefs Corner
- Many recipes instruct you to blanch the green beans. Blanching is a moist-heat cooking method which means to cook an item partially and briefly, usually in water. The purpose of blanching some vegetables is to set the color and destroy harmful enzymes, or to loosen the skins of tomatoes, peaches, and similar items for easier peeling.
- Since we are completely cooking the beans, we use the term “to simmer”. To simmer means to cook in a liquid that is bubbling gently at a temperature of about 185°F to 205°F.
Your Allergy Chefs are participants in the Amazon Associates Program, an affiliate advertising program designed to provide a means for sites to earn advertising fees by advertising and linking to Amazon.
Cheesy Green Bean Casserole
Yield 8 Servings
Free of: gluten and top 8 allergens.
Green Bean Casserole upgraded!
Ingredients
16 ounces white or cremini mushrooms, sliced, or a combination
3 tbsp dairy-free, soy-free margarine, such as Earth Balance sticks
3 tbsp sweet white rice flour (see recipe notes)
1/2 tsp sea salt
1/2 cup vegetable broth
1/4 cup dry sherry (not sherry vinegar or cooking sherry)
1 cup unsweetened alternative milk
2 cups cheddar-style cheese shreds, such as Daiya, divided (1-1/2 cups + 1/2 cup)
24 ounces fresh green beans, trimmed, cooked and shocked in ice water (see recipe notes)
1 cup frozen sweet corn kernels, thawed (optional)
1-1/2 cups allergy-friendly fried onions
Instructions
- Preheat oven to 350 degrees F.
- Heat 10-inch skillet or saucepan. Add mushrooms. To prevent sticking, it may be necessary to add a tablespoon of water until the mushrooms release their juices. Cook for 8 minutes. Remove from heat and set aside.
- Melt margarine in a medium saucepan over low heat. Add flour and salt. Cook for 1 minute, stirring constantly.
- Gradually add broth and sherry, whisking until smooth. Whisk in milk and increase heat to high. Bring the sauce to a boil, stirring constantly. Reduce heat and simmer 10 minutes, stirring frequently.
- Add 1-1/2 cups of cheddar shreds. Cook an additional 5 minutes until cheddar shreds are melted, whisking frequently. Remove from heat.
- In a large bowl, place green beans, mushrooms, and corn. Pour the sauce over the vegetables and gently combine with a rubber spatula.
- Transfer green bean mixture to baking dish. Gently press mixture evenly in pan.
- Place in oven. After 15 minutes of baking, sprinkle remaining 1/2 cup cheddar shreds over casserole and continue baking for 10-15 minutes or until casserole starts to bubble around the edges.
- Keep in mind if your green bean casserole was assembled ahead of time and has been in the fridge, you will need to add some additional cooking time.
- Remove from oven. Let rest for 10 minutes and enjoy garnished with fried onions.
Notes
- Sweet white rice flour is ground from short-grain glutinous rice and is different from white rice flour, which is made from ground white rice. Neither white nor brown rice flours are a substitute for sweet white rice flour, and will not yield the same results.
- You can replace the sweet white rice flour with equal amount of garbanzo bean flour (also known as chickpea flour). If using garbanzo bean flour, the cooking time after adding the sherry, broth and milk will be reduced from 10 to 5 minutes.
-
To cook the beans, bring a large pot of water to a boil. When the water is boiling, drop in the beans. When water returns to a boil, lower heat to medium and simmer for 4 minutes or until crisp tender. Drain beans and transfer beans into a large bowl of ice water for 5 minutes to shock the beans and stop the cooking process. The result will be crisp, tender, gorgeous green beans.
- We came across several brands of gluten-free French fried onions. 365 brand from Whole Foods Market carries Crispy Onions, which contain onions, buckwheat flour, canola oil, palm oil and salt. Sprouts also carries Gluten-Free French Fried Onions.
Courses Veggies & Sides
The post Cheesy Green Bean Casserole appeared first on Your Allergy Chefs.
]]>The post German Red Cabbage appeared first on Your Allergy Chefs.
]]>
As Oktoberfest comes to a close, did you get a chance to eat some good German food? Or was it only about the beer? We understand if it’s all about the beer since after all, Oktoberfest is the world’s largest beer celebration.
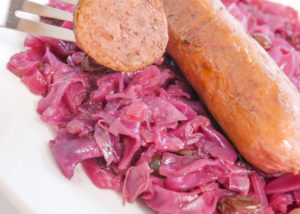
The good thing is that German food keeps on coming, before and after Oktoberfest. We absolutely love German red cabbage, or if you want to call it braised red cabbage. We make it for football games, at holiday gatherings, and whenever we want it!
It’s perfect with your favorite brats or sausage, or our favorite, Beyond Sausage!
In Germany, you’ll find that German red cabbage goes by several names, such as Rotkohl, Rotkraut, and Blaukraut, depending on what region in the country you’re in.
Ingredients and spices vary and may include juniper berries, caraway seeds, fennel, nutmeg, bay leaves, allspice, cinnamon, cloves, dill, red currant jelly or cherry preserves, bacon, whole grain mustard, apple cider or unsweetened apple juice.
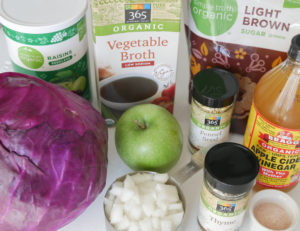
mise en place
We’re sharing our favorite German red cabbage. Writing down this recipe took some doing. You see, Joel cooks without recipes. He just starts cooking. I get it. Cooking does not have to be exact. It’s carefree and creative.
When I ask how much of an ingredient he is using, he gives a guesstimate. To take out the guesswork, I hung out and measured all of the ingredients while Joel was making this dish.
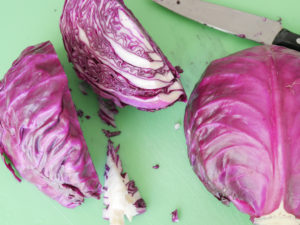
How to Braise Red Cabbage
- Cut the cabbage in half and then quarters, removing the white core. Then cut in equal thin shreds for even cooking, about 1/4″ wide. This can also be done on a mandolin.
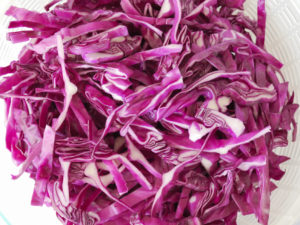
- Cook in a large Dutch oven.
- If using bacon, dice and cook 4 ounces of thick bacon until it has rendered most of its fat. Add onions and cook until golden. We prefer sweet onions, but red onions will work just as well.
- Add cabbage, apples, vegetable broth, sugar, fennel, thyme, and salt. Cover and simmer until cabbage is wilted, about 40 minutes, stirring often.
- Add apple cider vinegar, a little more sugar, and raisins. Cover and continue to cook for another 20 minutes, or until desired texture is reached.
- Be sure to stay close and stir occasionally to make sure the liquid doesn’t completely evaporate. Add water or additional vegetable broth if needed.
- Some like their braised cabbage very soft, and some like a bit more of a bite. Make sure to taste test after 50 minutes of cooking and then every 5 minutes or so.
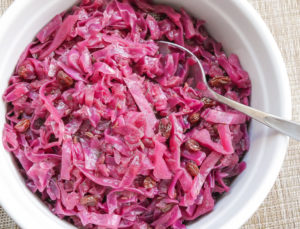
For a holiday side, add 1/4 cup fresh cranberries with the onions to sauté.
German red cabbage is a must-have with any German dish.
Guten Appetit!
German Red Cabbage
Yield 6-8 Servings
Free of: gluten and top 8 allergens.
A must-have with any German dish!
Ingredients
1 medium red cabbage, about 2 pounds (10 cups shredded)
2 tbsp vegetable oil
1 cup diced yellow or white onions
1/8 tsp plus 1/2 tsp salt, divided
1 1/2 cups diced granny smith apple (1 large apple)
1 1/2 cups low-sodium vegetable broth
4 tbsp light brown sugar, divided (2 tbsp + 2 tbsp)
1 1/2 tsp fennel seeds, toasted
1/2 tsp dried thyme
1/4 cup apple cider vinegar
3/4 cup dark raisins
Instructions
- Rinse the cabbage and remove the tough outer leaves so only clean, compact leaves remain. Cut the very bottom of the stem off to flatten the bottom of the cabbage. Turn the cabbage so the stem is flat against the cutting board. Cut the cabbage in half from top to bottom. Cut the halves in half to yield quarters. Remove the stem and touch core from each wedge by cutting on a diagonal to remove the solid parts.
- Laying the cabbage quarter on a flat side, use a knife or mandolin to cut into 1/4-inch shreds. Place the shreds in a large bowl and cover with cold water. Drain and spin dry in a salad spinner. Set aside.
- Heat a large Dutch oven, such as Le Creuset, over medium heat. Add onions and 1/8 teaspoon salt. Cook for 8-10 minutes until softened and lightly caramelized, stirring occasionally.
- Add drained cabbage, apples, vegetable broth, 2 tablespoons brown sugar, fennel, thyme, and 1/2 teaspoon salt. Cover and simmer until wilted, about 40 minutes, stirring often. The cabbage will shrink as it cooks.
- Add vinegar, remaining 2 tablespoons brown sugar, and raisins. Cover and continue to cook for another 20 minutes, or until desired texture is reached. Some like their braised cabbage very soft, and some like a bit more of a bite. Make sure to taste test after 50 minutes and then every 5 minutes or so.
- Make it a meal with your favorite brats or sausage!
Notes
- Using thick bacon is optional. Dice and cook 4 ounces of bacon until it has rendered most of its fat. Add onions and cook until golden. We prefer sweet onions, but red onions will work just as well.
Courses Veggies & Sides
The post German Red Cabbage appeared first on Your Allergy Chefs.
]]>The post Spaghetti Squash Fritters appeared first on Your Allergy Chefs.
]]>
plant based & free of gluten and top 8 allergens
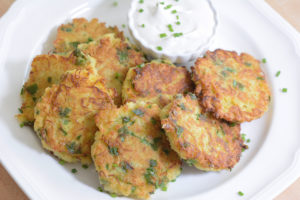
Spaghetti squash fritters are a delicious and healthier alternative to hash browns, potato pancakes or latkes.
They’re versatile with under 10 ingredients, including spaghetti squash, quinoa, and spinach and pair perfectly with a cool dollop of allergy-friendly sour cream or applesauce, or even drizzled with maple syrup.
Simply amazing…
If you have never prepared spaghetti squash before, it’s much easier than you might think.
The first step is to cut the stem off. Then split the squash in half lengthwise, by cutting from stem to end. Scrape out the seeds using a melon baller or spoon. Lightly rub olive oil on the inside of the halves.
Place squash halves cut side down in a baking dish lined with parchment and bake in an oven preheated to 375-degrees F for about 40-60 minutes, until the squash can be easily pierced with a fork. The time depends on the oven, the size of the squash and its moisture content.
When ready, remove from oven and allow to cool for 10 minutes before flipping over. Continue to cool for another 5-10 minutes.
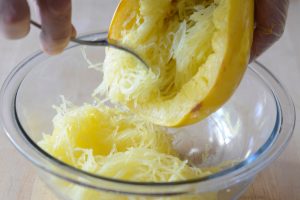
When the squash is cool enough to handle, use a fork to scrape and fluff the strands from the sides of the squash.
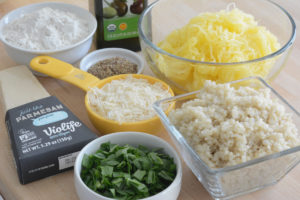
mise en place
Flax Eggs
If egg allergy or animal protein is not an issue, substitute 2 pasture-raised organic eggs for the flax eggs.
To make 2 flax eggs, whisk together 2 tbsp flaxseed meal with 6 tbsp lukewarm water in a medium bowl. Allow to sit for 5-10 minutes.
Easy Assembly
Using a hand held mixer, beat flax eggs on medium speed for 1-2 minutes. Add gluten-free all-purpose flour and 2 additional tbsp water and mix on low speed for about 30 seconds to combine. The batter will be thick.
To the same bowl, add spaghetti squash, quinoa, cheese, spinach, and salt. Mix well with hands until the mixture has uniform consistency.
Heat a large skillet over medium heat. When it’s hot, add olive oil. Frying in batches of 4-5 at a time, portion a scant quarter cup of batter for each fritter in the skillet. Slightly flatten to about 1/2-inch in thickness and cook for about 3 minutes on each side, until golden brown.
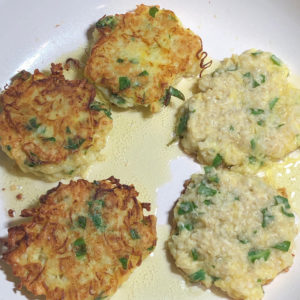
Transfer cooked fritters to a baking tray and place in a warm oven (about 170-degrees F) while frying the remaining fritters.
We had these this morning for brunch with applesauce, vegan sour cream, and maple syrup! And guess what? We ate ’em all!
Chef Joel’s Tip
- We like to use a portion scoop to portion the batter, also known as a disher. This ensures the fritters are uniform in size. For these fritters we used a #24 scoop, which often is identified with a red handle. The scoop holds about 3 tablespoons of batter.
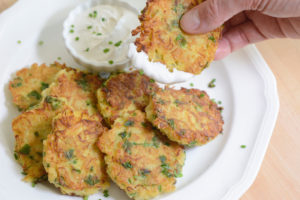
For other recipes you might like, check out our latkes, herb-roasted smashed potatoes, and spaghetti squash marinara.
Spaghetti Squash Fritters
Yield 4 Servings
Free of: gluten and top 8 allergens.
A delicious and healthier alternative to hash browns, potato pancakes or latkes!
Ingredients
1 spaghetti squash (2 cups cooked)
2 tbsp flaxseed meal (see recipe notes)
8 tbsp lukewarm water, divided (6 tbsp + 2 tbsp)
2/3 cup gluten-free all-purpose flour blend
2 cups quinoa, cooked
1/2 cup allergy-friendly grated parmesan cheese, such as Violife Just Like Parmesan
1/2 cup finely chopped fresh spinach
1/2 tsp salt
2 tbsp olive oil, or more as needed
chives or green onions, chopped (optional)
Desired toppings, such as allergy-friendly sour cream, applesauce, or pure maple syrup
Instructions
- Preheat oven to 375-degrees F. Cut off the stem of the squash. Then split in half lengthwise, by cutting from stem to end. Scrape out the seeds using a melon baller or spoon. Rub the inside of the halves lightly with olive oil. Place cut-side down on a baking sheet lined with parchment paper or foil.
- Bake for 40-60 minutes, until the interiors are easily pierced with a fork. The time will depend on the oven, the size of your squash and its moisture content. Remove from oven and allow to cool slightly for 10 minutes before flipping the squash so the cut sides are face up. Continue to cool for another 5-10 minutes. When the squash is cool, use a fork to scrape and fluff the strands from the sides of the squash.
- Measure out 2 cups of squash, reserving the remaining squash for another use. Wring out the squash by squeezing over a strainer in the sink to get rid of as much liquid as possible. Set aside.
- In a small bowl, whisk together flaxseed meal and 6 tbsp water. Let sit for 5-10 minutes.
- Transfer flax eggs to a large bowl. Using a hand held mixer, mix flax eggs on medium speed for 1-2 minutes. Add flour and 2 additional tbsp water and mix on low speed for about 30 seconds to combine.
- To the same bowl, add spaghetti squash, quinoa, cheese, spinach, and salt. Mix well with your hands until the mixture has uniform consistency.
- Heat a large skillet over medium heat. When hot add olive oil. Frying in batches of 4-5 at a time, portion a scant quarter cup of batter for each fritter in the skillet. Using a spatula, slightly flatten to about 1/2-inch in thickness. Cook until the bottom side of each is golden brown, about 3 minutes. Gently flip fritters over and cook 3 minutes more.
- As the fritters are cooked, transfer to a baking tray and place in a warm oven set at lowest temperature of the oven (about 170-degrees F). Continue to cook remaining fritters, adding additional oil as needed.
- Serve with sour cream, applesauce, or pure maple syrup. Garnish with chopped chives or green onions, if desired.
Notes
If egg allergy or animal protein is not an issue, substitute 2 pasture-raised organic eggs for the flax eggs.
Courses Veggies & Sides
The post Spaghetti Squash Fritters appeared first on Your Allergy Chefs.
]]>The post Lime Infused Refried Black Beans appeared first on Your Allergy Chefs.
]]>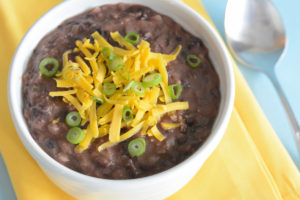
Homemade lime infused refried black beans come in an easy recipe that includes piece of mind knowing that these beans are healthy and made with real ingredients.
Lime juice adds freshness and a complexity to these beans that are so versatile.
A nutritious side dish to serve with any Mexican meal. You can also use these beans inside tacos, enchiladas and burritos. Spread in a quesadilla or on a tostada. Scoop onto a chip, or turn these refried beans into a dip.
The options are endless!
First, gather and prepare your mise en place.
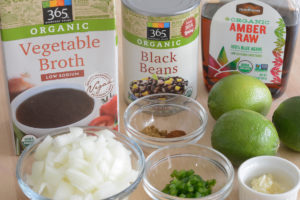
mise en place
In a hot small saucepan, add a little oil. For no-oil substitute, replace the oil with vegetable broth or water. When the broth is added to the hot pan, it will start to sputter. Add the onions with a dash of salt and cook for 5 minutes over medium heat.
Stir in minced jalapeño, minced garlic, ground cumin, and chili powder and cook for 1 minute.
Add black beans and vegetable broth and increase heat to medium-high. When the beans come to a boil, reduce heat to medium and gently simmer for 10 minutes, uncovered.
Using canned beans is a great shortcut! But, if you have the time you can go with dried black beans and cook your own. You will need 1-1/2 cups of cooked beans for this recipe.
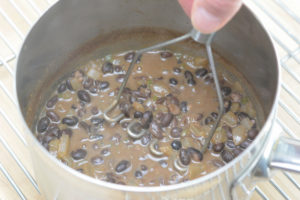
Remove from heat and mash with a potato masher until the beans are about three-quarters mashed. Black beans are not as creamy as pinto beans, so will be a little more chunky.
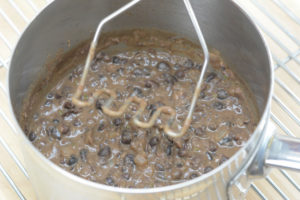
Return the beans to medium heat. Add fresh lime juice, a touch of agave nectar, and salt. Cook for another 2 minutes. As it cools, it will thicken.
Serve alongside your favorite Mexican dish, garnished with allergy-friendly cheese shreds and green onions or cilantro, if desired.

Buen Provecho!
Lime Infused Refried Black Beans
Yield 4 Servings
Free of: gluten and top 8 allergens.
A nutritious side dish to serve with any Mexican meal.
Ingredients
2 tbsp olive oil (see recipe notes for no-oil substitute)
1/2 cup diced yellow or white onions
1/8 tsp + 1/2 tsp salt, divided
1 tbsp minced jalapeno
1 tsp minced garlic
1 tsp ground cumin
1/2 tsp chili powder
1 (15-ounce) can black beans, rinsed and drained (1 1/2 cups cooked beans)
1 cup vegetable broth
2 tbsp lime juice
1/2 tsp agave nectar
Instructions
- Heat oil in a small saucepan over medium heat.
- Add onions and 1/8 tsp salt. Cook for 5 minutes, stirring occasionally.
- Stir in jalapeño, garlic, cumin, and chili powder; cook for 1 minute, stirring occasionally.
- Add black beans and vegetable broth and increase heat to medium-high. When the beans come to a boil, reduce heat to medium and gently simmer for 10 minutes, uncovered.
- Remove from heat and mash with a potato masher until the beans are about three-quarters mashed. Black beans are not as creamy as pinto beans and will be a little more chunky.
- Return to medium heat. Add lime juice, agave nectar, and 1/2 tsp salt. Cook for another 2 minutes. As the beans cool, they will thicken.
- Enjoy with your favorite Mexican meal or as a dip.
Notes
For no-oil substitute, replace the oil with vegetable broth or water. When the broth is added to the hot pan, it will start to sputter. Add the onions with a dash of salt and cook for 5 minutes over medium heat. Continue with remaining instructions.
Courses Veggies & Sides
The post Lime Infused Refried Black Beans appeared first on Your Allergy Chefs.
]]>The post Patatas Bravas appeared first on Your Allergy Chefs.
]]>
free from gluten and the top 8 allergens
Patatas bravas are simple yet super delicious tapas from Spain.
These fried or roasted potatoes with a spicy tomato sauce and garlic aioli are full of flavor and highly addictive. So addictive that we ordered them at every restaurant we dined at while in Barcelona this past week.
So delicious that we didn’t waste any time recreating patatas bravas as soon as we got home.
It’s tapas time!
Typically, patatas bravas are fried. We’ve opted to first steam, then pan-fry with minimal oil…classic patatas bravas, only healthier!
Steaming Versus Boiling
We like steaming potatoes rather than boiling. During boiling, potatoes collide with each other, which releases their starches; the more starch they release, the gummier they become. The potatoes can also break apart in rapidly boiling water.
Potatoes steam undisturbed, so the starch remains in their cells, yielding lighter, fluffier potatoes.
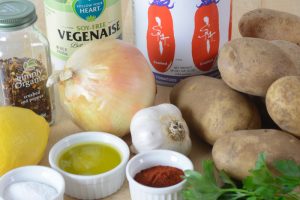
ingredients for patatas bravas
Begin by scrubbing the potatoes under cool water, then peel. Cut the potatoes into 1-inch cubes and immediately place in a bowl of cold water to prevent them from turning brown.
The key is to make sure the cubed potatoes are roughly the same size. This way they will all cook at the same rate.
Set a steamer basket in a large pot. Fill with enough water to come at least 1/2-inch below the bottom of the steamer insert; bring to a boil. Place potatoes in basket and reduce heat to a simmer. Cover, and cook until tender, about 10 minutes. Begin checking the potatoes for doneness after 5 minutes of steaming.
Transfer cooked potatoes to a baking sheet and spread out. Set aside while preparing the spicy tomato sauce and garlic aioli.
Spicy Tomato Sauce
For the spicy tomato sauce, cook diced onions in a little olive oil with a dash of salt for 6 minutes to slowly sweat until the onions become translucent. Stir in minced garlic for 30 seconds.
Add crushed tomatoes, paprika, chili flakes, a little sugar and a little salt. Simmer gently for 20 minutes and finish by processing in a blender or food processor until smooth.
Diced tomatoes should work, but the consistency will not be exactly the same. Crushed tomatoes are more concentrated and make the perfect sauce.
Garlic Aioli
The garlic aioli couldn’t be more simple. In a small bowl, allergy-friendly mayonnaise, grated garlic, and lemon juice are whisked together until smooth.
To finish the potatoes, heat 1 tbsp of olive oil in a large skillet over medium-high heat. Add half of the steamed potatoes and cook, turning occasionally, until potatoes are crisp and golden. Repeat with the remaining potatoes and season with a bit more salt to taste.
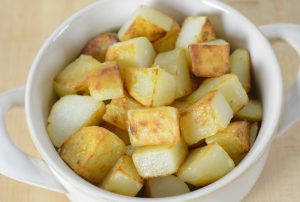
steamed and pan-fried
Just because we love patatas bravas, we made a second batch, but this time roasting the potatoes. The potatoes were tossed with the same amount of olive oil and seasoned with salt. In the oven preheated to 425-degrees F, they roasted for about 25 minutes.
We found the potatoes that were steamed and then pan-fried were crispier than the roasted potatoes.
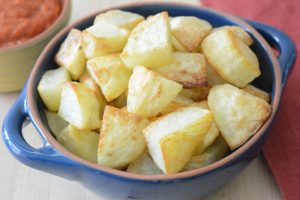
oven roasted
Now we’re ready to plate and enjoy these patatas bravas, drizzled with spicy tomato sauce and some garlic aioli, and garnished with fresh flat-leaf parsley if you like.
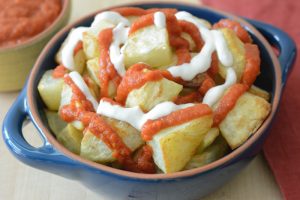
Again, super simple, fiercely flavored and totally satisfying!
Patatas Bravas
Yield 4 servings
Free of: gluten and top 8 allergens.
These crispy potatoes with a spicy tomato sauce and garlic aioli are full of flavor and highly addictive.
Ingredients
2 pounds small russet potatoes, washed, peeled and cut into 1-inch cubes
3 tbsp olive oil, divided
1 cup diced yellow onions
1/2 tsp salt, divided
1 tbsp minced garlic
1 (28-ounce) can crushed tomatoes
1 tsp smoked paprika
1/2 tsp crushed chili flakes
1/4 tsp granulated sugar
1/4 cup allergy-friendly mayonnaise, such as Follow Your Heart Soy-Free Vegenaise
1/2 tsp garlic clove, grated (about 1 clove)
1 tsp lemon juice
Chopped flat-leaf parsley, for garnish (optional)
Instructions
- For the potatoes, set a steamer basket in a large pot. Fill with enough water to come just below basket; bring to a boil. Place potatoes in basket and reduce heat to a simmer. Cover, and cook until tender, about 10 minutes. Begin checking for doneness after 5 minutes of steaming. Using a paring knife, pierce a few potato pieces to check for doneness. If the knife slides in and out cleanly, the potato is cooked.
- Transfer cooked potatoes to a baking sheet and spread out. Set aside while preparing the spicy tomato sauce and garlic aioli.
- For the spicy tomato sauce, heat 1 tbsp olive oil in a medium saucepan over medium-low heat. Add onion and 1/4 tsp salt. Cook for 6 minutes to slowly sweat until the onions become translucent. Stir in garlic and cook for an additional 30 seconds.
- Add tomatoes, paprika, chili flakes, sugar, and 1/4 tsp salt. Gently simmer for 20 minutes. Allow the sauce to cool slightly and puree in a blender or food processor until smooth. Set aside. This sauce makes 3 cups, more than you will need for this dish.
- For the garlic aioli, combine the mayonnaise, grated garlic, and lemon juice in a small bowl and whisk until smooth. Set aside.
- To finish the potatoes, heat 1 tbsp olive oil in a large skillet over medium-high heat. Add half of the potatoes and cook, turning occasionally, until potatoes are crispy and golden. Repeat with remaining potatoes. Season with a bit more salt to taste.
- Place potatoes in 4 small serving dishes and drizzle with spicy tomato sauce and garlic aioli; garnish with parsley if you like.
Courses Veggies & Sides
The post Patatas Bravas appeared first on Your Allergy Chefs.
]]>The post Colcannon appeared first on Your Allergy Chefs.
]]>
free from gluten and the top 8 food allergens
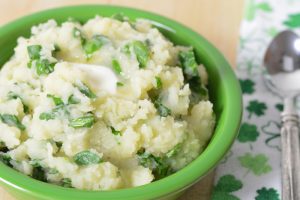
Colcannon is one of the great signature dishes of Ireland. There are probably as many colcannon recipes as there are Irish cooks.
Potatoes are a favorite and we love mashing them with just about anything. This recipe adds a twist to the traditional colcannon with the addition of parsnips and spinach.
Check out some of the top variations and make your favorite.
Starting with the mashers, if you’re a potato purist, you might just want to ditch the parsnips and stick with straight potatoes. That’s okay.
If you’re adventurous, try your mashers with parsnips. Or perhaps you’ll want to swap out the parsnips for carrots? That’s also a winner! Potato and carrot mash is one of our favorites.
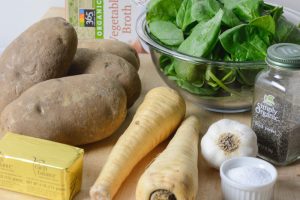
mise en place for Colcannon with Parsnips and Spinach
Spinach
Going the spinach route is quick and easy. Three cups of roughly chopped and loosely packed baby spinach are folded into hot mashed potatoes & parsnips and then covered for a few minutes to wilt the spinach. The lid is removed and the colcannon is briefly stirred and served.
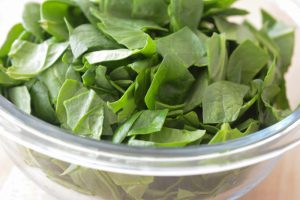
rough chopped spinach
Scratch the spinach if you’re up for cabbage or kale.
Cabbage
The most common colcannon variation pairs mashed potatoes with cabbage. This seems fitting since the word colcannon is from a Gaelic term meaning white-headed cabbage.
Napa or Savoy cabbages are good choices for colcannon. If using Napa cabbage, a good cooking method is to steam the cabbage. Fill a saucepan with several inches of water and bring to a boil. Add three cups sliced cabbage to a steaming basket. Set basket in the saucepan over the boiling water and cover. Lower heat and simmer until the cabbage is tender and crisp, about 3-5 minutes. Fold cabbage into mashed potatoes and parsnips.
If using Savoy, cut cabbage in half and core. Rinse the leaves. Cut crosswise into 1-inch strips and then cut lengthwise, removing thick ribs. Even though all types of cabbage can be steamed, since Savoy is a robust cabbage, it’s better suited to braising and sautéing.
Place three cups of chopped Savoy cabbage in a large skillet and add one cup water, as pictured below. Bring to a boil, and reduce heat to medium-low. Cover skillet and simmer until cabbage is very tender, tossing occasionally for 12 to 15 minutes. Pour out any remaining water from skillet. Fold cooked cabbage into mashed potatoes & parsnips.
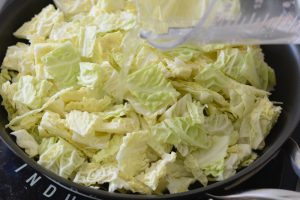
preparing to braise Savoy cabbage
Kale
Kale is also a winning choice. Clean and remove ribs. Roughly chop leaves into smaller pieces and measure out three cups, firmly packed. Steam for 3-5 minutes, following the above procedure for Napa cabbage. Fold into mashed potatoes and parsnips.
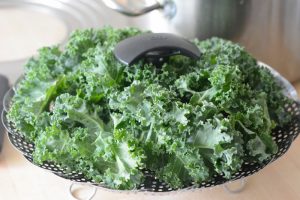
preparing to steam kale
Enjoy colcannon your way and Happy St. Patrick’s Day!
Colcannon
Yield 6 Servings
Free of: gluten and top 8 allergens.
Colcannon is one of the great signature dishes of Ireland. The most common variation pairs mashed potatoes with cabbage. This recipe adds a twist with the addition of parsnips and subs spinach for the cabbage.
Ingredients
2 parsnips or carrots (8 ounces), peeled and cut into 1-inch pieces
2-1/4 pounds russet potatoes (about 4-5 medium), peeled and cut into 1-inch cubes
1/2 tsp salt
dash white or black pepper
4 tbsp dairy-free, soy-free margarine, such as Earth Balance buttery sticks
2 tsp minced garlic
1 cup vegetable broth
3 cups baby spinach, roughly chopped and loosely packed
Instructions
- Place the parsnips in a small saucepan and cover with cold water by several inches. Cover saucepan and bring to a boil. We are cooking parsnips and potatoes separately to avoid overcooking potatoes, because parsnips usually take longer to cook. If you prefer, you can use all potatoes, or replace parsnips with carrots.
- Place the potatoes in a medium saucepan and also cover with cold water by several inches. Cover saucepan and bring to a boil over high heat.
- As the water comes to a boil for each saucepan, remove the lid and lower the heat to a simmer. Cook for 10-20 minutes or until potatoes and parsnips are tender, but not mushy. At 8 minutes, start testing a few of the potato and parsnip cubes for doneness by piercing with tines of a fork. Fork should glide easily through the pieces.
- Drain cooked potatoes over a colander. Do not rinse. Return potatoes to warm saucepan off heat. Sprinkle with salt and dash of pepper. When parsnips are done, drain over a colander. Add parsnips to potatoes.
- About 10 minutes before the potatoes and parsnips are done, melt margarine in a small saucepan over medium heat.
- Add garlic and cook for 30 seconds.
- Add broth; bring to a boil. Lower heat and simmer for 1 minute.
- Pour about a quarter of the hot broth over potatoes and parsnips. Start mashing with potato masher.
- As the potatoes and parsnips break down, add the remaining broth as needed to reach desired consistency.
- Stir in spinach and cover for a few minutes to allow spinach to wilt slightly.
- Serve and enjoy.
Notes
Over-mashing potatoes will rupture their starch granules, resulting in gummy potatoes.
Courses Veggies & Sides
The post Colcannon appeared first on Your Allergy Chefs.
]]>The post Stuffin’ Muffins appeared first on Your Allergy Chefs.
]]>
free from gluten and the top 8 food allergens
Let’s see what’s popular on the holiday table.
We found that December favorites varied from state to state. Based on a post from Organics.org, the most “google” searched term for food and recipes here in California was “stuffing”. This favorite was also shared by Louisiana.
Stuffing goes great with so many main dishes, from cauliflower steaks to beef Wellington and from turkey to ham.
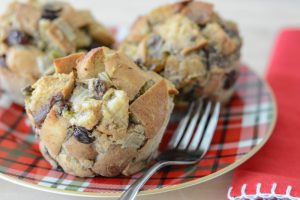
Free of gluten and the top 8 allergens, these delicious muffins come with a surprise stuffed in the center, a tradition with a twist.
Get the low-down on taking stuffing up a notch…
Our stuffin’ muffins are easy and can be made ahead, which we appreciate during the busy season.
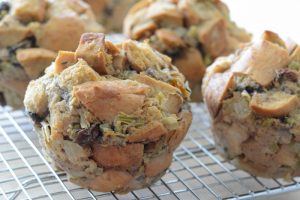
Standard muffin tins are lightly greased and filled half way with stuffing mixture which is then pressed down gently. The center of each cavity is then filled with one tablespoon of the special ingredient, apple butter! A mound of stuffing mixture is placed over each cavity, shaped and pressed down to ensure the muffins will not fall apart.
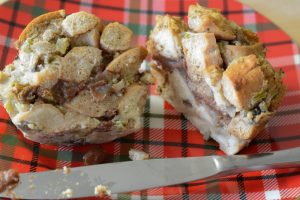
Check out the apple butter! It’s the perfect match for stuffing. We’ll have one with gravy and how about one for dessert, please?
Stuffing Pointers
- It’s all About the Bread Cubes
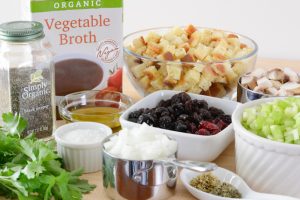
It’s easy to make your own bread cubes, instead of buying them already prepared. Simply cut bread into 1/2 by 1/2-inch cubes, toss with a little olive oil and a few spices and herbs, and bake to dry them out.
We made a batch of these muffins with store bought bread cubes and also a batch from scratch using our recipe for Bistro Croutons. Hands down, the homemade cubes made the best stuffing. The pictures are the muffins made with scratch bread cubes.
Adding the liquid to bread cubes that are too small will make a soggy mess.
In any case, the bread is the binder that holds the stuffing together. If the other ingredients, like vegetables, dried fruit, grains, nuts or meat outnumber the bread, it’s tough for the stuffing to stay together.
Therefore, the ratio of bread to other ingredients should be at least two to one.
- Too Much or not Enough Liquid
The key to a good stuffing is adding just the right amount of liquid so you have a contrast of soft and firm pieces. Adding too much broth or stock makes for a soggy stuffing.
On the other hand, not enough broth and you have dry stuffing on your plate.
Therefore, stuffing should be moist, without being soggy or dry. The amount of broth needed can vary depending on the bread being used. Adding the broth gradually is the key. You can always add more, but it’s hard to take away.
- Stuffing the Bird
If you are celebrating with a turkey, did you know that stuffing the bird is not as popular as it once was? Plenty of cooks today don’t stuff their turkeys.
In fact, food safety guidelines recommend cooking the stuffing inside the turkey to at least 165 degrees F, which would result in an overcooked bird.
Therefore, for best results, make these stuffin’ muffins in advance or assemble and bake while the turkey rests.
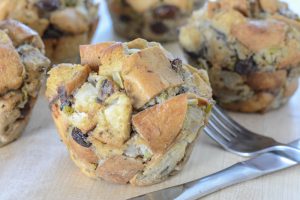
Moist in the center with crisp edges all around…now that’s what we call stuffing!
Holiday means tradition. We love holidays and we love traditions. Doing things our parents and grandparents did make us feel connected to them.
We wish you the warmth of family, friends and faith this holiday season.
Stuffin’ Muffins
Yield 12 Standard Muffins
Free of: gluten and top 8 allergens.
Stuffing goes great with so many main dishes. These muffins come with a surprise in the center, a tradition with a twist.
Ingredients
1 tbsp flaxseed meal
3 tbsp lukewarm water
1 tbsp grapeseed oil
1-1/4 cups diced yellow onions
1-1/4 cups diced celery
1-1/4 cups diced mushrooms, buttons or cremini
1/2 tsp dried oregano
1/2 tsp dried thyme
2/3 cup dried fruit (golden raisins, dark raisins, cranberries, cherries, or combination)
3 cups low-sodium vegetable broth, or more as needed
10 ounces allergy-friendly bread cubes (see recipe notes)
1/3 cup fresh Italian parsley, chopped
3/4 cup apple butter
Salt and pepper to taste
Instructions
- Preheat oven to 350 degrees F.
- Lightly grease a standard 12-muffin tin; set aside.
- In a small bowl, whisk together flaxseed meal and water. Set aside.
- Heat oil in a large saucepan over medium heat.
- Add onions and celery; sweat for 5 minutes, stirring occasionally.
- Add mushrooms, oregano and thyme. Cook for 3-5 minutes or until mushrooms are soft.
- Add dried fruit and broth. Increase heat to high and bring to a boil. Reduce heat and simmer for 2 minutes. Remove pan from heat.
- Add bread cubes and parsley to the pan. Using a rubber spatula, gently stir to incorporate flavors and coat bread cubes with liquid. Add more broth, if needed.
- Taste to see if additional salt and pepper are needed. This will depend on the seasoning of the broth and bread cubes. If they are well seasoned, you should not need to adjust seasoning.
- Return to flaxseed mixture and vigorously whisk; it will be gelatinous. Pour mixture over bread cubes and toss gently to combine.
- Fill each muffin cavity halfway with stuffing mixture, pressing mixture gently. Fill the center of each cavity with 1 tbsp apple butter.
- Spoon a mound of stuffing mixture over the apple butter, shape and press gently into the muffin cavity. This will ensure the muffins will not fall apart.
- Bake until set and crisp on top, about 20 minutes. Remove from oven and allow to cool before removing from tin.
- Stuffin’ muffins can be served fresh or can be easily reheated later.
Notes
- For homemade bread cubes, follow the recipe for Bistro Croutons. The recipe yields 2 quarts. You will need approximately 5 cups for the stuffin’ muffins and you’ll have leftovers for salads.
Courses Veggies & Sides
Nutrition Facts
Serving Size 1 muffin
|
Amount Per Serving |
||
|---|---|---|
|
Calories 140 |
||
|
% Daily Value |
||
|
Total Fat 4.1 g |
6% |
|
|
Saturated Fat 0.5 g |
3% |
|
|
Unsaturated Fat 3 g |
||
|
Sodium 201.6 mg |
8% |
|
|
Total Carbohydrates 22.2 g |
7% |
|
|
Dietary Fiber 3.2 g |
13% |
|
|
Sugars 10.1 g |
||
|
Protein 2.9 g |
6% |
|
* Percent Daily Values are based on a 2,000 calorie diet. Your daily values may be higher or lower depending on your calorie needs.
The post Stuffin’ Muffins appeared first on Your Allergy Chefs.
]]>The post Latkes appeared first on Your Allergy Chefs.
]]>
free from gluten and the top 8 food allergens
Hanukkah, Christmas and Kwanzaa are the most well-known December holidays celebrated in the U.S. This week we are excited to visit Hanukkah.
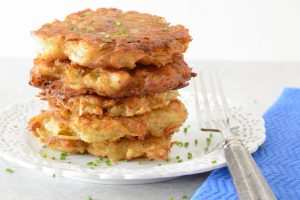
Latkes, a.k.a. potato pancakes are great any time of the year, but around Hanukkah there’s a whole latke love!
Some say Lat-KEY, we say LAT-ka. Could pronunciations vary in different regions? We’re not sure, but what we do know is that we can’t get enough when it comes to potato pancakes.
Why are Latkes Such a Beloved Tradition During Hanukkah?
The pancakes are fried to a golden crisp, and eaten to commemorate Hanukkah’s miracle in the temple of one day’s worth of oil burning in the Menorah for eight straight days.
This oil is the reason that Jewish people often deep fry much of their foods in oil when celebrating Hanukkah.
Joel grew up in Wisconsin, where Friday’s are famous for fish fries with potato pancakes being one of the side dishes. His family would enjoy them with applesauce, sour cream and blood sausage.
How about latkes benedict with grilled veggies and plant-based hollandaise? We love how versatile these gems can be. However, we always fall back on our favorite, plain and simple, latkes with applesauce, which we make at family get togethers and more.

The Best Potatoes for Latkes
We used russet potatoes in this recipe, but Yukon golds also yield great results. We found that the starchier the potato, the crispier the latke.
Simple Steps to Making Latkes
Prepare a heavy-duty skillet with oil to a depth of 1/4 to 1/2-inch while you gather your mise en place, in other words, your ingredients and utensils.
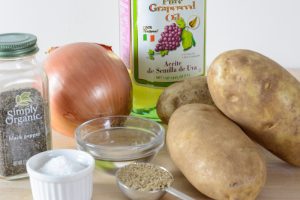
Prepare your flax egg. Grate or dice onions. Grate potatoes coarsely by hand, transferring to a large bowl of cold water as grated. Could you use a food processor? Of course!
When you are finished grating the potatoes, drain in a colander set in a large bowl, reserving liquid. Transfer potatoes to a colander lined with 3 layers of cheesecloth. Twist cheesecloth into a pouch, squeezing out moisture.
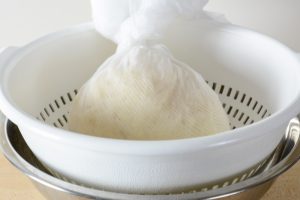
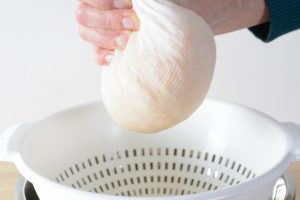
Get as much liquid out of your potato shreds as possible before mixing. The less moisture, the better the results will be. Slowly pour out and discard the liquid from potatoes, leaving the white potato starch that settled in the bottom of the bowl.
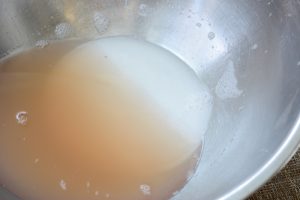
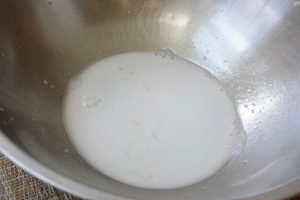
To the bowl with the starch add onion, flax egg, salt and pepper. Return drained potatoes to this mixture and toss to combine.
Cover the batter with plastic wrap so it’s directly touching surface so no air comes in contact with the batter while you are waiting to cook the pancakes. This will prevent the potatoes from oxidizing and turning brown.
When the oil is hot, portion 1/4 cup batter for each pancake into the pan, being careful not to crowd the pan. Spread pancakes into rounds with a fork. Flip when they are golden brown, about 3-4 minutes. Cook the other side until browned, about 3-4 minutes more.
If you are making a large batch, keep pancakes warm on a wire rack set in a shallow baking pan in oven at 200 degrees F.
No Flour?
You probably have seen recipes using flour or matzoh meal. We made a batch with a gluten-free flour blend, which produced a batter that was not as wet. This yielded nice pancakes that were denser than those without flour.
If you prefer your latkes with flour, simply add 1/2 cup of your favorite gluten-free flour blend and 1/2 tsp baking powder after you have mixed the batter ingredients.
Latkes
Yield 6 Latkes
Free of: gluten and top 8 allergens.
Potato pancakes are great any time of year, but around Hanukkah there’s a whole latke love!
Ingredients
1 tbsp flaxseed meal
3 tbsp lukewarm water
1 cup grated yellow onion, drained
2-3 large russet potatoes (about 1 pound after peeling)
1 tsp salt
1/4 tsp black pepper
1/4-1/2 cup vegetable oil (See Recipe Notes)
chives or green onions, optional
applesauce, optional
allergy-friendly sour cream, optional
Instructions
- In a small bowl, whisk together flaxseed meal and water. Set aside.
- Trim, peel and shred onions using large holes on a box grater or food processor with grating blade. Measure 1 cup and set aside.
- Wash, peel and shred potatoes in a food processor fitted with a grater blade. Place grated potatoes in a bowl of cold water. When finished grating potatoes, drain in a colander set over a large bowl, reserving the liquid. Place drained potato shreds in a colander lined with 3 layers of cheesecloth. Twist cheesecloth into a pouch, squeezing out moisture from the potatoes. Get as much liquid out of your potato shreds as possible before mixing. Slowly pour out the reserved liquid, leaving the white potato starch that settled in the bottom of the bowl.
- Return to the flaxseed meal and water and vigorously whisk; it will be gelatinous.
- To the bowl with the starch add onion, flax egg, salt and pepper. Measure out 3 cups of drained grated potatoes and add to mixture. Toss to combine.
- Cover batter with plastic wrap so it’s directly touching surface so no air comes in contact with the batter. This prevents potatoes from oxidizing and turning brown.
- Heat heavy-duty skillet with oil to a depth of 1/4 to 1/2-inch over medium heat. When the oil is hot, portion 1/4 cup batter for each pancake into the pan, being careful not to crowd the pan. Spread each pancake into rounds with a fork. Flip when they are golden brown, about 3-4 minutes. Cook the other side until browned, about 3-4 minutes more.
- Drain pancakes on paper towels and serve immediately with applesauce and allergy-friendly sour cream or keep latkes warm on a wire rack set in a shallow baking pan in oven at 200 degrees F.
Notes
- Fry with an oil that has a high smoke point, like grapeseed oil, canola oil or safflower oil. This will help ensure the latkes are crispy on the outside and perfectly fluffy on the inside.
Courses Veggies & Sides, Breakfast & Brunch
The post Latkes appeared first on Your Allergy Chefs.
]]>