The post Lemon Curd appeared first on Your Allergy Chefs.
]]>
free of gluten and top 8 allergens
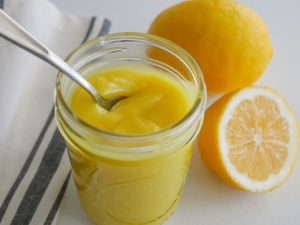
Lemon curd is deliciously tangy, creamy, sweet, and so much better when it’s homemade.
Our friends brought us some meyer lemons from their tree. With social distancing, Harriet and Roger dropped off some real beauties. We thank you both and look forward to getting together soon.
Our first thought…when life gives you lemons, make lemon curd!
Traditional lemon curd consists of egg yolks, butter, lemon juice, and sugar.
Converting this to an allergy-friendly and healthier curd is easy and we think even better than the traditional, and with just 5 ingredients. Honestly, we could just eat spoonfuls of it straight from the jar.
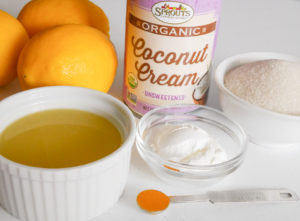
mise en place
Don’t worry. If you don’t have meyer lemons, any fresh lemons will make a great curd.
Lemon juicers make juicing lemons so easy, squeezing out every bit of juice. Our juicer is one of our most used kitchen tools. The best thing is that they are very affordable and can be found online or at kitchen specialty stores, such as Williams Sonoma.
Okay, so all you have to do is:
- Whisk together lemon juice and cornstarch in a small saucepan.
- Add coconut cream, sugar, and turmeric.
- Turn heat to medium and keep whisking and alternatively stirring until it thickens. Once it starts to thicken, whisk vigorously for 2 minutes more.
- Remove from heat and pour into a heat safe container and let it cool before storing in the fridge.
Lemon curd is perfect for meringue cookies, and this cookie recipe will be posted soon.
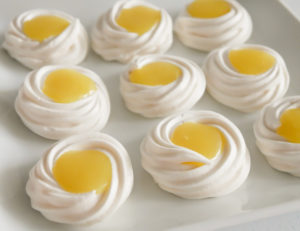
meringue cookies with lemon curd
Lemon curd is also perfect for:
- scones, muffins, cinnamon raisin toast, and waffles
- a filling for crepes, lemon cupcakes, and cakes
- a topping for pavlova, ice cream, or pound cake
- tart or pie filling
- fresh berries
- triffles
- and so much more!
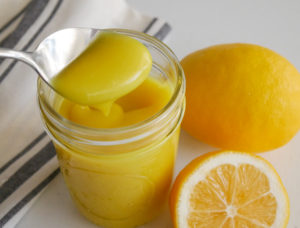
Chef Mary’s Tips
- Reactive cookware (aluminum, unlined copper, iron, and non-stainless steel) is an excellent heat conductor for cooking. However, it’s also highly reactive with acidic foods such as citrus, tomatoes, and vinegar. Acidic foods pull atoms of metal from reactive pans. So when making lemon curd, these pans can react with the acid in the lemons, discoloring the curd and leaving a metallic aftertaste.
- Always use fresh lemon juice, not the bottled stuff. The results are so much better!
Your Allergy Chefs are participants in the Amazon Associates Program, an affiliate advertising program designed to provide a means for sites to earn advertising fees by advertising and linking to Amazon.
Lemon Curd
Yield 1-3/4 cups
Free of: gluten and top 8 allergens.
Lemon curd is deliciously tangy, creamy, sweet, and so versatile.
Ingredients
1/2 cup fresh lemon juice
2 tbsp cornstarch
1 cup coconut cream
3/4 cup granulated sugar
1/4 tsp turmeric powder
Instructions
- In a small saucepan, whisk together lemon juice and cornstarch.
- Add coconut cream, sugar, and turmeric powder. Whisk together.
- Turn on heat to medium and continue to whisk and alternately stir. When the mixture thickens, vigorously whisk over medium-low heat for another 2 minutes.
- Remove from heat and let it rest for 15 minutes. Then whisk once more and transfer to a heatproof container. Allow lemon curd to cool before placing in the fridge for storage.
- It will thicken as it cools.
Notes
- Turmeric powder gives this curd its brilliant yellow color. It could be omitted. However, we strongly suggest keeping it in the recipe. After all, turmeric is good for you…and we do eat with our eyes!
- Before storing, classic lemon curd is covered with plastic wrap, with the plastic wrap touching the curd. This prevents a film from forming. However, with this recipe it’s not necessary to cover the curd directly. Simply give the curd a stir before using.
Courses Sauces & Condiments
The post Lemon Curd appeared first on Your Allergy Chefs.
]]>The post Pesto Pasta with Vegetables appeared first on Your Allergy Chefs.
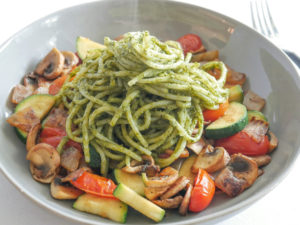
]]>
free of gluten and top 8 allergens
We’ve been keeping busy creating recipes with whatever we have in our refrigerator and pantry. This pesto pasta with vegetables is a hit. Super delicious and bursting with flavor!
We know that not everyone’s pantry is stocked the same. Do you have ingredients that you don’t know what to do with? Need help with recipe ideas? Contact us via email with your ingredient list and we’ll be happy to develop a recipe for you.
Now that we are confined to our homes because of the Coronavirus, cooking becomes a necessity. This pesto pasta with vegetables will not let you down…
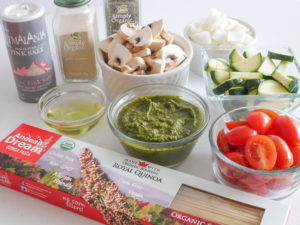
mise en place
You will need a heaping half cup of pesto. We made an allergy-friendly pesto, but the same technique applies to a store bought pesto.
Combine cilantro, Italian parsley, toasted sunflower seeds, Balsamic vinegar, garlic, and a little salt and pepper in a blender or food processor. With the machine running, slowly drizzle in olive oil. Continue processing until the mixture is well blended, scraping down the sides as necessary. If you don’t have a small food processor, we recommend using a blender because of the small quantity. Transfer the pesto to a small container and store in the fridge.
Steps
- Toast sunflower seeds by shaking them back and forth in a skillet over medium heat for 3 minutes or until they’re lightly browned. Let cool.
- Make pesto.
- Cook pasta, drain and rinse under cold water.
- Cook veggies.
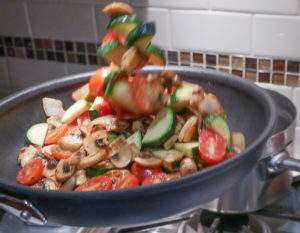
tossing vegetables
Heat a little oil over medium-high heat. Cook diced onion with a little salt for 3 minutes, stirring occasionally. Add sliced mushrooms and cook an additional 3 minutes. Add sliced zucchini, cherry tomatoes (halved), and garlic powder. Cook, tossing or stirring frequently, until the tomatoes begin to soften and the vegetables are crisp-tender, about another 3 minutes.
Joel is great at tossing. However, to avoid veggies from flying all over the kitchen, I stick to stirring.
Assembly
To warm up the pasta, rinse in a colander under hot water, draining well.
In a large saucepan, heat a heaping half cup of pesto with 1/4 cup of water or veggie broth over medium heat, stirring so the pesto doesn’t burn. Add the pasta and gently combine using tongs or a large spoon.
Portion veggies in each bowl and top with pesto pasta.
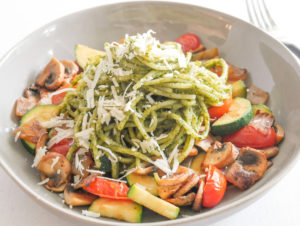
If you’d like, garnish with allergy-friendly parmesan cheese, such as Violife’s Just Like Parmesan.
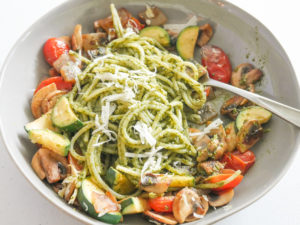
We are grateful for you and wish you and your family strength and wellness during these difficult times.
Pesto Pasta with Vegetables
Yield 4 Servings
Free of: gluten and top 8 allergens.
So delicious and bursting with flavor!
Ingredients
Pesto
1 cup packed fresh cilantro
1/2 cup packed fresh Italian parsley
1/4 cup sunflower seeds, toasted (see recipe notes)
2 tbsp balsamic vinegar
1-2 garlic cloves, roughly chopped
1/4 tsp sea salt
1/8 tsp ground black pepper
1/4 cup extra-virgin olive oil
Pasta
12 ounces allergy-friendly spaghetti, such as Andean Dream (see recipe notes)
Allergy-friendly parmesan cheese, such as Violife’s Just Like Parmesan
Vegetables
1 tbsp olive oil or vegetable oil
1 cup diced onion
1/4 tsp sea salt
2 cups sliced fresh mushrooms, button or cremini (about 6 ounces)
1 cup zucchini, sliced into 1/4-inch thick slices
1 cup cherry tomatoes, sliced in half
1/2 tsp garlic powder
Instructions
- For the pesto, combine cilantro, parsley, sunflower seeds, vinegar, garlic, salt, and pepper in a blender or food processor. With the machine running, slowly drizzle in olive oil. Continue processing until the mixture is well blended, scraping down sides as necessary. If you don’t have a small food processor, we recommend using a blender because of the small quantity. This makes about 1 cup, so you will have a little leftover.
- For the pasta, cook according to package directions. To ensure your pasta does not overcook, check for doneness several minutes before package directions specify, and then every minute or so. Drain in a colander and rinse under cold water. Drain well and set aside.
- For the vegetables, heat oil over medium-high heat. Add onion with 1/4 teaspoon of salt and cook for 3 minutes, stirring occasionally. Add sliced mushrooms and cook an additional 3 minutes, stirring occasionally. Add zucchini, cherry tomatoes, and garlic powder. Cook, tossing or stirring frequently, until the tomatoes begin to soften and the vegetables are crisp-tender, about another 3 minutes.
- To assemble, warm the pasta by rinsing in a colander under hot water, then draining well.
- In a large saucepan, heat a heaping half cup of pesto with 1/4 cup of water or veggie broth over medium heat, stirring so the pesto doesn’t burn. Add the pasta and combine using tongs or a large spoon.
- Portion veggies into serving bowls and top with pesto pasta. Garnish with parmesan cheese, if desired.
Notes
Toast sunflower seeds by shaking them back and forth in a dry skillet over medium heat for 3 minutes or until they’re lightly browned.
Penne or ziti pasta can be substituted for the spaghetti.
Courses Mains
The post Pesto Pasta with Vegetables appeared first on Your Allergy Chefs.
]]>The post Chocolate Cupcakes with Strawberry Frosting appeared first on Your Allergy Chefs.
]]>
vegan and free of gluten and the top 8 allergens
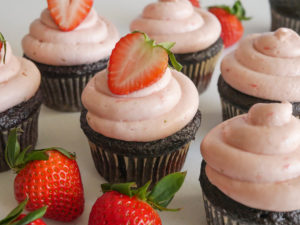
These chocolate cupcakes with strawberry frosting start with moist, fudgy chocolate cake. Then they’re topped with creamy strawberry buttercream that’s made with fresh strawberries.
Not just any cupcake…but no doubt one of the best cupcakes we’ve ever eaten!
Just in time for Valentine’s Day…
Guidelines For Baking Cupcakes and Cakes
- Read the recipe at least two times all the way through. Read the first time to get a basic understanding of the ingredients needed and recipe procedures. Read the second time to check that you have all the ingredients and tools and plan your time. See what tasks need to be done, or can be done, ahead of time.
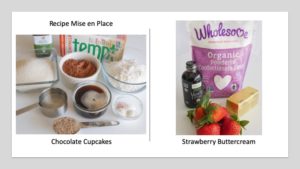
- Prepare your mise en place.
- Prepare your muffin pan by lining with muffin liners or lightly greasing the muffin cavities.
- Set your oven racks. Cupcakes should be baked in the upper third of the oven, just above the middle rack. This encourages doming. Cakes bake on the middle rack.
- Allow time for your oven to preheat.
- Do not make the batter until the oven is at the proper temperature. If a recipe contains baking soda, the leavening starts when the baking soda, acidic ingredient, and liquid are mixed. If the oven is not ready, the cupcakes will lose leavening power waiting for the oven to preheat and the finished cupcakes will not rise like they should.
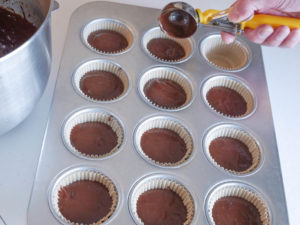
- If you fill the liners too full, the cupcakes will overflow. Filling too full also results in crisp mushroom tops and sinking in the center. Fill the liners 2/3’s to 3/4’s full. We use a level scoop using the number 20 portion scoop which is often identified by the color yellow. This ensures we don’t overfill the muffin pan and each cupcake is uniform in size.
Let’s Get Started
First of all, this recipe is a modification of Catherine Ruehle’s chocolate cake. For the cupcake batter, combine flour, sugar, cocoa powder, baking powder, baking soda, xanthan gum (if not already in gluten-free flour blend), and salt. Whisk to combine.
In a medium bowl, lightly whisk together flax eggs, alternative milk, oil, and vanilla. Add to the flour mixture and mix on low for 30 seconds. Scrape down bowl with a rubber spatula, and mix on medium-low for 1 minute. Pour in coffee and mix on low for 30 seconds. Scrape down sides and bottom and mix again on medium-low for 30 seconds more, until smooth.
Coffee In My Chocolate Cake?
If you bake chocolate cake or cupcakes often, you may have seen recipes that call for coffee. Coffee is a great way to enhance the flavor of cocoa powder, resulting in a more chocolaty cake, not a coffee-flavored one.
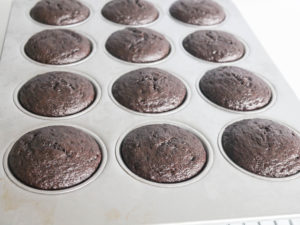
Fill the cupcake liners 2/3’s to 3/4’s full. Bake in an oven preheated to 350°F for about 30 minutes, or until a toothpick inserted into the center of a cupcake comes out clean.
Cooling
When cupcakes are finished baking, remove pan from oven and place on a wire rack to cool for 10 minutes. Condensation may collect on the bottom of the cupcakes if left in the pan for too long, which will result in cupcakes with soggy bottoms.
Carefully remove the cupcakes from the pan and set on wire rack to finish cooling. It is normal that allergy-friendly cupcakes are more fragile than their wheat counterpart.
Once the cupcakes are completely cooled, they can be refrigerated or frozen. We made ours a day ahead and stored them in the fridge until we were ready to frost them.
Simple Buttercream
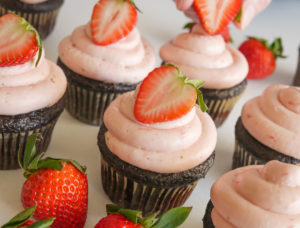
A quick version is made by whipping vegan butter with confectioners’ sugar, a little vanilla, and pureed strawberries. It’s that simple.
To decorate, trim the bottom of a piping bag and insert an open round tip. For easy filling, put the bag into a tall jar. Fold the bag down around the container and fill bag with buttercream not more than 2/3 full. Push the filling down into the tip to eliminate air pockets.
Start on one of the edges of the cupcake and pipe the icing around and hug the outside of the cupcake. When the buttercream meets, pull it in and go three rotations, bringing the buttercream to the center. When the cupcake is covered, pull up.
Decorate the cupcakes using your favorite method. There are so many different decorating tips that make fun finishes for cupcakes.
Chef Mary’s Tip About Cocoa Powder
Cocoa powder is available in two forms, non-alkalized (or natural) and alkalized (or Dutch process).
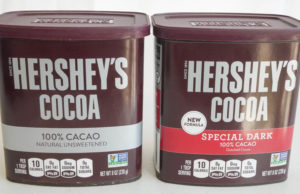
Non-Alkalized, aka Natural Cocoa is untreated cocoa powder that has a more acidic taste. If baking soda is called for in a recipe, use natural cocoa powder as the recipe relies on the acidity of natural cocoa powder to react with baking soda in order to leaven (expansion or rising of the batter).
Alkalized, aka Dutch Process is cocoa treated with an alkali to neutralize its acids. It does not react with baking soda alone. Dutch process cocoa is darker than natural cocoa, but has a mellower flavor.
Recipes should specify natural or Dutch process cocoa. The two cocoa powders are not interchangeable in batter-based desserts. For these delicious cupcakes we used Hershey’s natural, non-alkalized cocoa powder.
The Crumb
Check out the amazing crumb, aka the interior of the cupcakes.
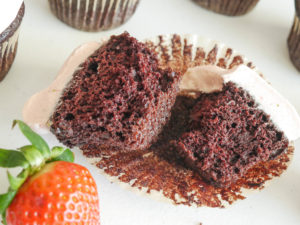
We really minimize our sweets and sugar intake. But for those times of celebration or when we just need a cupcake, these will be our go-to cupcakes. We hope you enjoy them as much as we do!
Your Allergy Chefs are participants in the Amazon Associates Program, an affiliate advertising program designed to provide a means for sites to earn advertising fees by advertising and linking to Amazon.
Chocolate Cupcakes with Strawberry Frosting
Yield 12 Standard Cupcakes
Free of: gluten and top 8 allergens.
The best moist and fudgy chocolate cupcakes!
Ingredients
Cupcake Batter
4 tbsp lukewarm water
4 tsp flaxseed meal
1-1/4 cups gluten-free all-purpose flour
1-1/4 cups cane sugar
2/3 cup natural (non-alkalized) cocoa powder
1 tsp baking powder
1 tsp baking soda
1/2 tsp xanthan gum (omit if using flour blend that contains xanthan gum)
1/2 tsp sea salt
2/3 cup alternative milk, such as unsweetened hemp milk
1/3 cup melted and cooled coconut oil
1-1/2 tsp pure vanilla extract
1/2 cup hot coffee
Buttercream
1/2 cup vegan butter, such as Earth Balance Soy-Free Buttery Sticks
1/2 tsp pure vanilla extract
4 cups confectioners’ sugar, sifted (see recipe notes)
3-4 tbsp strawberry puree (see recipe notes)
Instructions
- For the batter, position an oven rack in the top third of the oven, just above the middle rack. Preheat the oven to 350-degrees F. Line a 12-cavity, standard cupcake pan with paper liners or lightly grease cavities. Set aside.
- Make the flax eggs by whisking together the water and flaxseed meal in a medium bowl. Set aside for 5 minutes.
- In the bowl of a stand mixer, add the flour and sugar. Sift the cocoa powder, baking powder, baking soda, and xanthan gum into the bowl. Add the salt and whisk the dry ingredients together.
- Return to the flaxseed eggs and whisk vigorously. To the flax eggs add milk, coconut oil, and vanilla. Whisk lightly to combine.
- Add the flax egg mixture to the flour mixture and mix on low for 30 seconds. Scrape down the bowl with a rubber spatula, and mix on medium-low for 1 minute. Pour the coffee into the batter and carefully mix on low for 30 seconds, being careful the coffee doesn’t splash out. Scrape down sides and bottom of bowl and mix on medium-low for another 30 seconds until smooth.
- Portion the batter into the muffin liners, filling no more than 2/3’s to 3/4’s full. We like to use a #20 yellow portion scoop. Overfilling will result in crisp mushroom tops and sinking in the center.
- Bake in the top third of the oven for about 30 minutes, or until a toothpick inserted in the center comes out clean. Remove the pan and place on a wire rack to cool for 10 minutes. After 10 minutes, carefully remove the cupcakes from the pan and place on the wire rack to cool completely. It is normal for allergy-friendly cupcakes to be more fragile than their wheat counterparts.
- When completely cool, the cupcakes are best stored in the fridge for up to 2 days before decorating. The cupcakes can also be wrapped and stored in the freezer for up to 3 months.
- For the buttercream, place the vegan butter and vanilla in the bowl of an electric stand mixer fitted with the paddle attachment. Beat on low to blend. Increase the speed and beat until the mixture is creamy and light, 2-3 minutes, scraping down the sides of the bowl from time to time.
- Lower the speed and begin adding the confectioners’ sugar, 1/2 cup at a time, increasing to medium-high after each addition. Once the mixture gets dry, add 1 tablespoon of strawberry puree. Continue to add remaining sugar, 1/2 cup at a time and strawberry puree, beating for about 3-4 minutes. Add just enough puree to reach a buttercream of a consistency you desire.
- The buttercream is ready to use. Store, airtight, at room temperature until ready to decorate (see recipe notes). The buttercream yields 2 cups.
- For a plain buttercream, replace the strawberry puree with an alternative milk. To color plain buttercream, a variety of commercially-prepared natural, vegetable-based colors are available. Some are liquid and some are powdered. Natural colors are not as vibrant as the chemical-laden, artificial colors.
Notes
Sifting Confectioners’ Sugar
- Sifting the sugar prevents the buttercream from being grainy. Organic confectioners’ sugar is coarser than conventional confectioners’ sugar and should be sifted twice.
Strawberry Puree
- To make the strawberry puree for the buttercream, rinse and core 4-6 strawberries. Place in a blender or food processor and blend until you have a puree, about 30 seconds. If you don’t want seeds in your buttercream, put the puree through a metal sieve.
Decorating
- To decorate, trim the bottom of a piping bag and insert an open round tip. For easy filling, put the bag into a tall jar. Fold the bag down around the container and fill bag with buttercream not more than 2/3 full. Push the filling down into the tip to eliminate air pockets.
- Start on one of the edges of the cupcake and pipe the icing around, hugging the outside of the cupcake. When the buttercream meets, pull it in and pipe three rotations, bringing the buttercream to the center. When the cupcake is covered, pull up.
This cupcake batter is a modification of Catherine Ruehle’s Chocolate Cake.
Courses Sweets
The post Chocolate Cupcakes with Strawberry Frosting appeared first on Your Allergy Chefs.
]]>The post Zucchini Cheddar Pancakes appeared first on Your Allergy Chefs.
]]>
If you’re looking for a great recipe to use up your summer zucchini, give these zucchini cheddar pancakes a try.
With an abundance of zucchini and cheese in our fridge, we thought the combination would make great pancakes. We made several versions and liked our grain free cakes the best.
With under 10 ingredients, these fluffy pancakes are incredibly easy to whip up.
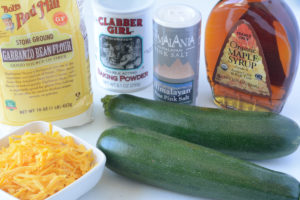
mise en place
Simply grate zucchini and toss with a little salt. Let sit for 10 minutes, then squeeze out the excess moisture.
Combine garbanzo bean flour, which is also known as chickpea flour, with a little salt and baking powder. Slowly whisk in water to form a batter. Add a little sweetener…maple syrup, coconut sugar or sweetener of choice.
Portion the batter onto a lightly greased, preheated skillet. We like to portion the batter using a blue #16 scoop, also called a “disher”. This scoop portions out 1/4 cup of batter.
Cook the pancakes for 2-1/2 minutes on each side, until golden brown.

Serve with maple syrup, applesauce, and/or allergy-friendly yogurt or sour cream. If you like, garnish with chopped chives.
We love these for brunch with all of the toppings.
They’re not only great for breakfast or brunch, but served with soup or salad for a light and satisfying lunch or dinner. Or make mini pancakes, dollop with allergy-friendly yogurt or sour cream, and enjoy as an appetizer.
Zucchini Cheddar Pancakes
Yield 8 pancakes
Free of: gluten and top 8 allergens.
Put your summer zucchini to good use and make these delicious pancakes!
Ingredients
2 – 3 medium zucchini (2 cups grated)
1 tsp sea salt, divided (1/2 tsp + 1/2 tsp)
1 cup garbanzo bean flour (also known as chickpea flour)
1 tbsp baking powder
1/2 cup water, plus more as needed
2 tbsp pure maple syrup
1 cup cheddar style shreds, such as Daiya
Optional toppings: maple syrup, applesauce, allergy-friendly yogurt or sour cream, and/or chopped chives
Instructions
- Wash zucchini and trim ends. Grate zucchini (including the peel) using the large holes of a box grater. Place 2 cups of grated zucchini in a colander over the sink. Add 1/2 tsp salt and gently toss to combine. Let sit for 10 minutes. Squeeze handfuls over the sink to remove excess water. Set aside.
- In a medium bowl, combine garbanzo bean flour, remaining 1/2 tsp salt, and baking powder. Whisk together to combine.
- Slowly add 1/2 cup water, whisking until smooth. Add 1 – 2 additional tablespoons of water as needed. The batter will be slightly thick.
- Whisk in the maple syrup. Gently fold in grated zucchini and cheddar shreds.
- Heat a large skillet over medium heat. Lightly coat skillet with oil, wiping excess with a paper towel. Reserve paper towel with oil to wipe pan between batches. Portion 1/4 cup of batter for each pancake into the skillet. We like to portion using a blue #16 scoop (disher). Cook about 2-1/2 minutes on each side until golden brown. Set aside and keep warm.
- Continue to cook pancakes with remaining batter.
- Serve with maple syrup, applesauce, and/or allergy-friendly yogurt or sour cream. Garnish with chopped chives, if desired.
Courses Breakfast & Brunch
The post Zucchini Cheddar Pancakes appeared first on Your Allergy Chefs.
]]>The post Teriyaki Chicken Plate Lunch appeared first on Your Allergy Chefs.
]]>
free of gluten and top 8 allergens
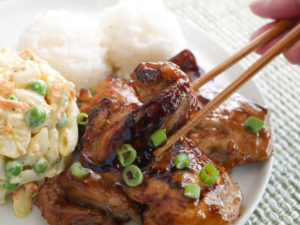
With it’s roots in the Japanese bento, the plate lunch is a staple in Hawaii.
So what is a plate lunch? Similar to the South’s meat-and-three, there are a variety of proteins to choose from. However, what’s always on the plate is macaroni salad and two scoops rice.
Our teriyaki sauce is great with anything teriyaki, including our veggie option…
The origin of the plate lunch dates back to the 1800s, where it became a popular lunch for plantation workers on the booming pineapple and sugar plantations.
Many of these plantation workers were immigrants from other countries such as Japan, China, the Philippines, Korea, and Portugal. With them, they brought various dishes from their homeland.
Along with many Hawaiian dishes on the plate lunch menu, there are a diverse number of others, including chicken or pork katsu, char sui chicken, teriyaki salmon (chicken or beef), and pork adobo.
We’re recreating one of the most popular, chicken teriyaki.
Replacing Soy Sauce
Of course when we think of teriyaki sauce, we automatically relate it to shoyu or soy sauce.
Coconut aminos is the perfect replacement for soy sauce, containing just 2 ingredients, organic coconut tree sap and organic sea salt.
Although naturally sweet, coconut aminos is low on the glycemic index scale, so it won’t spike your blood sugar. It’s also contains 73% less sodium than soy sauce. If that’s not enough, it’s organic, gluten-free, non-GMO, contains no MSG, and it’s vegan!
Coconut Aminos makes this teriyaki sauce a no-brainer.
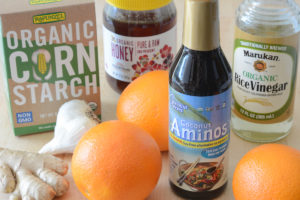
mise en place
Making the Teriyaki Sauce
In a small saucepan, combine coconut aminos, orange juice, rice vinegar, honey, minced ginger, and minced garlic. Reserve 1/2 cup for marinating chicken thighs.
Place chicken thighs and reserved sauce in a large zip lock bag. Seal and marinate in the fridge for 8 hours.
While the chicken is marinating, bring the ingredients in saucepan to a boil over high heat. Reduce heat to medium and simmer for 10 minutes.
Combine cornstarch and water, stirring to form a smooth paste. Whisk the cornstarch slurry into the simmering sauce, whisking constantly for 2 minutes.
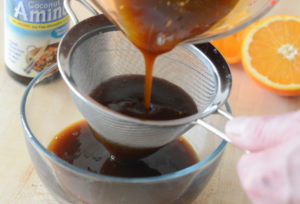
Strain the teriyaki sauce into a bowl. Allow to cool and refrigerate until needed. This will yield about 1-1/2 cups of sauce, with enough leftover to enjoy later in the week on your favorite burger or in a stir-fry.
The Chicken
Take marinated chicken out of the fridge 20 minutes before cooking, to let it warm up a bit. Drain well.
Preheat oven to 350-degrees F. Heat a large non-stick skillet over medium-high heat. Add chicken thighs, smooth side down and sear for about 1 minute, until golden brown. Flip over for another minute to brown the other side.
Transfer chicken to a parchment or foil lined baking sheet. Bake until internal temperature reaches 165-degrees F, about 10 minutes. To test for doneness, use an instant read meat thermometer inserted into the center of the thickest part of the thigh.
Remove chicken from oven. Cover loosely with foil and allow chicken to rest for 5-10 minutes.
Chef Joel’s Tip
Resting meat ensures it is moist, tender and juicy. When meat is cooked, the proteins push the meat’s juices to the center of the meat. Resting allows the juices to redistribute throughout the meat and be reabsorbed so when you eat the meat it will be juicier and tastier.
The Rice
Plate lunch or sushi = calrose rice.
Calrose rice is known for its short pearly white grains and sticky texture. If you must, you can certainly replace calrose with brown rice. However, any local would tell you da rice gotta be sticky, brah.

The Macaroni Salad
In Hawaii, macaroni salad is king. You won’t find a plate lunch without it.
We’ve chosen a mac salad variation with potatoes. Click here for our potato-mac salad recipe.
Let’s Eat!
On each plate, place two scoops rice, one scoop potato-mac salad, and chicken. Serve with warm teriyaki sauce on the side.

Make Mine Veggie
Make mine veggie with teriyaki portobello mushrooms! Following this recipe for teriyaki chicken, simply replace the chicken thighs with 4 portobello mushrooms and omit the marinating.
Cut the stems off the mushrooms and scrape out the gills. Pour 1/2 cup teriyaki sauce, or more as needed, into a small bowl. Slide a portobello into the sauce with the underside facing up. Spoon sauce over the mushroom, coating the entire mushroom. Place the mushroom on a parchment lined baking sheet, underside facing up. Repeat with remaining mushrooms.
Bake at 375-degrees F for about 15 minutes or until mushrooms reach desired tenderness. Slice and serve with rice and potato-mac salad.
Now it’s time fo grind!
Teriyaki Chicken Plate Lunch
Yield 4 Servings
Free of: gluten and top 8 allergens.
There’s no better way to indulge than with a teriyaki chicken plate lunch.
Ingredients
1 cup fresh orange juice or pineapple juice, or a combination of
3/4 cup coconut aminos
1/4 cup mirin or rice vinegar
1/4 cup honey or organic cane sugar
1 tbsp minced ginger
1 tbsp minced garlic
1-1/2 tbsp cornstarch
1/4 cup water
4 large boneless, skinless chicken thighs (about 1 pound)
8 scoops calrose rice, cooked according to package directions
4 scoops Potato-mac salad
Instructions
- In a small saucepan, combine orange juice, coconut aminos, mirin, honey, ginger, and garlic. Reserve 1/2 cup for marinating chicken thighs.
- Place chicken and reserved sauce in a large zip lock bag. Seal and marinate in the fridge for 8 hours.
- While the chicken is marinating, bring the ingredients in saucepan to a boil over high heat. Reduce heat to medium and simmer for 5 minutes, stirring occasionally.
- Combine cornstarch and water in a small bowl; stir until smooth paste forms. Whisk the cornstarch slurry into the simmering sauce, whisking constantly for 2 minutes.
- Strain the teriyaki sauce into a bowl. Allow to cool and refrigerate until needed. This will yield about one and a half cups of sauce. Warm up right before serving.
- Take marinated chicken out of the fridge 20 minutes before cooking, to let it warm up. Drain well.
- Preheat oven to 350-degrees F. Heat a large non-stick skillet over medium-high heat. Add chicken thighs, smooth side down and sear for about 1 minute, until golden brown. Flip over for another minute to brown the other side.
- Transfer chicken to a parchment or foil lined baking sheet. Bake until internal temperature reaches 165-degrees F, about 8-10 minutes. To test for doneness, use an instant read meat thermometer inserted into the center of the thickest part of the thigh.
- Remove chicken from oven. Cover loosely with foil and allow chicken to rest for 5-10 minutes.
- To serve: on each plate, place 2 scoops rice, one scoop potato-mac salad, and chicken. Serve with warm teriyaki sauce on the side.
Notes
Make Mine Veggie!
Make mine veggie with teriyaki portobello mushrooms! Following this recipe for teriyaki chicken, simply replace the chicken thighs with 4 portobello mushrooms and omit the marinating.
Cut the stems off the mushrooms and scrape out the gills. Pour 1/2 cup teriyaki sauce into a small bowl. Slide a portobello into the sauce with the underside facing up. Spoon sauce over the mushroom, coating the entire mushroom. Place the mushroom on a parchment lined baking sheet, underside facing up. Repeat with remaining mushrooms.
Bake at 375-degrees F for about 15 minutes or until mushrooms reach desired tenderness. Slice and serve with rice and potato-mac salad.
Courses Mains
The post Teriyaki Chicken Plate Lunch appeared first on Your Allergy Chefs.
]]>The post Teen Recipe Challenge appeared first on Your Allergy Chefs.
]]>
Did you know that 1 in 13 children, or roughly two in every classroom have food allergies?
About 30 percent of children with food allergies are allergic to more than one food, and every three minutes, a food allergy reaction sends someone to the emergency room.
FARE works on behalf of the millions of Americans who have food allergy, including all those at risk for life-threatening anaphylaxis.
FARECon Featuring Teen Summit is a new, annual educational event from FARE serving people of all ages managing food allergies.
At this year’s conference in Washington, DC, Joel conducted 3 educational sessions. The first was for the hotel staff, “TEACH Food Allergen Safety,” training the chefs, managers, and servers on the basics of food allergen service and kitchen safety.
The adult session was titled “Behind the Scenes…Tips for Safe Dining”, which offered Joel’s behind the scenes perspective on what restaurants can and cannot do to accommodate guests with food allergies.
In the teen session, “Reconstructing Teen Favorite Foods,” Joel dove into removing common allergens from teen favorites, replacing them with simple ingredients.
Joel appointed the teens as his sous chefs. The first task for the newly appointed sous chefs was to provide substitutions for the common food allergens in mac ‘n cheese.
We put post-it easel pads around the room, each one having a food ingredient for mac ‘n cheese listed on top. The teens were given post it notes where they could write their ideas for allergy-friendly substitutions and post them on the corresponding sheets. The teens had some great ideas for allergy-friendly substitutions. We reviewed the recipe for mac ‘n cheese and talked about the various substitutions provided.
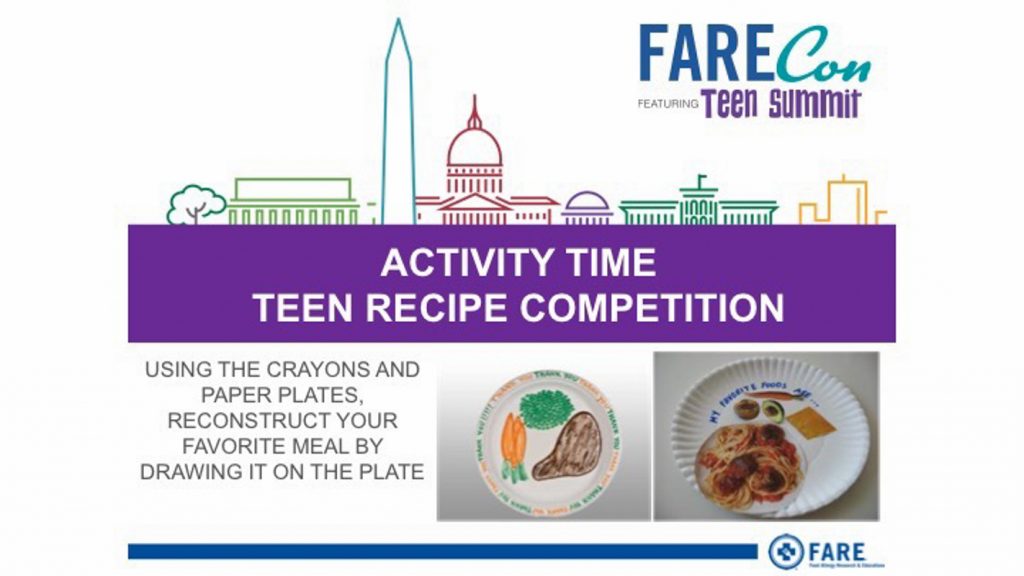
Now the teens were ready to create allergy-friendly versions of their own favorite dishes, writing down their recipe ideas and drawing pictures of their final plate.
Among the many creations were maple apple cider donuts, quesadillas, thin mints, pretzel pie with sunflower butter ice cream, beef ramen, and pizza.
The judges had the hard job of choosing the two winners, and we had the fun job of developing the winning recipes, allergen free!
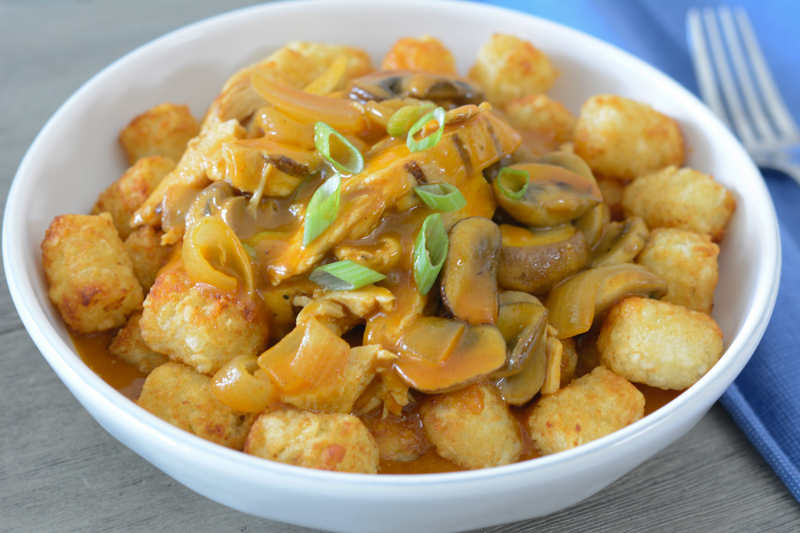
Inspired by Scout S-B, here’s the first of our winning recipes, a savory chicken paprikash featuring tender chunks of chicken in an unforgettably rich, flavorful and creamy paprika-infused sauce!
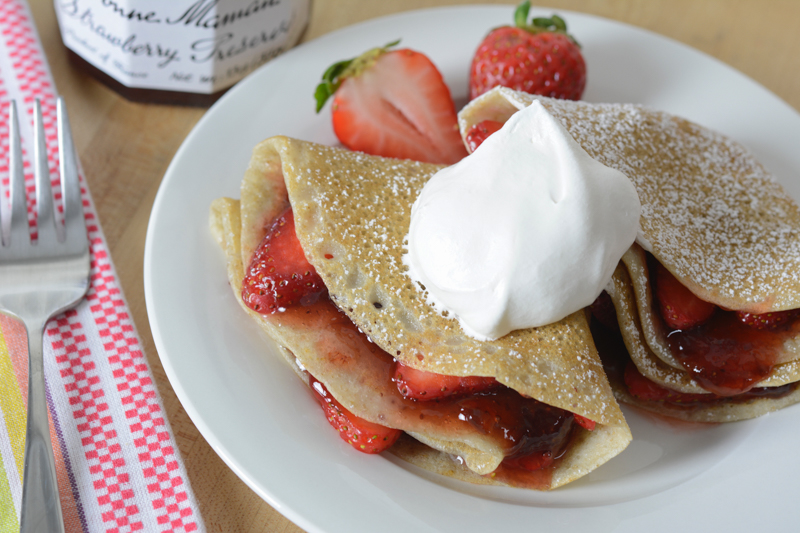
This next winning recipe was inspired by Celia Malba. Filled with strawberry jam and fresh strawberries, these crepes come together easily to make an impressive and delicious dessert!

For these winning recipes, visit FARE’s blog for chicken paprikash and strawberry crepes.
The post Teen Recipe Challenge appeared first on Your Allergy Chefs.
]]>The post Oregon Trail Oatmeal Cookies appeared first on Your Allergy Chefs.
]]>
free from gluten and the top 8 food allergens
Made with gluten-free rolled oats, chocolate chunks and dried fruit, these Oregon trail oatmeal cookies are bursting with ooey gooey chocolate goodness!
Is there anything sweeter than a soft, thick, chewy cookie with crispy edges? We don’t think so.
I’ve always been a fan of oatmeal cookies because there’s so many fun things you can add.
We’ve dubbed these cookies Oregon trail oatmeal cookies because of our love of Oregon and their fabulous flavors. The beaver state produces some pretty robust cherries, so we threw cherries in the mix. If tree nut is not an issue, filberts (a.k.a. hazelnuts and the official Oregon state nut) are an amazing edition to these cookies.
We always use Bob’s Red Mill gluten-free rolled oats. Did you know that Bob’s Red Mill is located in Milwaukie, Oregon?
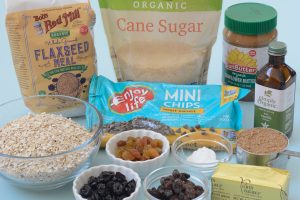
mise en place
To make these cookies, combine oats, salt and baking soda and set aside. Then, in a stand mixer with the paddle attachment, cream together Earth Balance buttery sticks, brown sugar and white sugar.
Add a flax egg (1 tablespoon flaxseed meal and 3 tablespoons of water whisked together) or your favorite egg replacer and a little vanilla. Add sunflower seed butter and mix on low speed just until combined. Add the oats. Fold in chocolate chips and your favorite combination of dried fruits. Cherries rock!
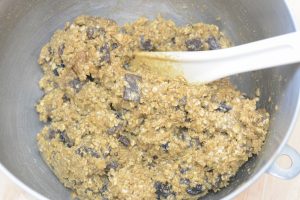
Portion the dough onto a baking pan lined with parchment paper or silicone baking mat. We like to use a portion scoop to portion the dough, also known as a disher. This ensures the cookies are uniform in size and will bake evenly. For these cookies we used a #30 scoop, which often is identified with a black handle. The scoop holds about 2 tablespoons of cookie dough.
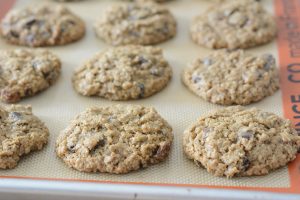
In the oven the cookies go for about 20 minutes.
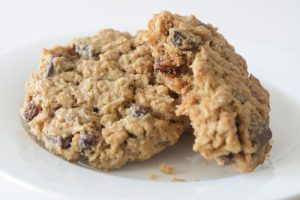
Yum! The cookies are best when allowed to sit several hours after baking so flavors can blend.
Store in a sealed container and enjoy these cookies for several days.
Chef’s Corner
The creaming method of mixing is used in many cookie recipes. This means the butter or fat is mixed with the sugar until the mix is light and fluffy. This method incorporates air which leavens the cookies.
Since we are using Earth Balance Soy-Free Buttery Sticks in place of butter or other fats, we want to blend the Earth Balance with the sugar just for a minute or so, until incorporated. These buttery sticks have a lower melting point, so overmixing will cause the fat to warm and the cookies to spread excessively.
If you’re up for good cookies, check out our recipes for Pumpkin Chocolate Chip Drops and No-Peanut Butter Cookies.
Oregon Trail Oatmeal Cookies
Yield 21 Cookies
Free of: gluten and top 8 allergens.
Made with gluten-free rolled oats, chocolate chunks and dried fruit, these Oregon trail oatmeal cookies are bursting with ooey gooey chocolate goodness.
Ingredients
1 flax egg (1 tablespoon flaxseed meal + 3 tablespoons lukewarm water), see recipe notes
2 1/4 cups gluten-free quick cooking oats
1/2 tsp kosher or sea salt
1/2 tsp baking soda
8 tablespoons soy-free buttery sticks, such as Earth Balance, cold
1/2 cup firmly packed light brown sugar
1/2 cup granulated sugar
1/2 tsp vanilla extract
2/3 cup sunflower seed butter, such as Sunbutter
3/4 cup allergy-friendly chocolate chips or chunks, such as Enjoy Life
1/4 cup dark raisins
1/4 cup golden raisins
1/4 cup dried cherries
Instructions
- Preheat oven to 350-degrees F. Line two cookie sheets with parchment paper or silicone baking mats.
- In a small bowl, whisk together flaxseed meal and water. Set aside for 5 minutes.
- Combine oats, salt and baking soda in a medium bowl. It may be necessary to sift the baking soda into the bowl if it contains lumps. Set aside.
- In a stand mixer fitted with the paddle attachment, cream together the margarine and sugars for about 1 minute. Since Earth Balance has a lower melting point than butter, you don’t want to over-mix. Over-mixing will cause the cookies to spread too much during baking.
- Return to the flax egg and whisk vigorously. Add flax egg and vanilla to sugar mixture and blend on low until combined. Add sunflower seed butter and briefly mix to combine.
- Add oats, chocolate chips, dark and golden raisins, and cherries. Mix on low just until combined. Finish mixing by hand.
- Portion dough onto cookie sheets. We like to use a portion scoop, also known as a disher. This ensures the cookies are uniform in size and also bake evenly. We use a #30 scoop, which holds about 2 tablespoons of dough. The #30 scoop is often identified with a black handle.
- Slightly flatten the cookies to just under 1-inch thick, as the cookies will spread.
- Bake for 18-20 minutes, until done. The cookies will crisp up as they cool.
Notes
If egg allergy is not an issue, you can replace the flaxseed and water with one large egg, slightly whisked.
Courses Sweets
The post Oregon Trail Oatmeal Cookies appeared first on Your Allergy Chefs.
]]>