The post Sugar Cookies appeared first on Your Allergy Chefs.
]]>
vegan and free from gluten and top 9 allergens
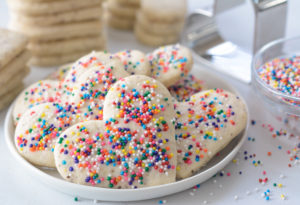
These delicious sugar cookies are so easy to make and they keep their shape when baked. You can enjoy them plain, decorated with sprinkles or sanding sugar, or frosted with royal icing.
A sugar cookie everyone can enjoy!
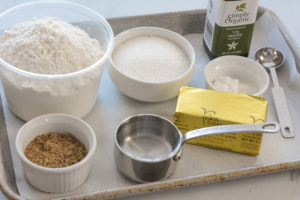
mise en place
These easy no-spread sugar cookies are great for cutouts and decorating. You can also freeze the cookie dough and baked cookies!
Look How Easy
- Make your flax eggs.
- Combine flour, baking powder, and xanthan gum.
- Cream non-dairy butter and sugar with a hand mixer for 1-1/2 minutes.
- Add flax eggs and vanilla to butter mixture and beat until combined.
- Add flour mixture and beat on low just until incorporated. Finish combining dough by hand. Form dough into a disk and wrap in plastic wrap. Place in fridge for at least 30 minutes.
- Take half the chilled dough and knead briefly. Shape into a flat disk and roll with a rolling pin between 2 sheets of parchment paper or plastic wrap to the thickness of about 1/4-inch.
- Using cookie cutters, cut dough into desired shapes. Place on a baking sheet lined with parchment or silicone baking mat. Decorate with sprinkles or sanding sugar, if desired. Bake for 10-12 minutes.
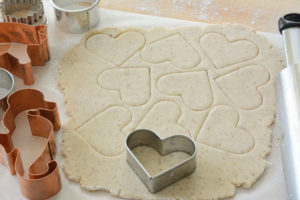
When cutting out your sugar cookies, make sure to keep your cuts as close together to get as many cookies out of your dough as possible. Re-roll any scraps.
Freeze
Plain or decorated baked cookies freeze beautifully for up to 3 months.
You can also freeze the dough. Divide dough in half and flatten both halves into a disk. Wrap well in plastic wrap and freeze. When ready to bake cookies, thaw the disks in the fridge, then bring to room temperature for 20 minutes. Roll away!
Getting the Most Accurate Measurement
Proper measuring and sifting of dry ingredients is essential in baking. Dry ingredients, including flour, naturally settle on standing. Texture, how long the flour has been stored, and humidity can all influence the degree to which flour settles.
To get the most accurate measurement, start by whisking the flour in its container to aerate.
Scooping the flour directly into your measuring cup packs the flour into the cup, causing you to end up with significantly more flour than the recipe calls for.
To measure the flour, spoon into measuring cup, overfilling. Use a knife or other straight edge to level off the top. Whisk again with the other dry ingredients to combine and further aerate the ingredients before incorporating them into the dough.
Some baked goods may require an extra step of sifting to obtain light and airy baked goods. Sifting also helps to filter out any impurities and/or clumps.
Allergy-Friendly Decorations
Tru Color Natural Sanding Sugars are free from the top 8 allergens, artificial colors, sesame, and mustard. They can be purchased online.
Betty Crocker Nonpareils are free from the top 8. However, they are not all processed at the same facility/lines. They take allergies VERY seriously and advise to check the labels. If the sprinkles are processed on a line that may process other allergens, they will state on the label “may contain”. The container does have a phone number that you can call for peace of mind.
Sugar Cookies
Yield 32 small cookies
Free of: gluten and top 9 allergens.
Finally, a sugar cookie everyone can enjoy!
Ingredients
Cookies
2 tablespoons ground flaxseed
1/3 cup lukewarm water
2 cups all-purpose gluten-free flour blend (1:1 baking flour)
1/2 teaspoon baking powder
1/4 teaspoon xanthan gum (omit if using a flour blend containing xanthan gum)
1/2 cup non-dairy butter (such as Earth Balance Soy Free Buttery Sticks), softened to room temperature
1/2 cup granulated sugar
1 teaspoon pure vanilla extract
Nonpareils or sanding sugar for decorating, optional
Royal Icing, Optional
6 tablespoons aquafaba (from a 15-ounce can of garbanzo beans)
1/2 teaspoon cream of tartar or 1/2 teaspoon fresh lemon juice
4-5 cups powdered sugar
1 teaspoon pure vanilla extract
Instructions
Prep
- Line 2 large baking sheets with parchment; set aside.
- Preheat oven to 350-degrees F.
Steps
- For the cookies, in a small bowl, whisk together flaxseed meal and water. Set aside for 5-10 minutes.
- In a medium bowl, whisk together the flour, baking powder, and xanthan gum. If the baking powder contains lumps, sift into the flour. Set aside.
- Return to the flax eggs and whisk vigorously.
- In a large bowl, cream together the butter and sugar with a hand mixer. Mix until the sugar is slightly dissolved into the butter, about 1-1/2 minutes. Add the flax eggs and vanilla. Beat until incorporated.
- Add the flour mixture and beat on low speed just until the dough starts to come together. Turn off hand mixer and finish combining the dough by hand.
- Once the dough is made, form the dough into a flat disk and wrap with plastic wrap. Let the dough chill in the refrigerator for at least 30 minutes. If making the dough in advance, store wrapped in refrigerator. Let rest on counter for 15 minutes before ready to use.
- When ready to make cookies, lightly flour a clean rolling surface and a rolling pin. Take half of the dough and knead briefly. Shape into a flat disk and roll with a rolling pin until dough is about 1/4-inch thick. It’s easiest to roll between 2 sheets of parchment paper or plastic wrap.
- Using cookie cutters, cut dough into desired shapes. Decorate with nonpareils or sanding sugar. If you’re going to decorate with royal icing, leave plain. Place cookies on prepared baking sheets.
- Repeat with remaining dough.
- Bake cookies for 10-12 minutes or until the edges are just beginning to turn lightly golden. Do not over bake, as they won’t turn much of a golden brown. Remove cookies from oven and place on cooling rack to cool. Enjoy plain or decorated with nonpareils or sanding sugar. The royal icing instructions follow if you will be decorating plain cookies with royal icing.
- For the royal icing, open a can of garbanzo beans (also known as chickpeas). Drain and strain the aquafaba (brine) through a fine mesh sieve. Reserve garbanzo beans for another use such as Chickpea Melts.
- Measure 6 tablespoons of aquafaba (brine) into a bowl. Add cream of tartar. Mix on medium to high speed using a hand mixer with a whisk attachment or in a stand mixer until mixture is frothy/foamy. Gradually add 4 cups of powdered sugar and continue beating on low speed until thick and everything is incorporated.
- Turn the mixer off and lift the whisk to check the consistency of your icing. It should be thick with a glue-like consistency. If it’s not there yet, add another cup of powdered sugar (or more) until a thick consistency is achieved. Add vanilla extract. Turn the mixer up to medium-high and beat for about 8 minutes.
- After 8 minutes or so, turn the mixer off. You should have a nice, stiff royal icing. Store in an airtight container, covered with plastic wrap and closed with a lid in the fridge up to 7 days. Let come to room temperature before decorating cookies. You may need to thin icing with a little water.
- Royal icing can be colored with gel food colors. Adding too much food coloring can result in excessive drying times.
Notes
Getting the Most Accurate Measurement
Proper measuring and sifting of dry ingredients is essential in baking. Dry ingredients, including flour, naturally settle on standing. Texture, how long the flour has been stored, and humidity can all influence the degree to which flour settles.
To get the most accurate measurement, start by whisking the flour in its container to aerate.
Scooping the flour directly into your measuring cup packs the flour into the cup, causing you to end up with significantly more flour than the recipe calls for.
To measure the flour, spoon into measuring cup, overfilling. Use a knife or other straight edge to level off the top. Whisk again with the other dry ingredients to combine and further aerate the ingredients before incorporating them into the dough.
Some baked goods may require an extra step of sifting to obtain light and airy baked goods. Sifting also helps to filter out any impurities and/or clumps.
Courses Sweets
The post Sugar Cookies appeared first on Your Allergy Chefs.
]]>The post Black-Eyed Peas and Tomato Stew with Sautéed Bananas appeared first on Your Allergy Chefs.
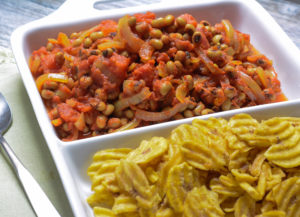
]]>
vegan and free of gluten and top 9 allergens
Black-eyed peas are a Southern good-luck tradition for the New Year. I grew up on this tradition and my mom never missed serving up black-eyed peas on New Year’s Day.
This year we’re enjoying them in a stew. Inspired by the dish Red-Red from Ghana, this simple black-eyed peas and tomato stew is traditionally served with fried plantains. We like dishing it up with plantain chips or sautéed bananas, which make a great stand in for plantains.
Enjoy this healthy stew throughout the year!
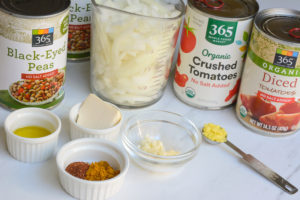
mise en place
The Ingredients
Using canned black-eyed peas slashes time without sacrificing flavor.
Thinly sliced onions are sautéed until lightly caramelized. Minced garlic, curry powder, grated fresh ginger, and chili powder are added and cooked with the onions for one minute. Tomatoes and black-eyed peas are added and the stew simmers for 15 minutes.
Sautéed Bananas or Plantain Chips
While the stew is simmering, cut 2 firm bananas in half lengthwise and then crosswise into 2 to 3-inch pieces. Sauté the bananas in a little vegan butter for about 5 minutes, until browned on both sides. The combination of the stew and bananas is incredible!
Or enjoy with plantain chips.
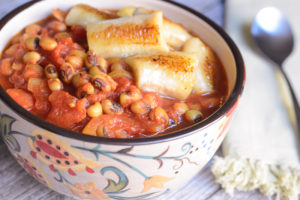
Black-Eyed Peas and Tomato Stew with Sautéed Bananas
Yield 6 cups
Free of: gluten and top 9 allergens.
This simple and delicious stew is inspired by the dish Red-Red from Ghana.
Ingredients
1 tablespoon vegan butter (such as Earth Balance Soy Free Buttery Sticks), divided
2 teaspoons olive oil
1 yellow onion, thinly sliced (about 2 cups)
1 teaspoon minced garlic (about 1 clove)
1 teaspoon curry powder
1/2 teaspoon ancho or chipotle chili powder
1/2 teaspoon grated fresh ginger
1 (15-ounce) can crushed tomatoes
1 (14.5-ounce) can diced tomatoes
2 (15-ounce) cans black-eyed peas, drained and rinsed (3 cups drained peas)
2 firm bananas, optional
Store-bought plantain chips, optional
Instructions
Prep
- If serving the stew with sautéed bananas, cut each banana crosswise into 3 or 4 pieces, depending on size. Cut each piece in half lengthwise. Set aside.
Steps
- Heat 1 teaspoon butter and the oil in a large saucepan over medium heat. Add onion and cook about 8-10 minutes, until lightly caramelized, stirring frequently.
- Add garlic, curry powder, chili powder, and ginger and cook for 1 minute, stirring constantly.
- Add crushed and diced tomatoes and black-eyed peas and bring to a simmer. Reduce heat to medium-low, cover and cook for 15 minutes, stirring occasionally.
- While black-eyed peas and tomatoes are simmering, if you are serving with sautéed bananas, melt remaining 2 teaspoons butter in a skillet over medium-high heat. Add bananas and reduce heat to medium. Cook about 5 minutes or until browned on both sides, gently flipping halfway through.
- Serve the stew with sautéed bananas, plantain chips, or brown rice.
Courses Mains
The post Black-Eyed Peas and Tomato Stew with Sautéed Bananas appeared first on Your Allergy Chefs.
]]>The post Mushroom-Spinach Eggs Benedict appeared first on Your Allergy Chefs.
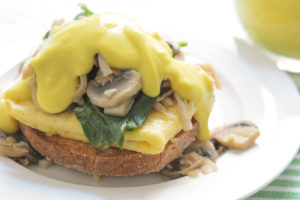
]]>
vegan and free from top 9 allergens
Decadence is what makes these eggs benedict the star of the brunch table. You get a golden brown, toasted English muffin layered with a JUST Egg patty, topped with mushrooms and spinach, and finished with a rich and creamy hollandaise sauce.
Vegan and free from gluten and the top 9 food allergens, read more to make the easiest and most delicious eggs benedict!
The components:
- hollandaise
- sautéed mushrooms and spinach
- JUST Egg patties
- allergy-friendly English muffins or other bread
About the Ingredients
Mushrooms
Any type of mushrooms can be used, including button (white mushrooms), cremini, portobello, oyster, king oyster, chanterelle, black trumpet, maitake, and lion’s mane. Whew, lots of choices!
We used a combination of king oyster and button. To get the mushrooms ready, wipe clean with a damp paper towel, trim, and slice. For king oysters, trim across the mushroom’s stem to separate it from the mushroom cap. Holding the stem down against your cutting board, pull a fork toward the base of the stem, shredding the stem, as shown below. Slice the caps.
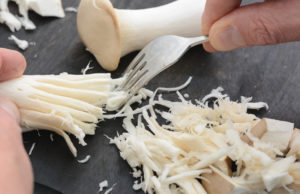
shredding king oysters
JUST Egg Folded Plant Eggs
What an amazing product! Fully cooked, all you have to do is heat them up. They are made without gluten or the top 9 food allergens and found in the freezer section of many grocery chains, including Whole Foods Market.
Jackie Sobon’s Hollandaise
Butter and egg yolks are the key components to the classic hollandaise sauce. This hollandaise recipe was adapted from Jackie Sobon’s Vegan Bowl Attack! We just made a couple of modifications to her recipe. It’s hard to mess with Jackie’s recipe which is already perfection.
Key Sauce Ingredients
- Nutritional Yeast
Nutritional yeast has a nutty, cheesy, and savory flavor. It’s an inactivated form of yeast that is not the same as brewer’s yeast.
Nutritional yeast is an excellent source of vitamins, minerals, and high-quality protein that can be found in the bulk section of just about any natural foods store and in many large grocery store chains.
- Indian Black Salt
Indian black salt (or kala namak) is known by many names including Himalayan black salt. This volcanic rock salt is pinkish-brown in color and is manufactured in the regions surrounding the Himalayas.
The sulfur compounds in black salt cause the salt to smell like hard-boiled or rotten eggs. Even though the smell is strong at first, it disappears in the final dish.
Black salt is often used in egg-free dishes to give them an eggy taste. You could skip the black salt, however, we strongly suggest using it. Since this hollandaise is not made with the traditional egg yolks, the black salt completes the sauce.
You can find Indian black salt online or at Indian markets.
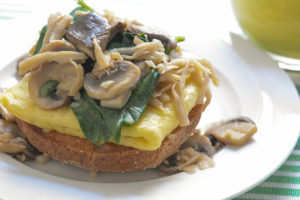
Hollandaise is so versatile. Who doesn’t love it on grilled vegetables, breakfast potatoes, and Hearts of Palm Cakes, just to name a few.
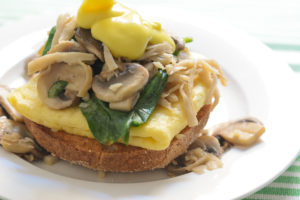
And eggs benedict just wouldn’t be eggs benedict without the hollandaise!
Mushroom-Spinach Eggs Benedict
Yield 4 Servings
Free of: gluten and top 9 allergens.
The easiest to make and most delicious eggs benedict!
Ingredients
Mushrooms
12 ounces assorted mushrooms, about 5 cups sliced (such as king oyster and white button)
1 tablespoon buttery sticks (such as Earth Balance Soy Free)
1 teaspoon olive oil
2 teaspoons minced garlic
2 tablespoons dry white wine, optional
4 cups baby spinach
Hollandaise
1 cup water
1/4 cup garbanzo bean (chickpea) flour
4 tablespoons buttery sticks (such as Earth Balance Soy Free), melted and cooled to room temperature
4 teaspoons fresh lemon juice
1 tablespoon nutritional yeast
1/2 teaspoon Indian black salt (kala namak)
1/4 teaspoon ground turmeric
1/4 teaspoon sea salt
1/8 teaspoon cayenne pepper, optional garnish
Other ingredients
4 JUST Egg frozen patties
2 allergy-friendly English muffins, cut in half or 4 slices of bread, toasted
Instructions
- For the mushrooms, trim and slice. Melt 1 tablespoon buttery sticks and oil in a large skillet over medium-high heat. Add mushrooms and cook until tender, about 6 minutes, stirring occasionally. Add garlic and cook for 1 minute. Add wine and reduce until almost evaporated. If not using wine, add 1-2 tablespoons of water if mushrooms are dry. Set aside.
- For the hollandaise, place all hollandaise ingredients in a blender and puree until smooth.
- Transfer sauce to a small saucepan over medium heat, whisking frequently. When sauce comes to a simmer, lower heat to medium-low. Simmer and continue whisking until sauce has thickened and is no longer grainy from the flour, about 5 minutes. If sauce is too thick, you can adjust consistency by whisking in a teaspoon or so of warm water. This makes 1-1/4 cups hollandaise.
- Cook JUST Egg patties following package directions.
- Return mushrooms to medium heat. Add spinach in batches; cook and stir until wilted, about 1 minute.
- To assemble, plate each English muffin half. Top with a Just Egg patty, followed by mushrooms-spinach. Ladle with warm hollandaise. Lightly sprinkle with cayenne pepper, if desired.
Notes
- Leftover hollandaise does not hold in the fridge to be reheated later.
- The recipe for the hollandaise was adapted from Jackie Sobon’s Vegan Bowl Attack!
Courses Breakfast & Brunch
The post Mushroom-Spinach Eggs Benedict appeared first on Your Allergy Chefs.
]]>The post Potato and Pea Croquettes with Mango Sauce appeared first on Your Allergy Chefs.
]]>
vegan and free from gluten and top 9 allergens
Made with mashed potatoes and peas, these croquettes are the perfect way to put some spark into those leftover mashed potatoes.
This popular Italian street food is traditionally deep fried, but for a healthier option that’s even better, we air-fry.
Leftover mashed potatoes never tasted so good!
Croquette Ingredients
- Mashed potatoes – leftover or fresh
- Diced onions – caramelized in vegan butter and olive oil
- Peas
- Minced garlic
- Spices – curry powder and cumin
- Seasoning – a little salt
- Gluten free bread crumbs
Sauce Ingredients
- Mango chunks – fresh or frozen and thawed
- Light brown sugar
- Coconut aminos
- Lime juice
- A little spice – sriracha
- Seasoning – garlic powder
Here’s a link to our Best Ever Mashed Potatoes.
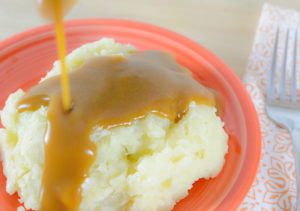
Crispy yet creamy, round or cylinder shaped, these croquettes are a winner. Besides, who can resist a good spud, regardless of how it has been transformed.
Potato and Pea Croquettes with Mango Sauce
Yield 12 Croquettes
Free of: gluten and top 9 allergens.
Leftover mashed potatoes never tasted so good!
Ingredients
Mango Sauce
2 cups mango chunks, fresh or frozen and thawed
1 tablespoon light brown sugar
2 teaspoons coconut aminos
2 teaspoons fresh lime juice
1 teaspoon sriracha
1/2 teaspoon garlic powder
Croquettes
1 tablespoon buttery sticks (such as Earth Balance Soy Free)
2 teaspoons olive oil
1 yellow onion, diced
1 teaspoon kosher salt, divided
2-1/2 cups cold mashed potatoes (about 5 medium potatoes)
3/4 cup frozen peas, thawed
2 teaspoons curry powder
1 teaspoon minced garlic
1/2 teaspoon ground cumin
1 cup gluten-free bread crumbs (such as Ian’s panko breadcrumbs)
Instructions
- Combine all ingredients for the mango sauce in a high speed blender. Blend until smooth, about 30 seconds. Pour into a small serving bowl and refrigerate until needed. This makes about 1-1/4 cups.
- Heat buttery sticks and oil in a medium saucepan or skillet over medium heat until melted and sizzling. Add diced onion and cook, stirring often, until onions start to soften. Reduce heat to medium-low and continue to cook, stirring often, until caramelized (golden and a jam like consistency), about 20-25 minutes. After 10 minutes of cooking, sprinkle ½ teaspoon salt over onions. Measure out ½ cup of caramelized onions and set aside. Reserve remaining onions for other uses, such as pizza, pasta, or soups.
- In a medium bowl, combine mashed potatoes, ½ cup caramelized onions, peas, curry powder, garlic, cumin, and remaining ½ teaspoon salt. Mix well.
- Portion potato mixture into 12 balls or cylinders. We like to portion using a #20 scoop or disher, often designated with a yellow handle.
- Preheat air fryer to 390-degrees F.
- Place breadcrumbs in a small bowl. Roll each croquette into breadcrumbs, coating well. Lightly spray each croquette and air fryer basket with vegetable or olive oil spray.
- Place croquettes in a single layer in basket and air fry for 8-10 minutes, or until golden brown. Depending on the size of your air fryer, you may need to fry in 2 batches, being careful not to crowd basket.
- Serve with mango sauce or a sweet chutney and a mixed green salad. The mango sauce doubles as a salad dressing for this dish.
Notes
We prefer Ian’s panko breadcrumbs. When we shopped they were out of stock, so for this recipe we used another gluten free brand.
Courses Starters
The post Potato and Pea Croquettes with Mango Sauce appeared first on Your Allergy Chefs.
]]>The post Pumpkin Bread Pudding with Vanilla Sauce appeared first on Your Allergy Chefs.
]]>
Vegan and free of gluten and top 9 allergens
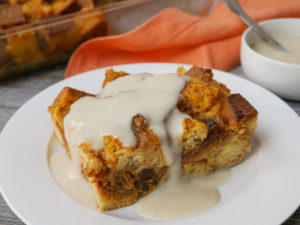
During the fall we look for any way to use pumpkin. Soft cushions of brioche soaked with a vegan pumpkin custard, make this easy dessert an autumn and holiday showstopper.
We love our favorite allergy-friendly brioche for this bread pudding, but you could use challah, French bread, or other crusty loaf.
Try this old-fashioned dessert that’s never out of style!
Aquafaba
We made two batches of bread pudding, one with flax eggs and one with aquafaba. For this recipe, we preferred aquafaba over flax eggs as the egg replacer.
Aquafaba is the viscous liquid in which garbanzo beans (also know as chickpeas) and other beans have been cooked. In many cases, aquafaba can be used as a replacement for eggs.
Take a 15.5 ounce can of garbanzo beans (chickpeas). Shake the can well. Open and drain liquid into a small bowl, reserving both liquid and beans. There you have the liquid, an amazing egg replacer!
Need an idea for the leftover beans? Try our delicious Chickpea Melt.
Ingredients Needed
Cornstarch, water, vanilla bean (optional), unsweetened alternative milk, pure maple syrup, pure vanilla extract, pumpkin puree, spices (cinnamon, ginger, nutmeg), sea salt, aquafaba, golden raisins, and allergy-friendly brioche (our favorite is from Rising Hearts Bakery) or other bread.
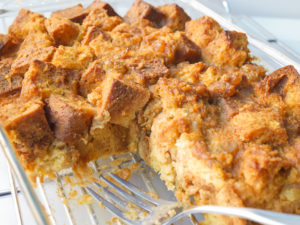
Follow our recipe below for an easy and amazing autumn dessert that’s sure to be a favorite.
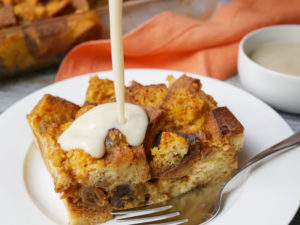
Pour on the vanilla sauce and enjoy!
Your Allergy Chefs are participants in the Amazon Associates Program, an affiliate advertising program designed to provide a means for sites to earn advertising fees by advertising and linking to Amazon.
Pumpkin Bread Pudding with Vanilla Sauce
Yield 6 servings
Free of: gluten and top 9 allergens.
Old-fashioned but never out of style!
Ingredients
Vanilla Sauce
2 tablespoons cornstarch
2 tablespoons water
1/2 vanilla bean, optional
1-1/2 cups unsweetened alternative milk (such as gluten-free oat)
2 tablespoons pure maple syrup
1 teaspoon pure vanilla extract
Bread Pudding
1-1/4 cups pure pumpkin puree
1-1/2 teaspoons ground cinnamon
1/2 teaspoon ground ginger
1/2 teaspoon sea salt
1/4 teaspoon ground nutmeg
1 cup unsweetened alternative milk (such as hemp or gluten-free oat)
1/2 cup pure maple syrup
2 teaspoons pure vanilla extract
1/2 cup aquafaba (liquid from can of garbanzo beans/chickpeas)
1/2 cup golden raisins
1 (14 to 16-ounce) loaf allergy-friendly brioche, French bread, or other crusty bread cut into 3/4 to 1-inch cubes
Instructions
Prep
- Cut bread into cubes and place in a large bowl.
- Lightly grease an 11x7x1-1/2 inch baking pan; set aside.
- Preheat oven to 350-degrees F.
Steps
- For the vanilla sauce, whisk together cornstarch and water in a small bowl. Set aside. Cut vanilla bean (if using) in half lengthwise and scrape out seeds. Add seeds with bean, milk, and syrup to a small saucepan. Bring just to a boil over medium-high heat.
- Return to cornstarch and water, whisk again and whisk into hot milk. Reduce heat to medium-low, whisking constantly until sauce thickens. When sauce thickens, simmer an additional 2 minutes, whisking constantly. Remove from heat; remove and discard vanilla bean. Whisk in vanilla extract.
- Transfer sauce to a container and place a piece of plastic wrap directly onto surface of the sauce to prevent a skin from forming while it cools. When cool enough, place in refrigerator until needed. Makes 1-1/2 cups.
- For the bread pudding, in a large bowl, whisk together pumpkin, cinnamon, ginger, salt, and nutmeg. Add milk, maple syrup, and vanilla, whisking to combine. Whisk in aquafaba.
- Sprinkle raisins over bread cubes. Pour liquid over bread cubes and gently toss to coat. Let sit for 15 minutes for mixture to soak into bread.
- Gently mix to ensure bread is coated. Gently pour mixture into baking pan or casserole dish. Evenly arrange bread cubes and gently press bread cubes down. Bake uncovered for 25-30 minutes or until top is golden brown and firm to the touch. Transfer to a wire rack and allow to cool for at least 15 minutes.
- Serve warm or cold with vanilla sauce.
Notes
The best bread for bread pudding is day old. Some gluten-free breads tend to be crumbly. If the bread you are using is crumbly or fresh, cube and spread on a baking sheet. Toast for 6-7 minutes in a preheated 350-degree F oven. If you’re using day-old bread, just cube bread and move on to next step.
Courses Sweets
The post Pumpkin Bread Pudding with Vanilla Sauce appeared first on Your Allergy Chefs.
]]>The post Fruited Sweet Potato Muffins appeared first on Your Allergy Chefs.
]]>
free of gluten and top 9 allergens
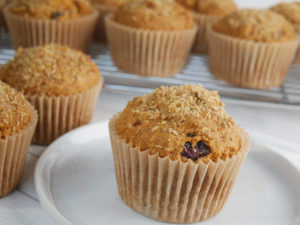
A blend of cinnamon, ginger, and nutmeg fills these muffins with the best flavors of fall.
If you’re looking for a morning muffin recipe that is oil-free and low in sugar, these fruited sweet potato muffins are the perfect guiltless treat!
To make these fruited sweet potato muffins, you’ll need:
- Sweet potatoes
- Flaxseed meal and water
- gluten-free all-purpose flour blend
- only a half cup of cane sugar
- baking soda and baking powder
- salt and spices
- unsweetened alternative milk, such as hemp or gluten-free oat
- unsweetened applesauce
- pure vanilla extract
- apple cider vinegar
- mixed dried fruit (chopped apricots, cranberries, and raisins)
Easy Steps in Making Fruited Sweet Potato Muffins
- Begin by baking 1 large or 2 medium sweet potatoes. This is best done a day ahead or several hours before making the muffins. When the potatoes have cooled, scoop out the flesh and mash with a fork or potato masher in a small bowl. You will need 1 cup of mashed sweet potatoes for this recipe.
- Make flax eggs by whisking together flaxseed meal and water. Set aside for 5-10 minutes. Then whisk vigorously until flax eggs are gelatinous. Add mashed sweet potato, milk, applesauce, vanilla, and apple cider vinegar. Whisk until smooth.
- In a large bowl, combine all dry ingredients and whisk together – flour, sugar, baking soda, cinnamon, baking powder, xanthan gum, salt, ginger, and nutmeg.
- Gently combine the dry mixture of flour and spices with the wet mixture and fold in dried fruit.
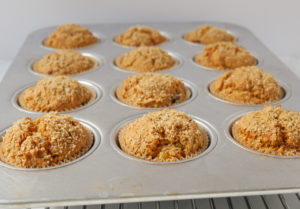
- Use a spoon or portion scoop to dollop the batter into a metal muffin pan or silicone muffin baking pan. We like to use a #16 portion scoop or disher to portion muffins, which is usually designated with a blue handle.
- Sprinkle each muffin with 1/4 teaspoon of flaxseed meal. Place in oven and bake about 25 minutes or until tops are firm and bounce back when you gently press on them. You can also insert a toothpick in center. It’s done if the toothpick comes out clean.
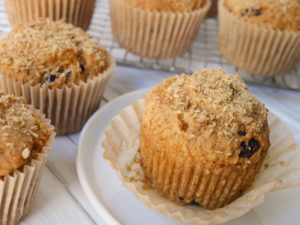
If using a metal muffin pan, use muffin liners to keep this recipe completely oil-free. Some sticking may occur if you use traditional muffin liners, or no muffin liners. We recommend the parchment paper liners for best results.
Sweet Potatoes
We look for sweet potatoes with tapered ends and a bright orange flesh. White sweet potatoes are too dry for these muffins.
Cooking the sweet potatoes can be accomplished by baking, boiling, or steaming. We recommend cooking the sweet potatoes a day ahead or several hours before making the muffins.
By baking the sweet potatoes, the cooking process allows a special enzyme in the potatoes to transform the starches into a natural sugar, making them sweeter than those potatoes that are boiled or steamed. This sweetness naturally means less sugar is needed when making these muffins.
Two Temperatures Are Better Than One!
We start high and then go low. The initial 5 minutes of baking time at 425-degrees F promotes a faster rise for the muffins, making them tall and rounded. The temperature is then turned down for the remaining bake time.
Chef Mary’s Tips
- Make sure your baking powder and baking soda are fresh. We replace ours every 6 months to ensure leavening power is not lost. The leavening power is what causes the muffins to rise.
- Remember that the key to baking quick breads is not to overmix the batter. Don’t use a hand mixer or stand mixer, just a large spoon or spatula. This ensures that your muffins will bake up soft!
- Naturally moist muffins, like these fruited sweet potato muffins, tend to get sticky and soggy in lidded containers and ziplock bags that prevent air circulation. When muffins have completely cooled, put a paper towel on the bottom of the container. Arrange muffins in a single layer. Top muffins with another paper towel before putting on the lid. Store at room temperature for up to 3 days. You can also store in a large ziplock, also lined with paper towels. It’s important to add the paper towels to absorb any moisture the muffins release. This helps keep them fresher longer. To freeze, place in airtight container or large freezer storage bag and store for up to 2 months in the freezer.
Fruited Sweet Potato Muffins
Yield 12 standard muffins
Free of: gluten and top 9 allergens.
Muffins with the best flavors of fall!
Ingredients
1 cup mashed cooked sweet potatoes
3 tablespoons flaxseed meal, divided (2 tablespoons + 1 tablespoon)
6 tablespoons water
1-3/4 cups gluten-free all-purpose flour blend
1/2 cup pure cane sugar
1 teaspoon baking soda
1 teaspoon ground cinnamon
1/2 teaspoon baking powder
1/2 teaspoon xanthan gum (omit if using a flour blend containing xanthan)
1/2 teaspoon salt
1/4 teaspoon ground ginger
1/8 teaspoon ground nutmeg
1/2-3/4 cup unsweetened hemp or gluten-free oat milk
1/2 cup unsweetened applesauce
1 teaspoon pure vanilla extract
1 teaspoon apple cider vinegar
3/4 cup mixed dried fruit (chopped apricots, cranberries, raisins)
Instructions
Prep
- Preheat oven to 400-degrees F. Wash and scrub 1 large or 2 medium sweet potatoes. Place on a baking sheet lined with foil and bake for 50-60 minutes, until tender. Remove from oven. When cool, scoop out flesh and place in a small bowl. Mash and measure out 1 cup; set aside. We recommend cooking the sweet potato a day ahead or a few hours before you make the muffins.
- Make flax eggs by whisking together 2 tablespoons flaxseed meal and water in a medium bowl. Set aside for 5-10 minutes.
- Line a standard 12-cavity muffin tin with parchment paper liners. Set aside.
- Preheat oven to 425-degrees F.
Steps
- In a large bowl whisk together flour, sugar, baking soda, cinnamon, baking powder, xanthan gum, salt, ginger, and nutmeg.
- Return to flax eggs and whisk vigorously. To the flax eggs, add mashed sweet potato, 1/2 cup milk, applesauce, vanilla, and vinegar, whisking together until smooth. Add the potato mixture to the dry ingredients; stir just until combined without overmixing. Depending on how dry the sweet potato is, it may be necessary to add an additional 2 tablespoons or up to 1/4 cup of milk. Gently fold in dried fruit. We used ¼ cup chopped apricots, ¼ cup dried cranberries, and ¼ cup golden raisins. The batter will be thick.
- Spoon batter into muffin liners. For portioning muffins with ease and uniformity, we like to use a #16 portion scoop or disher, often designated with a blue handle. Garnish with remaining 1 tablespoon of flaxseed meal by sprinkling each muffin with ¼ teaspoon.
- Bake at 425-degrees F for 5 minutes. After 5 minutes, lower the oven temperature to 375-degrees F and bake for an additional 15-20 minutes or until a toothpick inserted in center comes out clean. Cool in the pan for 10 minutes. Then gently remove muffins from pan and transfer to a wire rack to finish cooling.
Notes
To store muffins, when they have completely cooled, put a paper towel on the bottom of an airtight container. Arrange muffins in a single layer. Top muffins with another paper towel before putting on the lid. Store at room temperature for up to 3 days. You can also store in a large ziplock, also lined with paper towels. It’s important to add the paper towels to absorb any moisture the muffins release. This helps keep them fresher longer. To freeze, place in airtight container or large freezer storage bag and store for up to 2 months in the freezer.
Courses Breakfast & Brunch
The post Fruited Sweet Potato Muffins appeared first on Your Allergy Chefs.
]]>The post Squasho Tacos appeared first on Your Allergy Chefs.
]]>
free of gluten and top 9 allergens
There are so many ways to dress up a taco. Such a simple food to which you can add all kinds of veggies, proteins, sauces and salsas.
Taco Tuesday is one of our favorite nights of the week. We can’t ever get enough Mexican food, and tacos are a definite favorite!
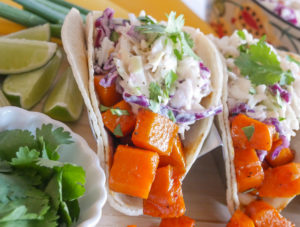
Check out our dream tacos…While we lived in Santa Clarita, one of our favorite dining spots was Wolf Creek Brewery. They have the most amazing sweet and spicy roasted butternut squash tacos.
Now that we’re in Las Vegas, the only way we can have our favorite is to replicate those tacos at home. So that’s just what we did!
mise en place
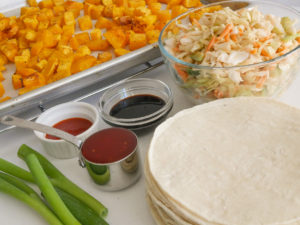
The sauce is key and the refrigerator chef struck again by raiding the pantry and mixing together sweet chili sauce, molasses, sriracha and minced green onions. This is gonna work!
Cut a large butternut squash into cubes and toss 6 cups with a little olive oil, salt and pepper. Roast cubes in an oven heated to 425°F for about 20-25 minutes until the squash is tender and lightly golden on the edges.
Tortillas Abound!
Heat your favorite corn or flour tortillas. If you avoid or can’t have corn, try “Potapas Gluten-Free Sweet Potato Tortillas. They are grain-free and free from corn and the top 9 allergens. We just found these in the freezer section at Sprouts and they are fantastic! As far as flour tortillas, our favorite are Follow Your Heart Gluten-Free Classic Tortillas. We haven’t found them yet here in Las Vegas, but we’re working on it.
In a large bowl, toss the warm butternut squash with the sauce. Fill 2 corn tortillas stacked together or 1 flour tortilla with about 1/2 cup of roasted squash and top with 1/2 cup creamy coleslaw. Garnish with chopped green onions, if desired.
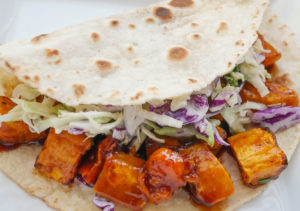
squasho tacos with gluten-free flour tortillas
We hope you enjoy our take on our favorite from Wolf Creek Brewery.
Squasho Tacos
Yield 8 tacos
Free of: gluten and top 9 allergens.
Just in time for Taco Tuesday!
Ingredients
1 large butternut squash (about 2-1/2 pounds), peeled and cut into 1-inch cubes
1 tbsp olive oil
1/2 tsp salt
1/8 tsp black pepper
1/4 cup sweet chili sauce, such as Sky Valley Sweet Chili Sauce
2 tbsp molasses
1 tbsp minced green onions
2 tsp sriracha
16 corn tortillas or 8 gluten-free flour tortillas
4 cups creamy coleslaw
Chopped green onions, garnish
Instructions
- Preheat the oven to 425-degrees F. Measure out 6 cups of butternut squash cubes and place in a large bowl. Add oil, salt, and pepper. Toss well until evenly coated. Arrange the squash in a single layer on a parchment paper lined baking sheet, making sure they have a little space between them. Cook butternut squash for about 20-25 minutes until the squash is tender and lightly golden on the edges.
- While the squash is roasting, prepare the sauce by whisking together the chili sauce, molasses, green onions, and sriracha in a small bowl until well blended.
- Heat the tortillas and keep warm.
- Place warm squash cubes in a bowl and add the sauce, tossing to combine and coat all cubes with the sauce.
- If using corn tortillas, stack 2 together and fill with ½ cup of roasted squash and top with ½ cup coleslaw. If using flour tortillas, use 1 tortilla per taco. Garnish with chopped green onions, if desired.
Notes
How to Peel Butternut Squash
To make the squash easier to peel, microwave the whole squash for about 30 seconds.
Lay the butternut squash on its side on a large cutting board. Using a chef’s knife, cut off about ½-inch from the bottom of the squash. Then cut off ½-inch from the stem end. Holding the squash in one hand, use a sharp vegetable peeler in the other hand to peel all of the skin off of the squash, while carefully holding the squash with your other hand. Discard the peel.
Stand the peeled squash upright on the cutting board. If it’s wobbly, make another cut at the bottom to even it out. Make one long cut, down the middle from the top to bottom. Use a spoon to scoop out the seeds and pulp from the squash cavity.
Lay the squash halves, cut side down on the cutting board. Cut in half crosswise. Working with one piece at a time, cut the squash into 1-inch slices, lengthwise. Lay the slices down (you can stack a few at a time) and make another set of lengthwise cuts. Then cut crosswise to make cubes.
Courses Mains
The post Squasho Tacos appeared first on Your Allergy Chefs.
]]>The post Roasted Cauliflower Stew appeared first on Your Allergy Chefs.
]]>
free of gluten and top 9 allergens
You’ll love this hearty and satisfying roasted cauliflower stew loaded with veggies and warm spices. We enjoyed it with brown rice, but serve it on top of your favorite cooked grains, or with your favorite crusty bread.
Joel put this together 2 weeks ago with leftovers from the fridge. Yes, the refrigerator chef strikes again! And we’re so obsessed with this dish, we’ve made it twice since!
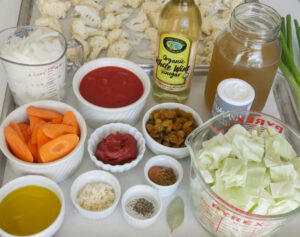
mise en place
Cutting Cauliflower
Cutting cauliflower into even pieces can be challenging. Here are a few steps to make it easy.
- Remove large leaves from the base of the cauliflower head and discard.
- With a paring knife, cut around the stem and remove the stem.
- Break the cauliflower into large florets with your fingers and rinse.
- Cut the cauliflower into smaller bite-sized florets. The large florets can be cut in half or quarters.
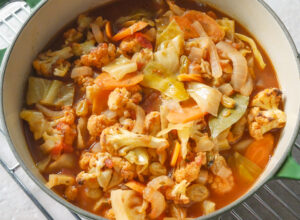
Why Roast Cauliflower?
Roasting cauliflower really brings out its sweetness and buttery flavor…and the texture is unmatched.
Besides roasting the cauliflower, it’s important to use a marinara sauce versus a canned tomato sauce for a more robust flavor. Not all tomato sauces are created equal.
The first time Joel made this, he used our leftover tomato sauce which is more like a marinara. The second time we used canned tomato sauce, and the third time we used Rao’s marinara. We did not like the second version with the canned tomato sauce as much as the other two. Both the first one with our tomato sauce and last night’s with Rao’s marinara were outstanding!
We hope you enjoy this recipe!
Chef Joel’s Tips
- Bias slicing, or cutting on the diagonal is a popular cut for vegetables. For the carrots in this recipe, hold a small chef’s knife at a 45-degree angle to the carrot. Begin cutting slices at the same angle, about 1/8 to 1/4-inch thick.
- Your best bet is to use stainless steel or enameled cookware or stove-safe glass or ceramics if you have them. These materials don’t react with the acid in tomatoes as cast iron and aluminum do. Cast iron and aluminum react chemically with the acid in tomatoes and may give the sauce an unpleasant flavor or color.
Roasted Cauliflower Stew
Yield 6 servings
Free of: gluten and top 9 allergens.
A hearty and satisfying roasted cauliflower stew!
Ingredients
4 cups cauliflower florets, about 1 small head (see recipe notes)
4 tbsp olive oil, divided (2 tbsp + 2 tbsp)
3/4 tsp salt, divided (1/2 tsp + 1/4 tsp)
1/4 tsp black pepper
1 onion, thinly sliced into quarter moons, about 1-1/2 cups (see recipe notes)
4 cups chopped green cabbage
1 cup sliced carrots on the diagonal (see recipe notes)
2 tsp minced garlic
1 tsp ground cinnamon
1/2 tsp ground cumin
1 bay leaf
4 cups vegetable broth
1 cup prepared marinara sauce, such as Rao’s or our homemade tomato sauce
1/2 cup golden raisins
3 tbsp white wine vinegar
3 tbsp tomato paste
Instructions
- Preheat oven to 400-degrees F. In a large bowl, toss the cauliflower with 2 tbsp oil, ½ tsp salt, and pepper. Arrange the cauliflower florets in a single layer, cut side down, on a parchment or foil lined baking sheet, making sure they have a little space between them. If you use parchment, be sure to use a brand that can tolerate 400-degrees F oven heat. Brands vary with their heat tolerances. Roast for about 25 minutes or until the cauliflower is tender and slightly caramelized, but not overcooked. Remove from oven and set aside.
- Heat large saucepan over medium heat. Add remaining 2 tbsp oil. When oil is hot, add onions and remaining ¼ tsp salt and cook for 10 minutes, stirring occasionally. Add cabbage and carrots; cook for 1 minute.
- Add garlic, cinnamon, cumin, and bay leaf; cook for 1 minute.
- Add broth, marinara, raisins, vinegar, and tomato paste and increase heat to high. When it just comes to a boil, reduce heat to medium and simmer for 10 minutes. Remove and discard the bay leaf.
- Add roasted cauliflower and stir to combine. Heat for 2-5 minutes to reheat the cauliflower.
- Eat as is or serve with steamed rice and garnish with green onions, if desired.
Notes
- To cut cauliflower, remove large leaves from the base and discard. With a paring knife, cut around the stem and remove the stem. Break the cauliflower into large florets with your fingers and rinse. Cut the cauliflower into smaller bite-sized florets. The larger florets can be cut in half or quarters.
- Cut onion in half lengthwise from root to stem end. Remove papery outer skin. Place onion, cut side down, on a cutting board. Cut off root and stem ends. Cut onion in half in same direction from root to stem end. Rotate onion and hold onion with free hand, keeping your fingertips curled backwards and the flat of your knife resting against your knuckles. Start slicing perpendicular to last cut. As you get to the end, rotate the onion so its lying on its most stable side and continue slicing.
- Bias slicing, or cutting on the diagonal is a popular cut for vegetables. Hold a small chef’s knife at a 45-degree angle to the carrot. Begin cutting slices at the same angle, about 1/8 to 1/4-inch thick.
Courses mains
The post Roasted Cauliflower Stew appeared first on Your Allergy Chefs.
]]>The post Blueberry Pound Cake appeared first on Your Allergy Chefs.
]]>
free of gluten and top 9 allergens
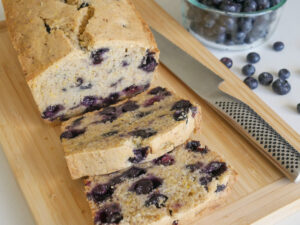
With fresh blueberries so plentiful, we couldn’t resist making this quick bread. It’s a spin off from the Strawberry Pound Cake recipe we developed for Allergic Living Magazine. The soft, buttery crumb is perfectly dense without being dry and crumbly.
While pound cake is traditionally made with a pound each of butter, sugar, eggs, and flour, we’ve made some adjustments for a great tasting loaf that’s free of the butter, eggs, and wheat flour.
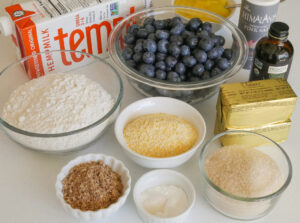
mise en place
The Method
- Preheat oven to 350°F. Lightly coat a 9×5-inch loaf pan with dairy-free margarine. Set aside.
- Make 3 flax eggs by whisking together 3 tablespoons of flaxseed meal with 1/2 cup of water. Set aside for 5-10 minutes. If egg allergy is not an issue and you’re not vegan, you can use 3 whole eggs in place of flaxseed meal and water.
- In a medium bowl, combine a gluten-free flour blend (such as King Arthur’s Gluten Free All-Purpose Flour), fine or medium grind yellow cornmeal, baking powder, xanthan gum (if not in flour blend), and salt. Set aside.
- Cream dairy-free, soy-free margarine and sugar using a hand-held mixer. Start on low and increase to medium. Blend until light and fluffy, about 2-3 minutes. If using a KitchenAid or similar stand mixer, use the paddle attachment to cream the margarine and sugar.
- Return to flax eggs and whisk vigorously; it will be gelatinous. On low speed, gradually blend flax eggs and vanilla into creamed margarine. The mixture may curdle slightly as seen in photo below.
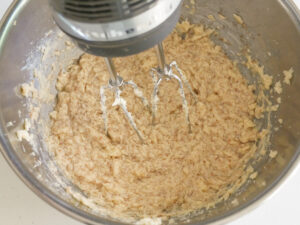
- In 3 stages, alternate adding flour mixture and alternative milk (such as unsweetened gluten-free oat milk or hemp milk) into creamed mixture on low speed.
- In a small bowl, toss 1 tablespoon of gluten-free flour blend with 1-1/2 cups of fresh blueberries that have been rinsed. Gently stir the lightly coated blueberries by hand into the batter. Spread batter level into prepared loaf pan.
- Bake on oven’s middle rack until done, about 60-70 minutes. Cool in the pan on a rack about 15 minutes. Gently invert cake onto cooling rack. Let cool completely, at least an hour.
So Many Ways to Enjoy
Serve a slice with our sweet and tangy lemon curd and more fresh blueberries.
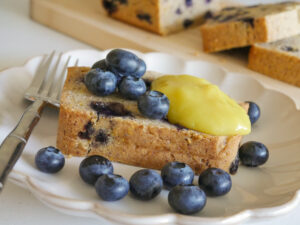
Enjoy with an alternative whipped cream and fresh strawberries and blueberries.
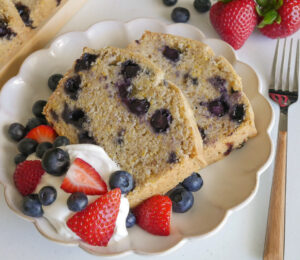
Contrary to most quick breads, we find this loaf better the second day. We like to toast the slices on a grill or in a skillet. How about maple syrup? Oh yeah! It’s almost like French Toast, and just as good.
Chef Mary’s Tips
- The light coating of flour around the blueberries will absorb some of the fruit’s liquid, making them less likely to sink.
- The purpose for adding dry and liquid ingredients alternately is that whipped margarine and sugar cannot absorb much liquid without separating. Beginning with dry ingredients and alternating with liquid ingredients will produce a better pound cake.
- Before measuring flour, use a spoon or whisk to fluff up the flour in the container or bag its in. Rather than scooping the flour with a measuring cup, spoon the flour into the measuring cup until it is heaping. Use a knife or other straight edge tool to level the flour across the top of the measuring cup. Scooping flour directly into your measuring cup packs the flour so you can end up with significantly more flour than the recipe calls for.
For another variation of this delicious quick bread, check out our Strawberry Pound Cake at Allergic Living.
Your Allergy Chefs are participants in the Amazon Associates Program, an affiliate advertising program designed to provide a means for sites to earn advertising fees by advertising and linking to Amazon.
Blueberry Poundcake
Yield 1 (9×5-inch) loaf pan
Free of: gluten and top 9 allergens.
Blueberries abound!
Ingredients
3 tbsp flaxseed meal
1/2 cup water
2 cups + 1 tbsp gluten-free flour blend, such as King Arthur’s Gluten Free All-Purpose Flour, divided (2 cups + 1 tbsp)
1/2 cup fine or medium yellow cornmeal
2 tsp baking powder
1/2 tsp xanthan gum (omit if using a flour blend with xanthan)
1/2 tsp salt
3/4 cup dairy-free soy-free margarine, such as Earth Balance buttery sticks, room temperature
3/4 cup granulated sugar
2 tsp pure vanilla extract
1/2 cup plus 1 tbsp alternative milk, such as unsweetened oat or hemp milk
1-1/2 cups fresh blueberries, rinsed
Allergen-safe whipped topping, optional
Mixed fresh berries, optional
Lemon Curd, optional
Instructions
- Preheat oven to 350-degrees F. Lightly coat a 9×5-inch loaf pan (or an 8.5×4.5-inch loaf pan) with dairy-free margarine. Set aside.
- Make 3 flax eggs by whisking together flaxseed meal and water. Set aside for 5-10 minutes.
- In a medium bowl, combine gluten-free flour blend, cornmeal, baking powder, xanthan gum, and salt. Set aside.
- Cream margarine and sugar using a hand-help mixer. Start on low and increase to medium. Blend until light and fluffy, about 2-3 minutes. If using a KitchenAid or similar stand mixer, use the paddle attachment to cream the margarine and sugar.
- Return to flax eggs and whisk vigorously; it will be gelatinous. On low speed, gradually blend flax eggs and vanilla into creamed margarine. The mixture will curdle slightly.
- In 3 stages, alternate adding flour mixture and alternative milk into creamed mixture on low speed.
- In a small bowl, toss remaining 1 tablespoon of gluten-free flour blend with blueberries. Gently stir the blueberries by hand into the batter. Spread the thick batter level into prepared loaf pan.
- Bake on oven’s middle rack until done, about 60-70 minutes. (A toothpick in the center should come out clean.) Cool in the pan on a rack about 15 minutes. Gently invert cake onto cooling rack. Let cool completely, at least an hour.
- Garnish with fresh berries and allergen-safe whipped topping and/or lemon curd.
Notes
You can substitute frozen blueberries when they’re not in season. Stir into the batter while still frozen, not allowing the blueberries to thaw. If using frozen blueberries, the bake time may be 5-10 minutes longer.
This recipe is a spin off from the Strawberry Pound Cake we developed for our friends at Allergic Living Magazine.
Courses Sweets
The post Blueberry Pound Cake appeared first on Your Allergy Chefs.
]]>The post Bourbon Baked Beans appeared first on Your Allergy Chefs.
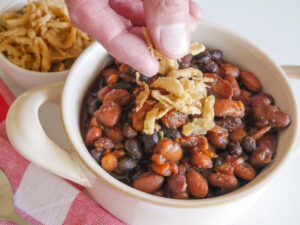
]]>
free of gluten and top 9 allergens
Since we are in the process of moving, we’re trying to use up what’s in our pantry…and that includes lots of beans. Not having everything needed to make my go-to baked beans, we created an easy recipe this weekend from items we had on hand and came up with these bourbon baked beans.
So obsessed with these delicious beans, read to the end and check out what we made with the leftovers.
Typically, baked beans are made with navy beans. We didn’t have any navy beans, but we did have 5 cans of assorted beans. We used light red kidney beans, great northern beans, black beans, pinto beans, and a can of a trio of beans. Mix and match with what you have on hand.
Two ingredients that really give personality to these baked beans are Bourbon Smoked Paprika from Bourbon Barrel Foods and bourbon, Knob Creek to be exact. However, any bourbon will do.
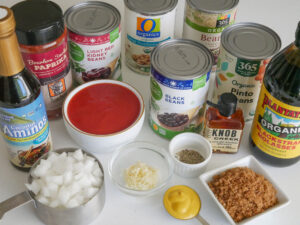
mise en place
Let’s Get Started
- Sauté onions for 5 minutes in a little vegetable or olive oil over medium heat. Add minced garlic and smoked paprika and cook another 30 seconds.
- In a large bowl, whisk together tomato sauce, molasses, brown sugar, bourbon, yellow mustard, coconut aminos, and black pepper. Add 5 (16-ounce) cans of assorted beans that have been drained and rinsed. Stir in the onion and garlic mixture.
Let’s Get Cooking
Choose your method:
- For crock pot cooking, place beans in crock pot and cover with lid. Cook on high for about 3 hours, or on low for about 5 hours, until beans are bubbling.
- To cook in the oven, preheat oven to 375°F. Transfer the bean mixture into a 2-1/2 quart casserole dish and bake for 1 hour, until beans are bubbling.
- Using an instant pot, place bean mixture in the pot and secure the instant pot lid. Cook the mixture on high pressure for 10 minutes. Be sure to follow manufacturer’s instructions for using the equipment.
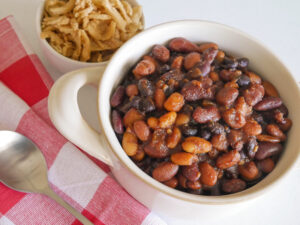
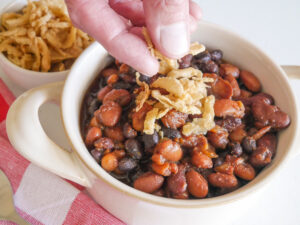
Serve and garnish with allergy-friendly French fried onions, if desired. These beans are also great served with dinner rolls, cornbread, or a toasted baguette.
Food Fun Ways to Use Leftover Baked Beans
- Make chili.
- Mix into cooked pasta with sausage, corn or other veggies. Top with cheddar cheese shreds.
- Stuff into a baked potato.
- Roll them in a burrito.
- Add cooked ground beef for Sloppy Joes.
- Create a shepherd’s pie.
Today, we whipped up this shepherd’s pie.
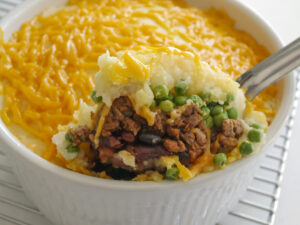
It’s Lunch Time
In a 2-1/2 quart casserole dish, place 2 cups of bourbon baked beans. Top with 1-pound of cooked Beyond meat, or ground meat of your choice. Add 1 cup of cheddar cheese shreds, followed by 1 cup of peas. Top with 3 cups of mashed potatoes and bake uncovered in an oven preheated to 350°F for 25 minutes. Add another cup of cheddar shreds and continue to bake for an additional 10 minutes.
These easy baked beans are a delicious addition to barbecues, picnics, and potlucks!
Your Allergy Chefs are participants in the Amazon Associates Program, an affiliate advertising program designed to provide a means for sites to earn advertising fees by advertising and linking to Amazon.
Bourbon Baked Beans
Yield 6-8 Servings
Free of: gluten and top 9 allergens.
Simple bourbon baked beans and so good!
Ingredients
1 tbsp vegetable or olive oil
1 cup chopped onion
1 tablespoon minced garlic (about 3 cloves)
1 tsp smoked paprika
1 cup tomato sauce
1/2 cup molasses
1/4 cup brown sugar, packed (light or dark)
1/4 cup bourbon
1 tbsp yellow mustard
2 tsp coconut aminos
1/4 tsp black pepper
1 (16-ounce) can light red kidney beans, drained and rinsed
1 (16-ounce) can black beans, drained and rinsed
1 (16-ounce) can great northern beans, drained and rinsed
1 (16-ounce) can pinto beans, drained and rinsed
1 (16-ounce) can navy beans, drained and rinsed
Instructions
- Preheat oven to 375-degrees F.
- Heat a medium saucepan over medium heat. Add oil. When oil is heated add onion and sauté for about 5 minutes. Add minced garlic and paprika and cook another 30 seconds.
- In a large bowl, whisk together tomato sauce, molasses, brown sugar, bourbon, mustard, coconut aminos, and pepper. Add the beans and the onion and garlic mixture. Stir gently to combine.
- Transfer the bean mixture into a 2-1/2 quart casserole dish and bake, covered for 1 hour, until beans are bubbling. This makes about 7-1/2 cups of baked beans.
- Serve, garnished with gluten-free French fried onions, if desired.
Notes
- For crock pot cooking, place beans in crock pot and cover with lid. Cook on high for about 3 hours, or on low for about 5 hours, or until beans are bubbling.
- Using an instant pot, place bean mixture in the pot and secure the instant pot lid. Cook the mixture on high pressure for 10 minutes. Be sure to follow manufacturer’s instructions for using the equipment.
Courses Veggie & Sides
The post Bourbon Baked Beans appeared first on Your Allergy Chefs.
]]>