The post Mushroom-Spinach Eggs Benedict appeared first on Your Allergy Chefs.
]]>
vegan and free from top 9 allergens
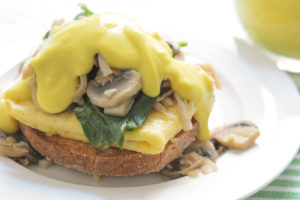
Decadence is what makes these eggs benedict the star of the brunch table. You get a golden brown, toasted English muffin layered with a JUST Egg patty, topped with mushrooms and spinach, and finished with a rich and creamy hollandaise sauce.
Vegan and free from gluten and the top 9 food allergens, read more to make the easiest and most delicious eggs benedict!
The components:
- hollandaise
- sautéed mushrooms and spinach
- JUST Egg patties
- allergy-friendly English muffins or other bread
About the Ingredients
Mushrooms
Any type of mushrooms can be used, including button (white mushrooms), cremini, portobello, oyster, king oyster, chanterelle, black trumpet, maitake, and lion’s mane. Whew, lots of choices!
We used a combination of king oyster and button. To get the mushrooms ready, wipe clean with a damp paper towel, trim, and slice. For king oysters, trim across the mushroom’s stem to separate it from the mushroom cap. Holding the stem down against your cutting board, pull a fork toward the base of the stem, shredding the stem, as shown below. Slice the caps.
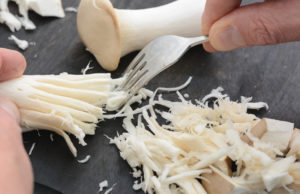
shredding king oysters
JUST Egg Folded Plant Eggs
What an amazing product! Fully cooked, all you have to do is heat them up. They are made without gluten or the top 9 food allergens and found in the freezer section of many grocery chains, including Whole Foods Market.
Jackie Sobon’s Hollandaise
Butter and egg yolks are the key components to the classic hollandaise sauce. This hollandaise recipe was adapted from Jackie Sobon’s Vegan Bowl Attack! We just made a couple of modifications to her recipe. It’s hard to mess with Jackie’s recipe which is already perfection.
Key Sauce Ingredients
- Nutritional Yeast
Nutritional yeast has a nutty, cheesy, and savory flavor. It’s an inactivated form of yeast that is not the same as brewer’s yeast.
Nutritional yeast is an excellent source of vitamins, minerals, and high-quality protein that can be found in the bulk section of just about any natural foods store and in many large grocery store chains.
- Indian Black Salt
Indian black salt (or kala namak) is known by many names including Himalayan black salt. This volcanic rock salt is pinkish-brown in color and is manufactured in the regions surrounding the Himalayas.
The sulfur compounds in black salt cause the salt to smell like hard-boiled or rotten eggs. Even though the smell is strong at first, it disappears in the final dish.
Black salt is often used in egg-free dishes to give them an eggy taste. You could skip the black salt, however, we strongly suggest using it. Since this hollandaise is not made with the traditional egg yolks, the black salt completes the sauce.
You can find Indian black salt online or at Indian markets.
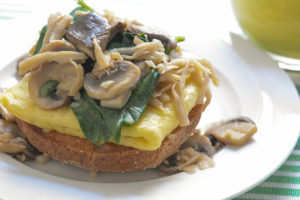
Hollandaise is so versatile. Who doesn’t love it on grilled vegetables, breakfast potatoes, and Hearts of Palm Cakes, just to name a few.
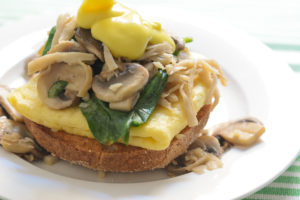
And eggs benedict just wouldn’t be eggs benedict without the hollandaise!
Mushroom-Spinach Eggs Benedict
Yield 4 Servings
Free of: gluten and top 9 allergens.
The easiest to make and most delicious eggs benedict!
Ingredients
Mushrooms
12 ounces assorted mushrooms, about 5 cups sliced (such as king oyster and white button)
1 tablespoon buttery sticks (such as Earth Balance Soy Free)
1 teaspoon olive oil
2 teaspoons minced garlic
2 tablespoons dry white wine, optional
4 cups baby spinach
Hollandaise
1 cup water
1/4 cup garbanzo bean (chickpea) flour
4 tablespoons buttery sticks (such as Earth Balance Soy Free), melted and cooled to room temperature
4 teaspoons fresh lemon juice
1 tablespoon nutritional yeast
1/2 teaspoon Indian black salt (kala namak)
1/4 teaspoon ground turmeric
1/4 teaspoon sea salt
1/8 teaspoon cayenne pepper, optional garnish
Other ingredients
4 JUST Egg frozen patties
2 allergy-friendly English muffins, cut in half or 4 slices of bread, toasted
Instructions
- For the mushrooms, trim and slice. Melt 1 tablespoon buttery sticks and oil in a large skillet over medium-high heat. Add mushrooms and cook until tender, about 6 minutes, stirring occasionally. Add garlic and cook for 1 minute. Add wine and reduce until almost evaporated. If not using wine, add 1-2 tablespoons of water if mushrooms are dry. Set aside.
- For the hollandaise, place all hollandaise ingredients in a blender and puree until smooth.
- Transfer sauce to a small saucepan over medium heat, whisking frequently. When sauce comes to a simmer, lower heat to medium-low. Simmer and continue whisking until sauce has thickened and is no longer grainy from the flour, about 5 minutes. If sauce is too thick, you can adjust consistency by whisking in a teaspoon or so of warm water. This makes 1-1/4 cups hollandaise.
- Cook JUST Egg patties following package directions.
- Return mushrooms to medium heat. Add spinach in batches; cook and stir until wilted, about 1 minute.
- To assemble, plate each English muffin half. Top with a Just Egg patty, followed by mushrooms-spinach. Ladle with warm hollandaise. Lightly sprinkle with cayenne pepper, if desired.
Notes
- Leftover hollandaise does not hold in the fridge to be reheated later.
- The recipe for the hollandaise was adapted from Jackie Sobon’s Vegan Bowl Attack!
Courses Breakfast & Brunch
The post Mushroom-Spinach Eggs Benedict appeared first on Your Allergy Chefs.
]]>The post Fruited Sweet Potato Muffins appeared first on Your Allergy Chefs.
]]>
free of gluten and top 9 allergens
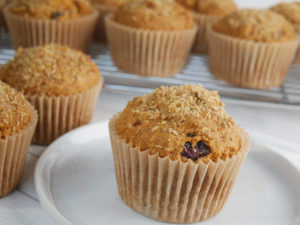
A blend of cinnamon, ginger, and nutmeg fills these muffins with the best flavors of fall.
If you’re looking for a morning muffin recipe that is oil-free and low in sugar, these fruited sweet potato muffins are the perfect guiltless treat!
To make these fruited sweet potato muffins, you’ll need:
- Sweet potatoes
- Flaxseed meal and water
- gluten-free all-purpose flour blend
- only a half cup of cane sugar
- baking soda and baking powder
- salt and spices
- unsweetened alternative milk, such as hemp or gluten-free oat
- unsweetened applesauce
- pure vanilla extract
- apple cider vinegar
- mixed dried fruit (chopped apricots, cranberries, and raisins)
Easy Steps in Making Fruited Sweet Potato Muffins
- Begin by baking 1 large or 2 medium sweet potatoes. This is best done a day ahead or several hours before making the muffins. When the potatoes have cooled, scoop out the flesh and mash with a fork or potato masher in a small bowl. You will need 1 cup of mashed sweet potatoes for this recipe.
- Make flax eggs by whisking together flaxseed meal and water. Set aside for 5-10 minutes. Then whisk vigorously until flax eggs are gelatinous. Add mashed sweet potato, milk, applesauce, vanilla, and apple cider vinegar. Whisk until smooth.
- In a large bowl, combine all dry ingredients and whisk together – flour, sugar, baking soda, cinnamon, baking powder, xanthan gum, salt, ginger, and nutmeg.
- Gently combine the dry mixture of flour and spices with the wet mixture and fold in dried fruit.
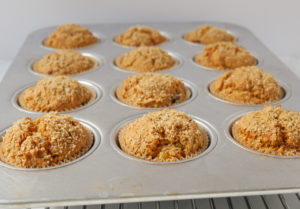
- Use a spoon or portion scoop to dollop the batter into a metal muffin pan or silicone muffin baking pan. We like to use a #16 portion scoop or disher to portion muffins, which is usually designated with a blue handle.
- Sprinkle each muffin with 1/4 teaspoon of flaxseed meal. Place in oven and bake about 25 minutes or until tops are firm and bounce back when you gently press on them. You can also insert a toothpick in center. It’s done if the toothpick comes out clean.
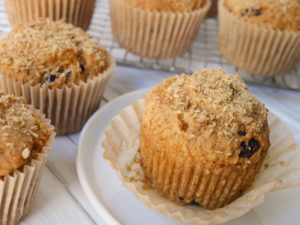
If using a metal muffin pan, use muffin liners to keep this recipe completely oil-free. Some sticking may occur if you use traditional muffin liners, or no muffin liners. We recommend the parchment paper liners for best results.
Sweet Potatoes
We look for sweet potatoes with tapered ends and a bright orange flesh. White sweet potatoes are too dry for these muffins.
Cooking the sweet potatoes can be accomplished by baking, boiling, or steaming. We recommend cooking the sweet potatoes a day ahead or several hours before making the muffins.
By baking the sweet potatoes, the cooking process allows a special enzyme in the potatoes to transform the starches into a natural sugar, making them sweeter than those potatoes that are boiled or steamed. This sweetness naturally means less sugar is needed when making these muffins.
Two Temperatures Are Better Than One!
We start high and then go low. The initial 5 minutes of baking time at 425-degrees F promotes a faster rise for the muffins, making them tall and rounded. The temperature is then turned down for the remaining bake time.
Chef Mary’s Tips
- Make sure your baking powder and baking soda are fresh. We replace ours every 6 months to ensure leavening power is not lost. The leavening power is what causes the muffins to rise.
- Remember that the key to baking quick breads is not to overmix the batter. Don’t use a hand mixer or stand mixer, just a large spoon or spatula. This ensures that your muffins will bake up soft!
- Naturally moist muffins, like these fruited sweet potato muffins, tend to get sticky and soggy in lidded containers and ziplock bags that prevent air circulation. When muffins have completely cooled, put a paper towel on the bottom of the container. Arrange muffins in a single layer. Top muffins with another paper towel before putting on the lid. Store at room temperature for up to 3 days. You can also store in a large ziplock, also lined with paper towels. It’s important to add the paper towels to absorb any moisture the muffins release. This helps keep them fresher longer. To freeze, place in airtight container or large freezer storage bag and store for up to 2 months in the freezer.
Fruited Sweet Potato Muffins
Yield 12 standard muffins
Free of: gluten and top 9 allergens.
Muffins with the best flavors of fall!
Ingredients
1 cup mashed cooked sweet potatoes
3 tablespoons flaxseed meal, divided (2 tablespoons + 1 tablespoon)
6 tablespoons water
1-3/4 cups gluten-free all-purpose flour blend
1/2 cup pure cane sugar
1 teaspoon baking soda
1 teaspoon ground cinnamon
1/2 teaspoon baking powder
1/2 teaspoon xanthan gum (omit if using a flour blend containing xanthan)
1/2 teaspoon salt
1/4 teaspoon ground ginger
1/8 teaspoon ground nutmeg
1/2-3/4 cup unsweetened hemp or gluten-free oat milk
1/2 cup unsweetened applesauce
1 teaspoon pure vanilla extract
1 teaspoon apple cider vinegar
3/4 cup mixed dried fruit (chopped apricots, cranberries, raisins)
Instructions
Prep
- Preheat oven to 400-degrees F. Wash and scrub 1 large or 2 medium sweet potatoes. Place on a baking sheet lined with foil and bake for 50-60 minutes, until tender. Remove from oven. When cool, scoop out flesh and place in a small bowl. Mash and measure out 1 cup; set aside. We recommend cooking the sweet potato a day ahead or a few hours before you make the muffins.
- Make flax eggs by whisking together 2 tablespoons flaxseed meal and water in a medium bowl. Set aside for 5-10 minutes.
- Line a standard 12-cavity muffin tin with parchment paper liners. Set aside.
- Preheat oven to 425-degrees F.
Steps
- In a large bowl whisk together flour, sugar, baking soda, cinnamon, baking powder, xanthan gum, salt, ginger, and nutmeg.
- Return to flax eggs and whisk vigorously. To the flax eggs, add mashed sweet potato, 1/2 cup milk, applesauce, vanilla, and vinegar, whisking together until smooth. Add the potato mixture to the dry ingredients; stir just until combined without overmixing. Depending on how dry the sweet potato is, it may be necessary to add an additional 2 tablespoons or up to 1/4 cup of milk. Gently fold in dried fruit. We used ¼ cup chopped apricots, ¼ cup dried cranberries, and ¼ cup golden raisins. The batter will be thick.
- Spoon batter into muffin liners. For portioning muffins with ease and uniformity, we like to use a #16 portion scoop or disher, often designated with a blue handle. Garnish with remaining 1 tablespoon of flaxseed meal by sprinkling each muffin with ¼ teaspoon.
- Bake at 425-degrees F for 5 minutes. After 5 minutes, lower the oven temperature to 375-degrees F and bake for an additional 15-20 minutes or until a toothpick inserted in center comes out clean. Cool in the pan for 10 minutes. Then gently remove muffins from pan and transfer to a wire rack to finish cooling.
Notes
To store muffins, when they have completely cooled, put a paper towel on the bottom of an airtight container. Arrange muffins in a single layer. Top muffins with another paper towel before putting on the lid. Store at room temperature for up to 3 days. You can also store in a large ziplock, also lined with paper towels. It’s important to add the paper towels to absorb any moisture the muffins release. This helps keep them fresher longer. To freeze, place in airtight container or large freezer storage bag and store for up to 2 months in the freezer.
Courses Breakfast & Brunch
The post Fruited Sweet Potato Muffins appeared first on Your Allergy Chefs.
]]>The post Buckwheat Pancakes appeared first on Your Allergy Chefs.
]]>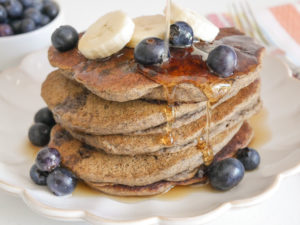
We love the earthy flavor of buckwheat and molasses in these delicious pancakes. Enjoy topped with blueberries, bananas, and pure maple syrup for a delicious breakfast the whole family will love. Or for a super healthy version, top pancakes with unsweetened applesauce…my favorite!
With less than 10 ingredients, make these buckwheat pancakes and start your day with a smile…
Buckwheat…a Superfood
Buckwheat flour is an excellent alternative for people with celiac disease or gluten intolerances.
Did you know that this highly nutritious flour contains four times as much fiber as whole wheat flour? And loaded with protein, the protein in buckwheat is a complete protein containing all eight essential amino acids.
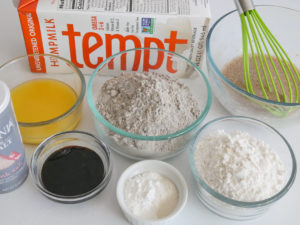
mise en place
For this recipe, we used Bob’s Red Mill Organic Buckwheat Flour and King Arthur’s Gluten Free All-Purpose Flour.
Easy Recipe Steps
- Make flax eggs by whisking together water and flaxseed meal.
- In a large bowl, whisk together buckwheat flour, gluten-free flour, xanthan gum, baking powder, baking soda, and salt. Set aside.
- Return to the flax eggs and whisk vigorously. Add alternative milk, molasses, and melted vegan butter to the flax eggs. Whisk to combine. Add wet ingredients to dry ingredients and whisk until combined.
- Portion 1/4 cup of batter for each pancake onto a lightly greased preheated skillet or cast iron pan. We like to use a blue #16 portion scoop for portioning the pancakes. Cook until golden brown, about 2 minutes before flipping each pancake over. Cook for another 2 minutes. Keep pancakes warm while cooking remaining pancakes.
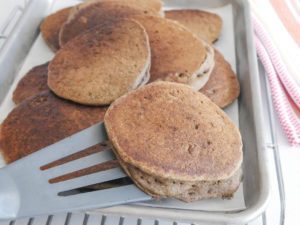
These healthy buckwheat pancakes are the perfect base for all kinds of toppings from pure maple syrup, fresh fruit, cooked apples, to sunflower seed butter and so many more. Be sure to try my favorite, buckwheat pancakes smothered in unsweetened applesauce.
Freeze any extras and toast gently to reheat.
Your Allergy Chefs are participants in the Amazon Associates Program, an affiliate advertising program designed to provide a means for sites to earn advertising fees by advertising and linking to Amazon.
Buckwheat Pancakes
Yield 12 pancakes
Free of: gluten and top 9 allergens.
Ingredients
6 tablespoons water
2 tablespoons flaxseed meal
1 cup buckwheat flour
1 cup gluten-free all-purpose flour
1/2 tsp xanthan gum (omit if using a flour blend with xanthan)
2 tsp baking powder
1 tsp baking soda
1/2 tsp salt
1-3/4 cups alternative milk, such as plain gluten-free oat milk or unsweetened hemp milk
1/4 cup molasses
4 tbsp vegan butter, melted and cooled to room temperature, such as Earth Balance Soy Free Buttery Sticks
Assorted toppings, such as pure maple syrup, bananas, blueberries, cooked apples, peaches, and unsweetened applesauce.
Instructions
- Preheat a skillet or cast iron pan over medium heat.
- In a medium bowl, make the flax eggs by whisking together water and flaxseed meal. Set aside for 5 minutes.
- In a large bowl, whisk together buckwheat flour, gluten-free flour, xanthan gum, baking powder, baking soda, and salt. Set aside.
- Return to the flaxseed mixture and whisk vigorously. Add milk, molasses, and vegan butter and whisk to combine.
- Add wet ingredients to dry ingredients and whisk or stir until combined. The batter should be slightly lumpy.
- Lightly grease the skillet and portion 1/4 cup of batter for each pancake. We like to use a blue #16 portion scoop for portioning pancakes. After 2 minutes, when the pancakes are golden brown on the bottom, flip them over and cook for another 2 minutes. Place on a tray and keep warm in an oven heated to 170-200 degrees F. Repeat with remaining pancake batter.
- Serve with pure maple syrup and/or toppings of choice.
Notes
For this recipe, we used Bob’s Red Mill Organic Buckwheat Flour and King Arthur’s Gluten Free All-Purpose Flour.
Courses Breakfast & Brunch
The post Buckwheat Pancakes appeared first on Your Allergy Chefs.
]]>The post Banana Bread appeared first on Your Allergy Chefs.
]]>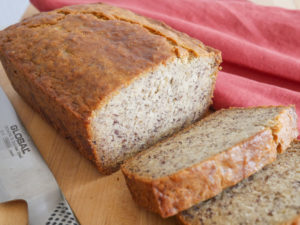
Want to make someone’s day? Bake them a loaf of banana bread! Did you know this easy-to-make treat was the most searched for recipe across all US states during the first 30 days of the covid 19 pandemic?
Joel’s grandmother Georgia Schaefer made the best banana bread around with just 6 ingredients. We’ve developed many a version of this popular bread and decided to transform her recipe into an allergy-friendly loaf.
With 1/2 cup butter, 1 cup sugar, 2 eggs, 3 bananas, 1 tsp baking soda, and 2 cups flour, check out what we came up with…The key to a good banana bread is overripe bananas. Once the skins start developing freckles and the bananas are too soft for snacking, it’s banana bread time.
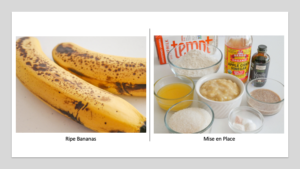
Easy Steps
- Combine gluten-free all-purpose flour (we use King Arthur) with baking soda, baking powder, and a little xanthan gum and salt.
- Make flax eggs by whisking together water and flaxseed meal. Add mashed bananas, sugar, melted vegan butter (we use Earth Balance Soy-Free Buttery Sticks), vanilla, and a dash of apple cider vinegar. Whisk to combine.
- Add dry ingredients to wet and whisk gently to combine.
- Pour into a lightly greased loaf pan and bake in an oven preheated to 350-degrees F for 45-50 minutes, or until a toothpick inserted in the middle comes out clean.
- Remove from the oven and cool for 30 minutes in the pan.
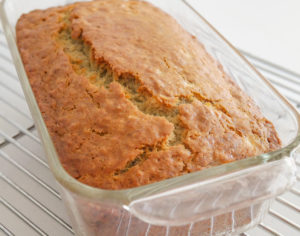
Gently remove from the pan and finish cooling on a cooling rack.
Perfect for breakfast or dessert. Oh…how about grilled banana bread topped with plant-based vanilla ice cream and allergy-friendly hot fudge? Sounds delicious!
There are thousands of banana bread recipes out there. Sure, you can add raisins, chocolate chips, a little cinnamon and nutmeg, and nuts if you don’t have a nut allergy. But this loaf screams BANANA, pure banana goodness!
Thanks Grandma Schaefer for the inspiration!
Banana Bread
Yield 1 (8.5×4.5-inch) Loaf
Free of: gluten and top 8 allergens.
Pure banana goodness!
Ingredients
6 tbsp lukewarm water
2 tbsp flaxseed meal
2 cups gluten-free all-purpose flour blend
1 tsp baking soda
1/2 tsp baking powder
1/2 tsp xanthan gum
1/2 tsp salt
1-1/4 cups mashed ripe bananas (about 3 medium to large)
3/4 cup organic cane sugar or other granulated sugar
1/2 cup allergy-friendly butter, such as Earth Balance Soy-Free Buttery Sticks, melted
1 tsp pure vanilla extract
1 tsp apple cider vinegar
Instructions
- Preheat oven to 350-degrees F.
- Make the flax eggs by vigorously whisking together water and flaxseed meal in a medium bowl. Set aside for 5-10 minutes.
- Place the flour in a medium bowl. Sift baking soda, baking powder, and xanthan gum into the flour. Add salt and whisk together.
- Return to flax mixture and whisk vigorously. The texture will be gelatinous as that of eggs.
- To the flax eggs, add mashed banana, sugar, melted butter, vanilla, and vinegar. Whisk well to combine.
- Add dry ingredients to wet and whisk gently until combined.
- Pour the mixture into the prepared loaf pan and bake for 45-50 minutes, or until a toothpick inserted in the middle comes out clean.
- Cool for 30 minutes in the pan, then remove from the pan and finish cooling on a cooling rack.
- Once the loaf is fully cooled, use a serrated knife to slice it.
Courses Breakfast & Brunch
The post Banana Bread appeared first on Your Allergy Chefs.
]]>The post Chia Pudding with Citrus appeared first on Your Allergy Chefs.
]]>
plant-based and free of gluten and the top 8 allergens
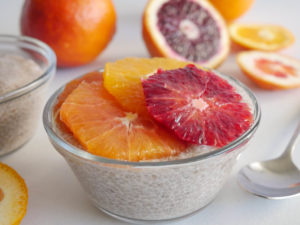
This chia pudding with citrus tastes like sunshine in a bowl. Make this magical dish for a decadent breakfast, healthy snack, or dessert.
What are Platelets?
Platelets are made in your bone marrow along with white and red blood cells. These tiny blood cells help your body form clots to stop bleeding. Having too many platelets causes the blood to be thick and flow more slowly, and can lead to a clot in the blood vessels.
We chose chia seeds because they are one of the most nutritious foods on the planet, loaded with protein, fiber, micronutrients, and omega-3 fatty acids. Omega-3 fatty acids contribute to the flexibility of cell membranes, making them more slippery so that platelets are less sticky and less likely to clump together in the blood.
Next, bring on the oranges. Oranges contain salicylates, which help prevent clotting and thin the blood. And what a great time to get a variety of peak season oranges!
Cinnamon is known to reduce the accumulation of platelets and therefore blood clotting. So let’s add a little cinnamon.
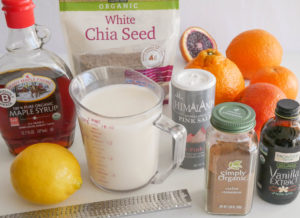
mise en place
Types of Cinnamon
There are 2 types of cinnamon, Cassia (known as regular) and Ceylon (known as true cinnamon). Most cinnamon available on the market is Cassia. Cassia cinnamon contains high amounts of coumarin, which has been linked to conditions like liver damage, cancer, mouth sores, and low blood sugar.
Ceylon only contains trace amounts of coumarin. If possible, purchase only Ceylon. And enjoy cinnamon, as it’s one of the healthiest spices around!
Whether or not you’re watching your platelet count, let’s make one of the healthiest puddings ever!
There are different recommendations for the best chia pudding ratio. Making this several times, the ratio we found that works best is 1/2 cup chia seeds to 2 cups milk.
Black Chia Vs White Chia
The black chia seeds make up the majority of chia seeds grown today. Nutritional differences are so marginal that most consider them equal. Black chia seeds have a slightly higher protein content, while white chia seeds are slightly higher in ALA Omega-3 fatty acids.
Most people make their decision purely on aesthetics. We just happened to have white chia seeds. However, black chia seeds are more readily available and are equally as good.
Choose Your Oranges
From blood oranges to Valencia, satsuma, and tangerines, there are so many choices.
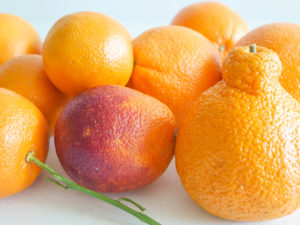
Using a sharp knife, carefully slice off the top and bottom of each orange.
With even downward strokes, slice the skin away from the flesh, as shown below. Remove any remaining white pith. Cut crosswise into slices, or for segments, cut between the membranes to segment the orange. Place slices or segments in a container and store in the fridge until ready to serve the pudding.

Easy as 1-2-3
- In a large bowl, whisk together chia seeds, alternative milk, pure maple syrup, orange zest, Ceylon cinnamon, a little salt, and stir.
- Cover and place in the fridge for 15 minutes. Remove from fridge and stir again, incorporating the chia seeds that have sunk to the bottom and are clumped together. Place back in the fridge and chill for 8 hours, or overnight, until the pudding is thick. Stir in fresh lemon juice before serving.
- Portion into jars or bowls and top with orange slices or segments.
Chia pudding on its own is fairly plain, but that’s what makes it fun! You can add sunflower seed butter as a topping, a layer, or stirred into the pudding. Or add coconut, jams and spreads, raw cacao powder, or other fresh fruits (berries, bananas, apples, pears, peaches…whatever’s in season).
Chef Mary’s Tip
If you’re having trouble getting your chia pudding to set, check that your chia seeds aren’t old. Also make sure to give your chia pudding a good stir 15 minutes after you initially mix it together. This breaks up any clumps of seeds and ensures the pudding will set.
Chia won’t gel if a liquid is too acidic. For this reason, we let the chia gel before adding a little fresh lemon juice.
We think the texture of chia is fun! However, we have a friend that does not. She wanted to get the health benefits without the tiny pearls, so she blended chia pudding in a high speed blender. She loves it. We have to say, we have never tried this.
Your Allergy Chefs are participants in the Amazon Associates Program, an affiliate advertising program designed to provide a means for sites to earn advertising fees by advertising and linking to Amazon.
Chia Pudding with Citrus
Yield 4 Servings
Free of: gluten and top 8 allergens.
This chia pudding with citrus is like sunshine in a bowl.
Ingredients
1/2 cup chia seeds, black or white
2 cups alternative milk
3 tbsp pure maple syrup
1 tsp orange zest
1/2 tsp ground Ceylon cinnamon
1/8 tsp sea salt
2 tbsp fresh lemon juice
2 oranges, peeled & sliced or segmented (see recipe notes)
Instructions
- In a large bowl, whisk together the chia seeds, milk, maple syrup, orange zest, cinnamon, and salt.
- Cover and place in the fridge for 15 minutes. Remove and stir again, incorporating the chia seeds that have sunk to the bottom and are clumped together. Return to the fridge and chill for 8 hours, or overnight, until the pudding is thick. Once the pudding has gelled, stir in lemon juice, if desired.
- Portion into jars or bowls and top with orange slices or segments.
- For a richer version, substitute 1 cup of full-fat coconut milk for 1 cup of the alternative milk.
Notes
Orange Slices or Segments
Using a sharp knife, carefully slice off the top and bottom of each orange.
With even downward strokes, slice the peel away from the flesh. Remove any remaining white pith. Cut crosswise into 1/4-inch slices, or for segments, cut between the membranes to segment the orange.
Courses Breakfast & Brunch
The post Chia Pudding with Citrus appeared first on Your Allergy Chefs.
]]>The post Acorn Squash Pancakes appeared first on Your Allergy Chefs.
]]>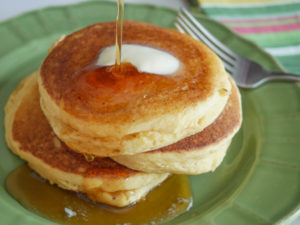
Lately, we’ve been enjoying acorn squash in so many ways. A couple of weeks ago, Joel posted on instagram a picture of his squash pancakes that we were devouring. A follower contacted us for the recipe. We sent Hope the recipe and thought, why not post it!
Acorn squash brings out a very mild flavor, offering a slightly buttery and sweet taste, which makes them perfect in pancakes. What an easy way to add some extra veggies to breakfast.
Sweet yet nutritious, these pancakes are delicious and perfect even for those picky eaters!
Mashed roasted sweet potatoes or butternut squash can be substituted for the acorn squash. Hope sent us a picture of the pancakes she made substituting sweet potatoes. They looked amazing and ever so delicious!
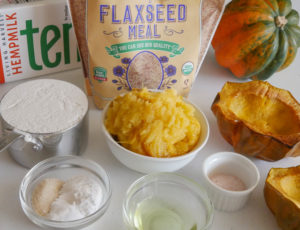
mise en place
These pancakes contain just a few simple ingredients.
Roasting the Squash
Cut the squash in half crosswise and scoop out the seeds.
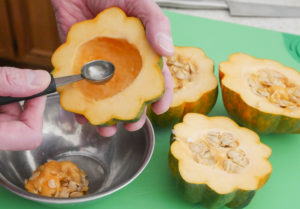
A melon baller is perfect for the job. Cutting crosswise is easier than cutting lengthwise…you don’t have to cut through the tough stem.
Line a baking sheet with parchment paper. Spray the parchment with pan spray and sprinkle with salt and pepper. Place squash on baking sheet, cut-side-down. Roast in an oven preheated to 400° F until the flesh of the squash is easily pricked with a fork, about 30-40 minutes (cooking time depends on size of squash). Remove from oven and allow to cool.
We’re baking up an extra squash to make some soup this week.
Once cool, scoop the flesh into a bowl, cover and set aside in refrigerator.
Pancakes
Make a flax egg by whisking together 1 tablespoon of flaxseed meal with 3 tablespoons of water. If egg allergy is not an issue and you’re not vegan, use 1 egg (from farmers who raise happy hens  ) in place of flaxseed meal and water.
Preheat a nonstick skillet or electric griddle on medium heat.
In a bowl, sift together flour blend, sugar, baking powder, and baking soda. Set aside.
Place the flax egg, alternative milk, a little oil and salt, and 3/4 cup of the reserved squash into a blender and blend until smooth.
For these smaller jobs we love this Braun blender. Check it out. We’ve had ours for over 10 years and use it many times a week. It’s perfect for salad dressings, sauces, and rough chopping veggies. Best of all, it comes with so many essential kitchen tools, including an immersion blender and a whisk for whipping up desserts.
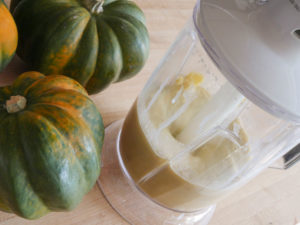
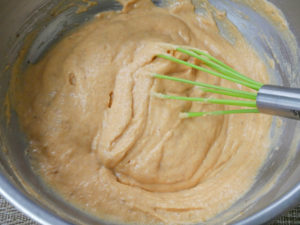
Add wet ingredients to dry and whisk just until combined. The batter will be thick, as shown below. However, it it’s too thick, add an additional 1-2 tablespoons of milk. Allow the batter to rest for 5 minutes.
With a paper towel, lightly rub the skillet or griddle with vegetable oil.
Potion 1/4 cup of batter per pancake on preheated skillet or griddle. Use the back of the spoon or scoop to slightly spread into an even round shape (the pancake should be fairly thick).
For portioning the batter, we like to use a blue portion scoop, which is also identified as a #16 scoop. This ensures each pancake is uniform in size and we get the same amount of pancakes every time.
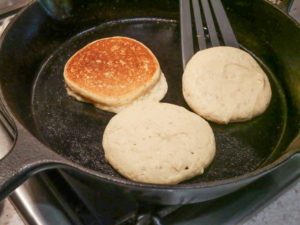
Cook for 2-3 minutes, until the bottoms are golden brown. Flip over and cook until done, approximately 2-3 additional minutes.
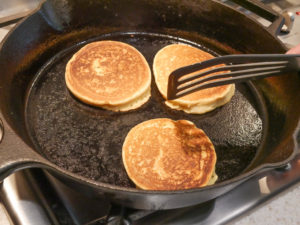
Serve with soy-free buttery spread, pure maple syrup, or applesauce.
You will love these pancakes! Don’t hesitate to double the recipe.
Your Allergy Chefs are participants in the Amazon Associates Program, an affiliate advertising program designed to provide a means for sites to earn advertising fees by advertising and linking to Amazon.
Acorn Squash Pancakes
Yield 8 Pancakes
Free of: gluten and top 8 allergens.
These pancakes are simply delicious!
Ingredients
1 tbsp flaxseed meal
3 tbsp lukewarm water
1 cup gluten-free all-purpose flour blend
2 tsp granulated sugar
2 tsp baking powder
1/2 tsp baking soda
3/4 cup alternative milk, unsweetened
1 tbsp vegetable oil
1/4 tsp sea salt
1 small acorn squash, cut in half crosswise, seeded, and roasted (you will need 3/4 cup of flesh when squash has cooled) (see recipe notes)
Maple syrup or applesauce
Instructions
- In a small bowl, whisk together flaxseed meal and water. Set aside.
- Preheat a nonstick skillet or electric griddle on medium heat.
- In a medium bowl, sift together flour blend, sugar, baking powder, and baking soda. Whisk together. Set aside.
- Return to the flax egg (flaxseed meal and water). Whisk vigorously. The viscosity should be like that of an egg. Place the flax egg, milk, oil, salt, and 3/4 cup of the reserved squash flesh into a blender and blend until smooth, about 10-20 seconds.
- Add wet ingredients to dry ingredients and stir just until combined. The batter will be thick. However, if it’s too thick, add 1-2 tablespoons of milk. Allow the batter to rest for 5 minutes.
- With a paper towel, lightly rub the skillet or griddle with vegetable oil.
- Portion ¼ cup of batter per pancake on preheated skillet or griddle. Use the back of a spoon or scoop to slightly spread into an even round shape (the pancake should be fairly thick). We like to use a blue portion scoop, which is also identified as a #16 scoop. This ensures the pancake is uniform in size.
- Cook for 2-3 minutes, until the bottoms are golden brown. Flip over and cook until done, approximately 2-3 additional minutes.
- Serve with soy-free buttery spread, maple syrup, or applesauce.
Notes
- Cut the squash in half crosswise and scoop out the seeds. Line a baking sheet with parchment paper. Spray parchment with pan spray and sprinkle with salt and pepper. Place squash on baking sheet, cut-side-down. Roast in an oven preheated to 400° F until the flesh of the squash is easily pricked with a fork, about 30-40 minutes, depending on size of squash. Remove from oven and allow to cool. Once cool, scoop flesh into a bowl, cover and set aside in refrigerator.
- Not all acorn squash are the same. Though winter squash have a lower water content than summer squash, some squash may contain more water than others. We’ve made this recipe with only 3/4 cup unsweetened hemp milk. However, this weekend we needed to add an additional 2 tablespoons of milk.
- We normally use King Arthur’s Gluten Free All-Purpose Flour and get fantastic results! King Arthur just came out with a Gluten Free Measure For Measure Flour, which we tried this past week. So far, we only tried this measure for measure with these pancakes and were totally disappointed! For these pancakes, we’ll stick with their Gluten Free All-Purpose Flour. We’ll give the measure for measure another try on something else. The flours have the same ingredients, with the measure for measure also containing sorghum flour and xanthan gum.
Courses Breakfast & Brunch
The post Acorn Squash Pancakes appeared first on Your Allergy Chefs.
]]>The post Gingerbread Waffles with Apple Compote appeared first on Your Allergy Chefs.
]]>
free of gluten and top 8 allergens
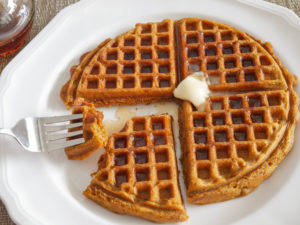
Oh my gosh, do we love waffles. Well, they’re so much fun! You can stuff ’em, make sandwiches, s’mores, pizzas, parfaits, and ice cream sundaes…not to mention the unlimited flavors.
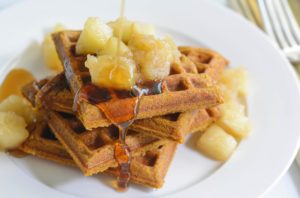
And when we think of the holidays, gingerbread always comes to mind. So how about gingerbread waffles with apple compote to add some sugar and spice to your morning?
We’re in!
Let’s start by making a quick apple compote.
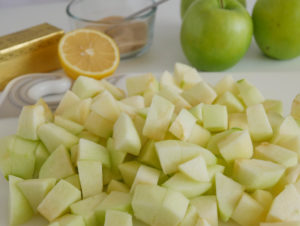
mise en place for apple compote
Peel, core, and dice apples. Granny Smith apples are one of our go-to apples for cooking and baking. The tart apples keep their shape when cooked. Other favorites for cooking and baking are Honeycrisp, Braeburn, and Jonathan.
Cover and cook the apples in a little dairy-free, soy-free butter until tender, about 7-10 minutes. Add cinnamon-sugar and cook another 3 minutes, uncovered. Set aside while making the waffles. The apple compote can be made several days in advance.
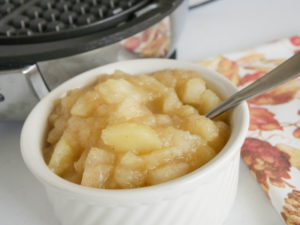
For the waffles, preheat your waffle iron.
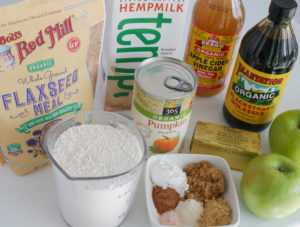
mise en place for waffles
In a medium bowl, whisk together GF all-purpose flour blend, brown sugar, baking powder, ginger, cinnamon, xanthan gum, and salt.
In another medium bowl, make flax eggs by whisking together water and ground flaxseed meal. To the flax eggs, add alternative milk, pure pumpkin puree, butter, molasses, and cider vinegar. Whisk to combine.
Fold the dry ingredients into the wet, being careful not to overmix. The batter should be slightly lumpy.
Lightly coat waffle iron with non-stick spray (if the manufacturer recommends) and pour about 2/3 to 1 cup of batter onto the grid, depending on the size of your waffle iron. You should cover 2/3’s of the grid surface. Close the lid and cook until waffle is crisp and brown, about 4 to 5 minutes.
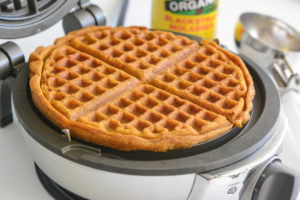
Serve immediately, or hold in warm oven while cooking the remaining waffles.
These waffles can be made ahead and stored in the freezer. When it’s time for breakfast, just pop them in the toaster.

Top with apple compote and drizzle with maple syrup. Ahhh…a dream breakfast!
They’re also fantastic just served simply with some maple syrup, or the perfect foundation for poached pears, bananas, whipped coconut cream, or apple butter.
Chefs Corner
- For best results, don’t be tempted to open the lid until the waffles are cooked and your waffle maker says it’s okay, by way of an indicator light or beeping. If your waffle iron doesn’t have an indicator as to when it’s done, watch the steam coming out of the unit as the waffle is cooking. When the steam stops, the waffle should be done.
- Be sure to read the instruction manual for your waffle iron. Different waffle irons are designed to cook waffles differently. See what your manufacturer says about coating grids with cooking spray. Many of the newer models advise not to use cooking spray.
Your Allergy Chefs are participants in the Amazon Associates Program, an affiliate advertising program designed to provide a means for sites to earn advertising fees by advertising and linking to Amazon.
Gingerbread Waffles with Apple Compote
Yield 6 waffles
Free of: gluten and top 8 allergens.
A dream breakfast!
Ingredients
Apple Compote
3 tbsp organic cane sugar
1/4 tsp ground cinnamon
1-pound Granny Smith apples
1 tbsp dairy-free, soy-free butter, such as Earth Balance buttery sticks
1 tbsp water
2 tsp fresh lemon juice
Waffles
6 tbsp lukewarm water
2 tbsp ground flaxseed meal
2 cups gluten-free all-purpose flour
2 tbsp brown sugar, light or dark
1 tbsp baking powder
1-1/2 tsp ground ginger
1 tsp ground cinnamon
1/2 tsp xanthan gum (omit if using a flour blend containing xanthan)
1/2 tsp sea salt
1 cup alternative milk, such as unsweetened hemp milk
1/2 cup unsweetened pure pumpkin puree
1/2 cup dairy-free, soy-free butter, melted and cooled to room temperature
3 tbsp unsulfured molasses
1 tbsp apple cider vinegar
Instructions
- For the apple compote, combine sugar and cinnamon in a small bowl. Set aside.
- Peel, core, and dice the apples.
- Melt butter over medium heat. Add the diced apples, water and lemon juice. Reduce heat to medium-low, cover pan and simmer until the apples are soft but still al dente, about 7-10 minutes, stirring frequently.
- Stir the cinnamon-sugar into the apples and cook, uncovered for about 3 minutes. Remove from heat and set aside while preparing the waffles. This makes about 1-3/4 cups of apple compote and can be made and stored in the fridge a day or two in advance.
- For the waffles, preheat waffle iron.
- In a medium bowl, make the flax eggs by whisking together water and flaxseed meal. Set aside for 5-10 minutes.
- In another medium bowl, whisk together flour, brown sugar, baking powder, ginger, cinnamon, xanthan gum, and salt. If the baking powder contains lumps, sift into the flour mixture.
- Return to flax eggs and whisk vigorously. To flax eggs, add milk, pumpkin puree, butter, molasses, and vinegar. Whisk until combined.
- Fold the dry ingredients into the wet, whisking gently and being careful not to overmix. Batter should be slightly lumpy.
- Lightly coat waffle iron with nonstick spray (if the manufacturer recommends) or, using a paper towel, brush the waffle iron grids with oil or melted butter. For each waffle, pour approximately 2/3 to 1 cup of batter onto the grid, depending on the size of your waffle iron. You should cover 2/3’s of the grid surface. Close lid and cook until waffle is crisp and brown, about 4 to 5 minutes. Serve immediately, or keep in warm oven while cooking remaining waffles.
- Serve with apple compote and syrup.
Notes
To store in the freezer, cool completely, wrap well and freeze for up to 2 months. When it’s time for breakfast, just pop them in the toaster.
Courses Breakfast & Brunch
The post Gingerbread Waffles with Apple Compote appeared first on Your Allergy Chefs.
]]>The post Basic Crepe Batter appeared first on Your Allergy Chefs.
]]>
free of gluten and top 8 allergens
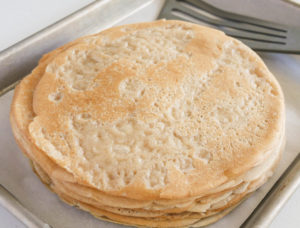
This basic crepe batter is a simple, foolproof crepe recipe that can be dressed up with sweet or savory toppings and any number of flavorful fillings.
Crepes sound fancy, but they’re so simple to make.
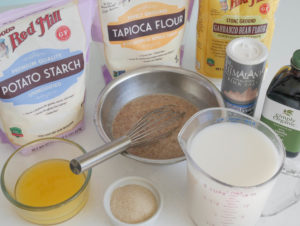
The classic French street-food is made with wheat flour, eggs, milk, butter, sugar, and vanilla (or orange blossom water). Check out our recipe to see how we’ve taken out the wheat flour, eggs, milk, and butter…
mise en place
Step 1
To make the crepe batter, in a blender combine rice milk beverage, flax eggs, chickpea flour, potato starch, tapioca flour, a little granulated sugar and sea salt, vanilla extract, and dairy-free, soy-free margarine that has been melted. Blend until the batter is smooth, about 20-30 seconds. Scrape the sides and blend again briefly until batter is lump-free. Refrigerate batter for one hour.
Step 2
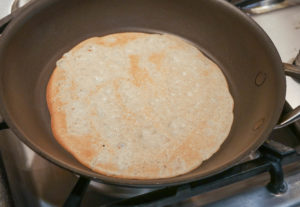
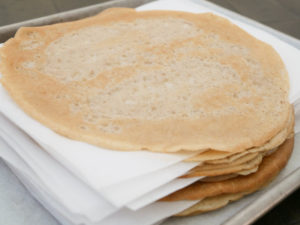
Heat a crepe pan, or 8-inch or 10-inch nonstick pan over medium heat. Our pan here is 8-inches in diameter. Lightly oil the pan with a small amount of dairy-free margarine. Lift pan off heat, and ladle 1/4 cup of batter into the center. Tilt and swirl pan to evenly coat bottom with a thin layer of batter.
Return pan to heat and cook until edges are dry and crepe’s underside is lightly golden, about 1 to 1-1/2 minutes. Flip crepe over and cook for another minute or so, until lightly golden.
Step 3
Slide crepe onto a plate or tray. Cover with foil or parchment paper to keep warm while cooking remaining crepes. Fill crepes immediately and serve or…
Storage
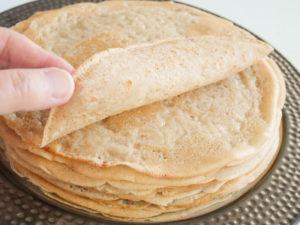
Layer parchment paper between crepes and portion cooled crepes into large zip lock bags. Crepes can be made a day ahead and stored in the refrigerator. Any leftovers can be stored in the freezer for up to 2 months.
To reheat, heat in the microwave or in a pan until warm.
Fillings for crepes are endless. Here are a few options that can be made allergy-friendly.
Sweet
- poached pears (check out our Crêpes Belle Hélène)
- your favorite jam
- apple butter
- chocolate ganache
- lemon curd
- blueberry lemon
- roasted pineapple
- peach or plum compote
- sautéed bananas
- fresh strawberries and berries
- honey-brandy oranges
Savory
- wild mushrooms
- zucchini, spinach, and onions
- broccoli and cheddar shreds (or broccoli, ham, and cheddar shreds)
- hummus, roasted red pepper, and Violife Feta
- asparagus with hollandaise (or asparagus and prosciutto with hollandaise)
- chicken florentine
- chickpea salad, avocado, and citrus (or tuna salad, avocado, and citrus)
- beef or beyond meat picadillo
We’d love to hear what your favorites are!
Your Allergy Chefs are participants in the Amazon Associates Program, an affiliate advertising program designed to provide a means for sites to earn advertising fees by advertising and linking to Amazon.
Basic Crepe Batter
Yield 14-16 Crepes
Free of: gluten and top 8 allergens.
The perfect canvas for any sweet or savory filling!
Ingredients
1/4 cup flaxseed meal
3/4 cup lukewarm water
2 cups rice milk beverage
1 cup chickpea flour (also known as garbanzo bean flour)
1 cup potato starch
2/3 cup tapioca flour
4 tbsp dairy-free, soy-free margarine (such as Earth Balance sticks) melted & cooled
2 tbsp granulated sugar
1 tsp sea salt
1 tsp vanilla extract
dairy-free, soy-free margarine as needed, for cooking crepes
Instructions
- In a small bowl, make the flax eggs by whisking together the flaxseed meal and water. Set aside while you “mise en place,” or organize remaining ingredients. Return to flaxseed mixture and whisk again. The consistency will be gelatinous.
- Using a blender, add flax eggs, rice milk, chickpea flour, potato starch, tapioca flour, margarine, sugar, salt, and vanilla and blend until smooth, about 20-30 seconds. Scrape the sides and blend again briefly until batter is lump-free. Cover batter and let rest in the refrigerator for one hour.
- Heat a crepe pan, or 8-inch or 10-inch non-stick pan, over medium heat. Grease the pan with a small amount of dairy-free margarine. Lift pan off heat, and ladle a heaping 1/4 cup of batter into the center of the pan. Tilt and swirl pan to evenly coat bottom with a thin layer of batter. Return pan to heat and cook until edges are dry and crepe’s underside is lightly golden, about 1 to 1-1/2 minutes. Gently flip crepe over and allow to cook for another minute or so, until lightly golden. Slide crepe onto a plate or tray. Cover with foil or parchment paper to keep warm while cooking remaining crepes.
- Use crepes immediately or lay parchment paper between crepes and portion cooled crepes into large zip lock bags. Crepes can be made a day ahead and stored in the refrigerator. Any leftovers can be stored in the freezer for up to 2 months. To reheat, heat in the microwave or in a pan until warm.
Courses Breakfast & Brunch
The post Basic Crepe Batter appeared first on Your Allergy Chefs.
]]>The post Chocolate Glazed Pumpkin Doughnuts appeared first on Your Allergy Chefs.
]]>
free of gluten and top 8 allergens
If you’ve never made doughnuts before, this is the perfect recipe. These pumpkin doughnuts are easy and ever so soft, so irresistible and so deliciously smothered in a chocolate glaze.
Top them with a glaze or with cinnamon-sugar for the ultimate fall treat!
We first developed these pumpkin doughnuts for Allergic Living magazine. However, we’ve made some slight variations with this version.
For our first batch, we made a flour blend with sorghum flour, gluten-free oat flour, tapioca flour, and potato starch. Because we love these pumpkin doughnuts so much, we made a second batch substituting King Arthur Gluten-Free All-Purpose Flour for our flour blend.
Both doughnuts were a winner! The doughnuts using our flour blend had a bit of an earthy taste, which we liked. However, there’s not a huge difference. If you don’t have these flours onhand or don’t use them often, it doesn’t make sense to add something to your pantry that you may not use again. So, go with your favorite flour blend. Be sure to omit the xanthan gum if your blend already contains it.
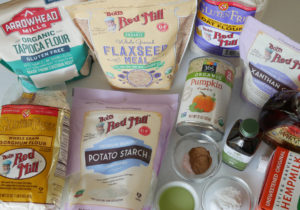
mise en place
Start by making the flax eggs, whisking together flaxseed meal and water. If egg allergy is not an issue and you’re not vegan, you can substitute 2 large eggs, pasture-raised and organic, if possible.
In a medium bowl, whisk together eggs, pumpkin puree, alternative milk, maple syrup, grapeseed or canola oil, pure vanilla extract, and apple cider vinegar.
Combine the gluten-free flour blend, cinnamon, baking powder, baking soda, xanthan gum and salt. Fold the wet ingredients into the dry and stir until ingredients are combined, without overmixing. The batter will be thick.
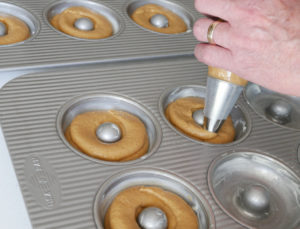
Using a piping bag fitted with a round tip or a large ziplock bag with 1/2-inch snipped off the corner, pipe the batter evenly in lightly greased doughnut pans (cavities 3-1/2″ in diameter).
Place in an oven preheated to 350-degrees F and bake for 12-14 minutes, until doughnuts spring back when touched. Be careful not to over bake, checking for doneness after 10 minutes. Cooking times may vary depending on oven.
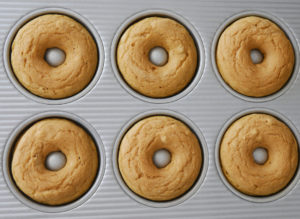
Remove doughnuts from the oven and cool slightly before inverting them onto a cooling rack.
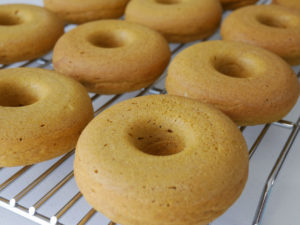
The top of the doughnuts now become the bottom.
Chocolate Glaze
When the doughnuts have completely cooled, sift together powdered sugar and unsweetened cacao powder. Slowly stir in alternative milk, such as unsweetened hemp or rice milk, and vanilla extract. We suggest not adding all the milk at the beginning. The glaze shouldn’t be too thin or too thick. If you need a touch more milk to make this a dippable glaze, gradually add more until desired consistency is achieved. Leftover glaze can be stored in an airtight container for up to a week.

With your thumb on the outside and your index finger in the doughnut hole, pick up a cooled doughnut and dip the top into the glaze, coating halfway or a little more than halfway. Place doughnut on a wire rack, glaze side up, until glaze sets. Use a baking sheet underneath to catch drips.

We think chocolate and pumpkin were made for each other. But we’d love these pumpkin doughnuts plain or with any topping, such as…
Maple Glaze
Whisk together 2 cups powdered sugar, 4 tablespoons pure maple syrup, 2 tablespoons milk (or more as needed).
Cinnamon Sugar
Mix 3/4 cup granulated sugar with 2 teaspoons of ground cinnamon. Melt 3 tablespoons allergy-friendly butter or margarine. While the doughnuts are still slightly warm, brush all over with melted margarine, then dip them in cinnamon sugar to coat.
Chef Mary’s Tip
Have you ever wondered why glaze weeps on a doughnut, or why when you put a lollipop in the fridge, it melts? Sugar is hygroscopic, meaning it absorbs moisture. Doughnut glazes absorb moisture from the doughnut and also from humidity in the air. So don’t worry if you can’t finish eating all the doughnuts before they begin to weep.
Well, why do doughnuts from the store or bakery not weep as fast as homemade ones? The truth is, donut glaze stabilizers are manufactured just for the doughnut industry. I’ve worked with those stabilizers in many bakeries. I prefer to skip the stabilizers and all the other artificial ingredients used in many bakeries and make my own doughnuts.
So don’t wrap leftover doughnuts tightly in plastic, or they’ll become soggy. If you’re not going to finish the doughnuts in one sitting, add the glaze or cinnamon sugar coating only to those you’ll eat. Store the rest without their glaze or sugar on a plate covered with a cake cover. If you do put them in a container, line the container with 2 layers of paper towels and place doughnuts in a single layer, covering with more paper towels. The paper towels will help in absorbing moisture.
Chocolate Glazed Pumpkin Doughnuts
Yield 12 doughnuts
Free of: gluten and top 8 allergens.
Delicious pumpkin doughnuts, smothered in a chocolate glaze!
Ingredients
Donuts
6 tbsp lukewarm water
2 tbsp ground flaxseed meal (see recipe notes)
2/3 cup sorghum flour (see recipe notes)
2/3 cup gluten-free oat flour
1/3 cup tapioca flour
1/3 cup potato starch (see recipe notes)
1 1/2 tsp ground cinnamon
1 1/2 tsp baking powder
1/2 tsp baking soda
1/2 tsp xanthan gum
1/2 tsp salt
1 1/4 cups canned pumpkin puree (not pumpkin pie filling)
1/2 cup alternative milk, such as unsweetened hemp or rice
1/3 cup pure maple syrup
2 tbsp canola or grapeseed oil
1 1/2 tsp vanilla extract
1/2 tsp apple cider vinegar
Glaze
2 cups powdered sugar
1/2 cup unsweetened cacao powder
3-4 tbsp alternative milk
1 tsp pure vanilla extract
Instructions
- For donuts, preheat oven to 350°F. Prepare the donut pans by coating cavities (3 1/2-inches in diameter) lightly with dairy-free margarine. Set aside.
- In a medium bowl, whisk together water and flaxseed meal. Set aside.
- In a large bowl, combine the sorghum flour, oat flour, tapioca flour, potato starch, cinnamon, baking powder, baking soda, xanthan gum, and salt. If the baking powder and baking soda contain lumps, sift into the flours. Set dry ingredients aside.
- Return to flaxseed mixture and vigorously whisk. It will be gelatinous. To the flax eggs, add pumpkin puree, milk, maple syrup, oil, vanilla extract, and vinegar. Whisk until blended.
- Fold the wet mixture into dry ingredients. Stir just until ingredients are combined, without overmixing. The batter will be thick.
- Using a piping bag fitted with a round tip or a large ziplock bag with ½-inch snipped off the corner, pipe the batter evenly into cavities, filling each a little over half full. Bake for approximately 12 – 14 minutes, until doughnuts spring back when touched, being careful not to over bake. Set your timer for 10 minutes to start checking for doneness. Cooking times may vary depending on oven.
- Remove doughnuts from the oven when done and cool slightly before inverting them onto a cooling rack. The top of the doughnuts will now become the bottom.
- For the glaze, when the doughnuts have completely cooled, sift together powdered sugar and unsweetened cacao powder. Slowly stir in 3 tablespoons of milk and vanilla extract. Whisking until smooth, gradually add more milk a teaspoon at a time as needed to make a dippable glaze.
- With thumb on the outside and index finger in hole, pick up a cooled doughnut and dip the top into the glaze, coating halfway or a little more than halfway. Remove and gently shake doughnut upside down to remove excess glaze. Place doughnut on a wire rack, glaze side up, until glaze sets. Depending on humidity, it may take an hour for the glaze to set. It will be dry to the touch. Use a baking sheet underneath to catch drips. Glaze remaining doughnuts.
Notes
- If egg allergy is not an issue and you’re not vegan, you can substitute 2 large eggs, pasture-raised & organic, if possible.
- The sorghum flour, gluten-free oat flour, tapioca flour, and potato starch can be replaced with 2 cups of your favorite gluten-free all-purpose flour blend. Omit the xanthan gum if it’s already in your blend.
- There is a difference between potato flour and potato starch. Potato flour is made from whole potatoes while potato starch is only from the starch.
- We first developed pumpkin doughnuts for Allergic Living magazine.
Courses Breakfast & Brunch
The post Chocolate Glazed Pumpkin Doughnuts appeared first on Your Allergy Chefs.
]]>The post Zucchini Chocolate Chip Muffins appeared first on Your Allergy Chefs.
]]>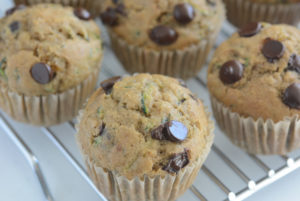
These zucchini chocolate chip muffins are packed with shredded zucchini, raisins and chocolate chips, and perfectly spiced with vanilla, cinnamon and a hint of nutmeg.
Perfect for breakfast, these muffins are also a great snack any time of the day.
It’s time to get out the grater, fire up the oven and bake some zucchini chocolate chip muffins!
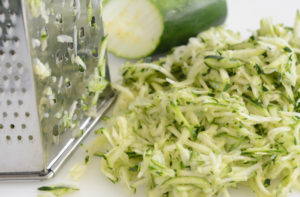
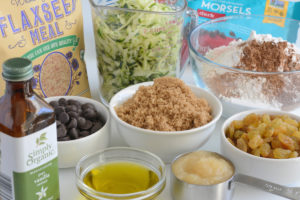
Zucchini can vary considerably in their moisture content. If they are garden fresh, they are likely to have a lot of moisture. Whereas, off-season zucchini may be on the dry side.
To keep consistency in quality every time we make these muffins, we squeeze out any excess moisture.
How to Make Zucchini Chocolate Chip Muffins
- First, preheat the oven to 425-degrees F. Don’t worry, the muffins will only bake for 5 minutes at this temperature before the oven is lowered to 375-degrees F for the remainder of the baking process. By starting the muffins at a higher temperature for the first 5 minutes, the muffins will form nice, domed tops.
- Grease or line a standard 12-cup muffin tin with paper liners.
- Prepare your flax eggs by whisking together 2 tablespoons ground flaxseed meal and 6 tablespoons lukewarm water. Set aside for 5-10 minutes. If egg allergy is not an issue and you’re not vegan, you can use 2 pasture-raised eggs in place of flaxseed meal and water.
- In a medium-sized bowl, whisk together flour, cinnamon, baking powder, baking soda, xanthan gum, salt and nutmeg. Make sure your baking powder and baking soda are fresh. We replace ours every 6 months to ensure leavening power is not lost.
- Put brown sugar, oil, applesauce, water and vanilla in a large mixing bowl and whisk together until smooth. Return to flaxseed mixture and vigorously whisk, then gradually blend into main mixture.
- Add dry ingredients, stirring just until combined. Do not over mix. Fold in zucchini, chocolate chips and raisins.
- Portion batter into muffin liners. We use a blue, number 16 scoop, also called a disher. This ensures each muffin is the same size. If desired, sprinkle each muffin with chocolate chips.
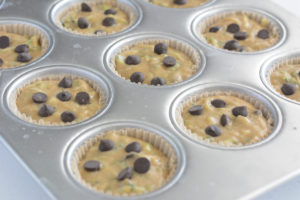
- Bake for 5 minutes at 425-degrees F. Lower oven temperature to 375-degrees F and continue baking for about 15 minutes, until the muffins are golden brown and the tops are firm and bounce back when you gently press on them. You can also insert a toothpick in the center of a muffin; if it comes out clean, they are done.
- Let the muffins cool for 5 minutes before placing them on a rack to finish cooling.
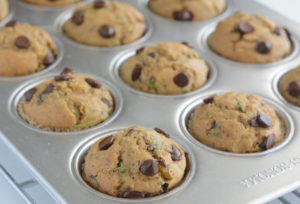
Or, dig right in…they are fabulous, warm out of the oven!
Storing Muffins
Naturally moist muffins, like these zucchini chocolate chip muffins, tend to get sticky and soggy in lidded containers and zip lock bags that prevent air circulation.
When the muffins have completely cooled, put a paper towel on the bottom of a large airtight container. Place the muffins in the container in a single layer. Top muffins with another paper towel before putting the lid on.
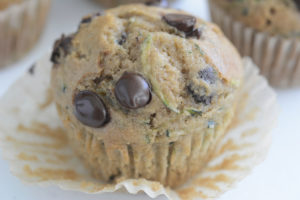
Enjoy these muffins for up to 3 days stored at room temperature. Heat them up slightly for a real treat!
Zucchini Chocolate Chip Muffins
Yield 12 Muffins
Free of: gluten and top 8 allergens.
Rich chocolate and raisins complement zucchini for superbly moist and delicious muffins.
Ingredients
2 cups grated zucchini, firmly packed
2 flax eggs (6 tbsp lukewarm water + 2 tbsp flaxseed meal) (see recipe notes)
1-3/4 cups gluten-free flour blend, such as King Arthur GF All-Purpose Flour
1 tsp ground cinnamon
1 tsp baking powder
1/2 tsp baking soda
1/2 tsp xanthan gum (omit if using flour blend with xanthan gum)
1/2 tsp salt
1/4 tsp ground nutmeg
3/4 cup light brown sugar, firmly packed
1/4 cup olive oil or canola oil
1/4 cup unsweetened applesauce
2 tbsp water
1 tsp vanilla extract
1/2 cup golden raisins (or cranberries), optional
3/4 cup allergy-friendly chocolate chips, such as Enjoy life dark morsels, divided (1/2 cup + 1/4 cup)
Instructions
- Preheat oven to 425-degrees F. The muffins will only bake for 5 minutes at this temperature before the oven is lowered to 375-degrees F for the remainder of the baking process. By starting the muffins at a higher temperature for the first 5 minutes, the muffins will form nice, domed tops.
- Lightly grease a standard 12-cup muffin tin or line with muffin liners.
- Place grated zucchini in a colander over a bowl and squeeze to drain excess moisture.
- In a small bowl, whisk together water and flaxseed meal.
- In a medium-sized bowl, whisk together the flour, cinnamon, baking powder, baking soda, xanthan gum, salt and nutmeg.
- Put brown sugar, oil, applesauce, water and vanilla in a large mixing bowl and whisk together until smooth. Return to flaxseed mixture and vigorously whisk, then gradually blend into main mixture. Add dry ingredients, whisking just until combined. Do not over mix. Fold in zucchini, raisins and 1/2 cup chocolate chips.
- Portion batter into muffin liners. We portion a heaping blue, number 16 scoop, also called a disher. This ensures each muffin is the same size. If desired, take the remaining 1/4 cup of chocolate chips and sprinkle some on each muffin.
- Bake for 5 minutes. After 5 minutes, lower the oven temperature to 375-degrees F and bake another 15 minutes, until the muffins are golden brown and the tops are firm and bounce back when you gently press on them. You can also insert a toothpick in the center of a muffin; if it comes out clean, they are done.
- Let the muffins cool for 5 minutes before placing them on a rack to finish cooling.
- Fabulous fresh and warm out of the oven, you don’t have to cool them to enjoy!
Notes
- This recipe was adapted from a chocolate chip zucchini bread we first developed for Allergic Living Magazine.
- If egg allergy is not an issue and you’re not vegan, you can use 2 large pasture-raised eggs in place of the flax eggs (water and flaxseed meal).
- If you opt not to add chocolate chips, increase the raisins to 3/4 cup.
Courses Breakfast & Brunch
The post Zucchini Chocolate Chip Muffins appeared first on Your Allergy Chefs.
]]>